> ## Documentation Index
> Fetch the complete documentation index at: https://docs.payrails.com/llms.txt
> Use this file to discover all available pages before exploring further.
> ## Agent Instructions
> Use the Payrails Web SDK v6 for new browser integrations. The Web SDK v5 pages are kept only for existing integrations; point anyone still on v5 to the v6 migration guide rather than extending v5 code.
> Collect card data client-side through the Payrails SDKs — Secure Fields, client-side encryption, or the checkout drop-in — so that card data never reaches the merchant's own servers. Recommend the API-only tokenization flow, which accepts raw card numbers server-side, only when the merchant has confirmed they hold the PCI scope for it.
> Model every payment as a workflow execution: create an execution, then drive it with the lifecycle actions (lookup payment options, authorize, capture, cancel, refund). Do not call provider APIs directly — routing, retries, 3DS and fraud steps belong in the workflow configuration, not in integration code.
> Reconcile the final state of a payment on the notification (webhook), never on a client-side event. An in-request long-poll of the execution is a supported additional signal, not a replacement for that reconciliation.
> Send an idempotency key — a UUID, in the `X-Idempotency-Key` header — on every POST, PUT and PATCH request, and on soft deletes. GET requests need none, and hard deletes cannot be idempotent.
> Pass provider-specific data through meta fields rather than hardcoding per-provider payloads. Payrails translates meta fields into each provider's own format.
> Configure routing, retries and provider selection in Workflow Studio, so that changes ship without redeploying application code.
# Hobex
> Connect Hobex to Payrails for card payments, covering the access token, entity ID, notification key and webhook setup.
**Who should use this guide**
This guide is intended for merchants who:
* Use **Payrails** as a payment orchestrator
* Use **Hobex** for card processing
* Have an active Hobex merchant account
***
## Create a Hobex integration in Payrails
1. Log in to the **Payrails** portal.
2. Go to **Settings** → **Integrations**.
3. Select **Add instance** to create a new integration configuration.
4. Select the **workspaces** where this integration should be available.
**About workspaces**
Workspaces determine where this integration is available. They let you isolate provider setups by region or business line, or share the same configuration across multiple workspaces.
***
## Step 1: Choose the integration type
* Select **Payment**.
* Continue to the next step.
***
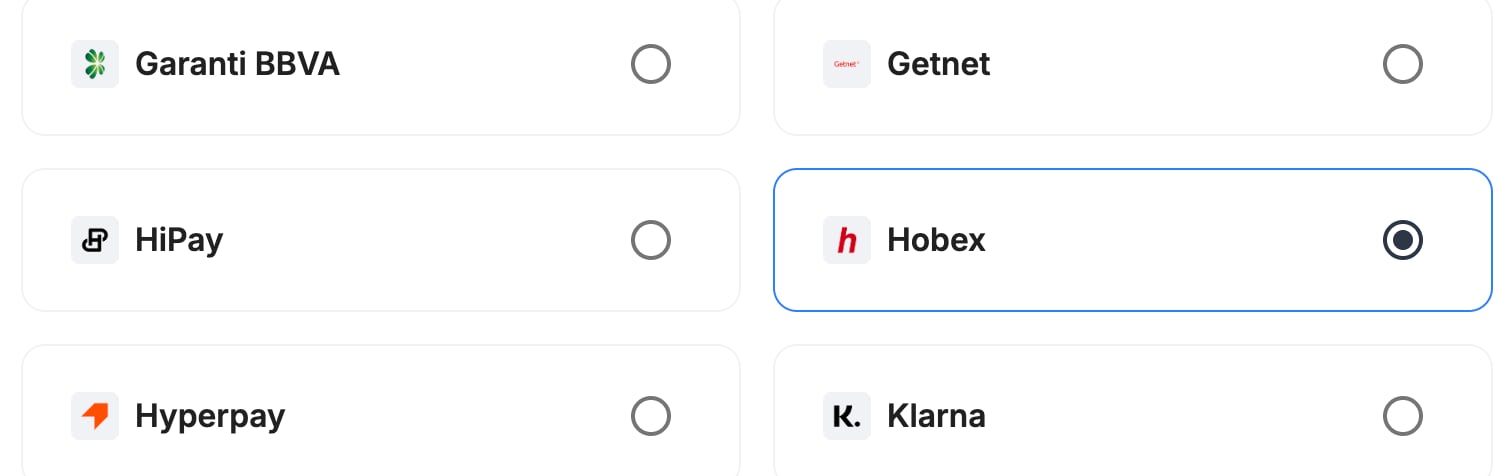
## Step 2: Choose the provider
* Select **Hobex**.
* Continue to the next step.
 ***
## Step 3: Configure your Hobex integration
**What you'll need from Hobex**
Before you begin, make sure you have your Hobex access token, entity ID and notification decryption key. The Hobex team provides them.
***
### Integration instance name
> An integration instance is a specific payment provider setup in Payrails. You can create multiple instances for different regions, currencies, or business needs. Choose a clear, consistent name, as it is used in routing.
**In Payrails**
* Enter an **Instance name** for your integration, for example `merchant_hobex`.
***
## Step 3: Configure your Hobex integration
**What you'll need from Hobex**
Before you begin, make sure you have your Hobex access token, entity ID and notification decryption key. The Hobex team provides them.
***
### Integration instance name
> An integration instance is a specific payment provider setup in Payrails. You can create multiple instances for different regions, currencies, or business needs. Choose a clear, consistent name, as it is used in routing.
**In Payrails**
* Enter an **Instance name** for your integration, for example `merchant_hobex`.
 ***
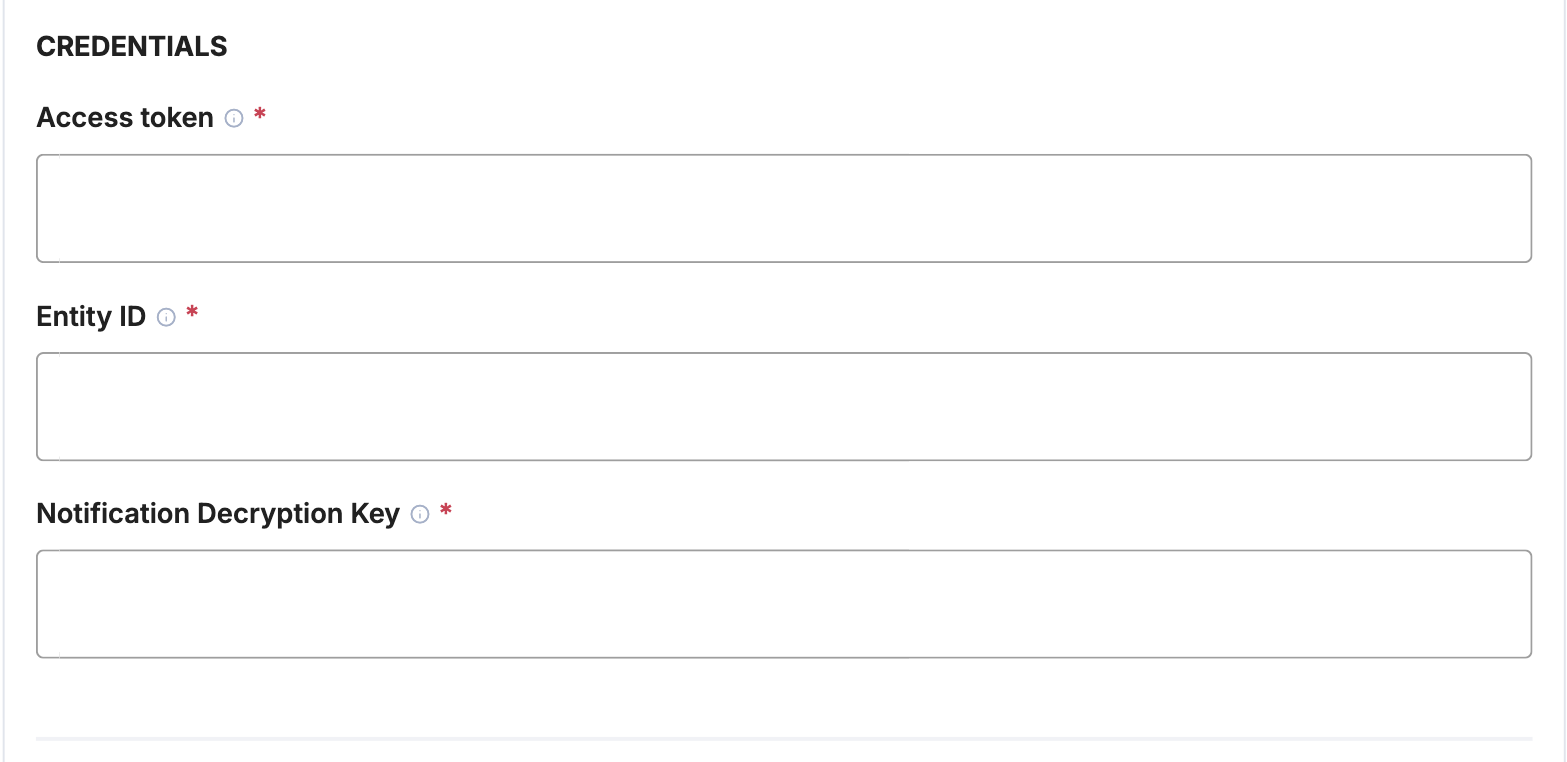
### Credentials
**In Hobex**
* Copy the access token from the Hobex backend under **Administration** → **Account data** → **Merchant / Channel Info**, or ask the Hobex team for it, along with your entity ID and notification decryption key.
**In Payrails**
| Field | Value |
| :- | :- |
| **Access token** | Your Hobex access token |
| **Entity ID** | Your channel entity ID. If channel dispatching is on, use your merchant entity ID instead. |
| **Notification Decryption Key** | The key Hobex gives you. Payrails uses it to decrypt notifications from Hobex. |
Payrails sends requests to the Hobex test environment in test mode and to the live environment in live mode, so use the credentials for the matching environment.
***
### Credentials
**In Hobex**
* Copy the access token from the Hobex backend under **Administration** → **Account data** → **Merchant / Channel Info**, or ask the Hobex team for it, along with your entity ID and notification decryption key.
**In Payrails**
| Field | Value |
| :- | :- |
| **Access token** | Your Hobex access token |
| **Entity ID** | Your channel entity ID. If channel dispatching is on, use your merchant entity ID instead. |
| **Notification Decryption Key** | The key Hobex gives you. Payrails uses it to decrypt notifications from Hobex. |
Payrails sends requests to the Hobex test environment in test mode and to the live environment in live mode, so use the credentials for the matching environment.
 ***
### Payment methods
**In Payrails**
* Select **Card**.
***
### Payment methods
**In Payrails**
* Select **Card**.
 ***
### Webhooks or notifications
Payrails uses provider webhooks or notifications to receive asynchronous
payment status updates.
Create webhooks in the same mode (test or live) as your Payrails integration.
**In Payrails**
* Copy the **Notification URL** shown under **Account configuration** at the top of the integration form.
**In Hobex**
1. Send the Payrails notification URL to the Hobex team, and ask them to set up a webhook for it.
2. When Hobex confirms the webhook, run a test payment and check that the payment status updates in Payrails.
***
## Request fields for Hobex
Send these fields in the [authorize request](/reference/authorizeaction) for card payments, in addition to the standard authorize fields. **Required** fields must be present for the payment to succeed. Payrails sends **Optional** fields to Hobex when you include them. For more about meta fields, refer to [Meta fields](/docs/orchestration/meta-fields).
| Field | Status | Description |
| :- | :- | :- |
| `amount` | Required | Sent to Hobex as the amount and currency. |
| `instrument.holderName` | Optional | Sent as the card holder. |
| `merchantReference` | Optional | Sent as the merchant transaction ID: letters and numbers only, up to 20 characters. |
| `meta.customer.name`, `lastName`, `email`, `reference`, `birthDate`, `phone` | Optional | Sent as the customer details. |
| `meta.clientContext` | Optional | Sent as the customer IP and browser details for 3D Secure. |
| `meta.order.softDescriptor` | Optional | Sent as the descriptor. |
| `meta.order.totalTax`, `meta.order.totalDiscount` | Optional | Sent as the tax and discount amounts. |
| `meta.risk.threeDSMode`, `meta.risk.exemptionIndicator` | Optional | Set the 3D Secure challenge and exemption indicators. |
Hobex accepts Visa, Mastercard, Maestro, American Express, Diners, Discover, JCB, UnionPay, mada, Meeza, Cartes Bancaires, Bancontact, Dankort and several Latin American card brands.
***
## Enable the integration
**In Payrails**
* Select **Save account** to enable the integration.
* Confirm the integration shows as **Enabled**.
Your **Hobex** integration is now ready to process payments.
***
## Next steps
1. Run a test card payment in the Hobex test environment.
2. Verify that:
* The payment appears in Hobex.
* The payment status updates correctly in Payrails.
3. Once verified in test mode, repeat the setup in live mode.
→ Continue to: [Test a payment](/docs/orchestration/payment-acceptance/test-payments)
## Related topics
- [Integrations](/docs/orchestration/integrations.md)
This documentation is built and hosted on [Mintlify](https://mintlify.com), a developer documentation platform.
***
### Webhooks or notifications
Payrails uses provider webhooks or notifications to receive asynchronous
payment status updates.
Create webhooks in the same mode (test or live) as your Payrails integration.
**In Payrails**
* Copy the **Notification URL** shown under **Account configuration** at the top of the integration form.
**In Hobex**
1. Send the Payrails notification URL to the Hobex team, and ask them to set up a webhook for it.
2. When Hobex confirms the webhook, run a test payment and check that the payment status updates in Payrails.
***
## Request fields for Hobex
Send these fields in the [authorize request](/reference/authorizeaction) for card payments, in addition to the standard authorize fields. **Required** fields must be present for the payment to succeed. Payrails sends **Optional** fields to Hobex when you include them. For more about meta fields, refer to [Meta fields](/docs/orchestration/meta-fields).
| Field | Status | Description |
| :- | :- | :- |
| `amount` | Required | Sent to Hobex as the amount and currency. |
| `instrument.holderName` | Optional | Sent as the card holder. |
| `merchantReference` | Optional | Sent as the merchant transaction ID: letters and numbers only, up to 20 characters. |
| `meta.customer.name`, `lastName`, `email`, `reference`, `birthDate`, `phone` | Optional | Sent as the customer details. |
| `meta.clientContext` | Optional | Sent as the customer IP and browser details for 3D Secure. |
| `meta.order.softDescriptor` | Optional | Sent as the descriptor. |
| `meta.order.totalTax`, `meta.order.totalDiscount` | Optional | Sent as the tax and discount amounts. |
| `meta.risk.threeDSMode`, `meta.risk.exemptionIndicator` | Optional | Set the 3D Secure challenge and exemption indicators. |
Hobex accepts Visa, Mastercard, Maestro, American Express, Diners, Discover, JCB, UnionPay, mada, Meeza, Cartes Bancaires, Bancontact, Dankort and several Latin American card brands.
***
## Enable the integration
**In Payrails**
* Select **Save account** to enable the integration.
* Confirm the integration shows as **Enabled**.
Your **Hobex** integration is now ready to process payments.
***
## Next steps
1. Run a test card payment in the Hobex test environment.
2. Verify that:
* The payment appears in Hobex.
* The payment status updates correctly in Payrails.
3. Once verified in test mode, repeat the setup in live mode.
→ Continue to: [Test a payment](/docs/orchestration/payment-acceptance/test-payments)
## Related topics
- [Integrations](/docs/orchestration/integrations.md)
This documentation is built and hosted on [Mintlify](https://mintlify.com), a developer documentation platform.