> ## Documentation Index
> Fetch the complete documentation index at: https://docs.payrails.com/llms.txt
> Use this file to discover all available pages before exploring further.
> ## Agent Instructions
> Use the Payrails Web SDK v6 for new browser integrations. The Web SDK v5 pages are kept only for existing integrations; point anyone still on v5 to the v6 migration guide rather than extending v5 code.
> Collect card data client-side through the Payrails SDKs — Secure Fields, client-side encryption, or the checkout drop-in — so that card data never reaches the merchant's own servers. Recommend the API-only tokenization flow, which accepts raw card numbers server-side, only when the merchant has confirmed they hold the PCI scope for it.
> Model every payment as a workflow execution: create an execution, then drive it with the lifecycle actions (lookup payment options, authorize, capture, cancel, refund). Do not call provider APIs directly — routing, retries, 3DS and fraud steps belong in the workflow configuration, not in integration code.
> Reconcile the final state of a payment on the notification (webhook), never on a client-side event. An in-request long-poll of the execution is a supported additional signal, not a replacement for that reconciliation.
> Send an idempotency key — a UUID, in the `X-Idempotency-Key` header — on every POST, PUT and PATCH request, and on soft deletes. GET requests need none, and hard deletes cannot be idempotent.
> Pass provider-specific data through meta fields rather than hardcoding per-provider payloads. Payrails translates meta fields into each provider's own format.
> Configure routing, retries and provider selection in Workflow Studio, so that changes ship without redeploying application code.
# Routing
## Overview
With Payrails you can configure your own routing rules to make sure that each transaction is processed via the most efficient route, to maximize your acceptance rates.
The routing rules are a part of a workflow configuration, together with [Payment options](/docs/orchestration/workflow-studio/configure-your-payment-options). Both steps need to be configured before the workflow version can be used for processing payments.
If you are creating an entirely new workflow configuration using “+ New version”, after clicking on Routing you will be redirected to an empty canvas where you can configure the rules.
If you are making changes to an existing version using “Edit as new version”, you will see all the routing rules of this version.
## Routing configuration
Routing configuration consists of two parts:
* Authorization settings configuration
* Routing configuration, separately for each payment method you added in [Payment options](/docs/orchestration/workflow-studio/configure-your-payment-options)

### Authorization settings
To configure authorization settings, simply click on “Authorization settings” in the upper right part. Here you can configure:
* capture mode
* cancel mode
* [Instrument future usage](/docs/resources/payments/authorization-flags)
### Routing rules
Routing rules have to be configured for every payment method separately. To add a routing rule, simply click on “+ Add Routing rule”. As a first step you need to define the default routing - this is the provider to which the payment will be routed if no other rules are configured or no other rules apply.
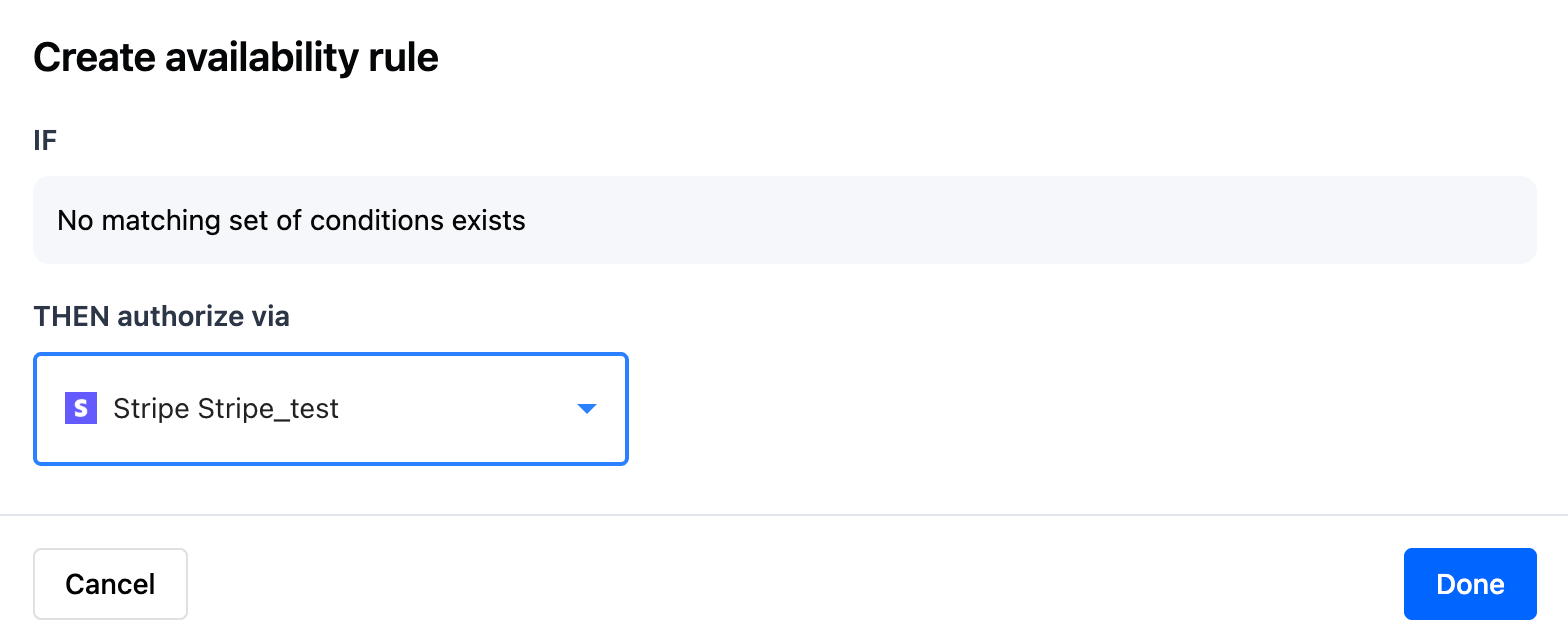 Once you confirm, you will see your first rule on the canvas.
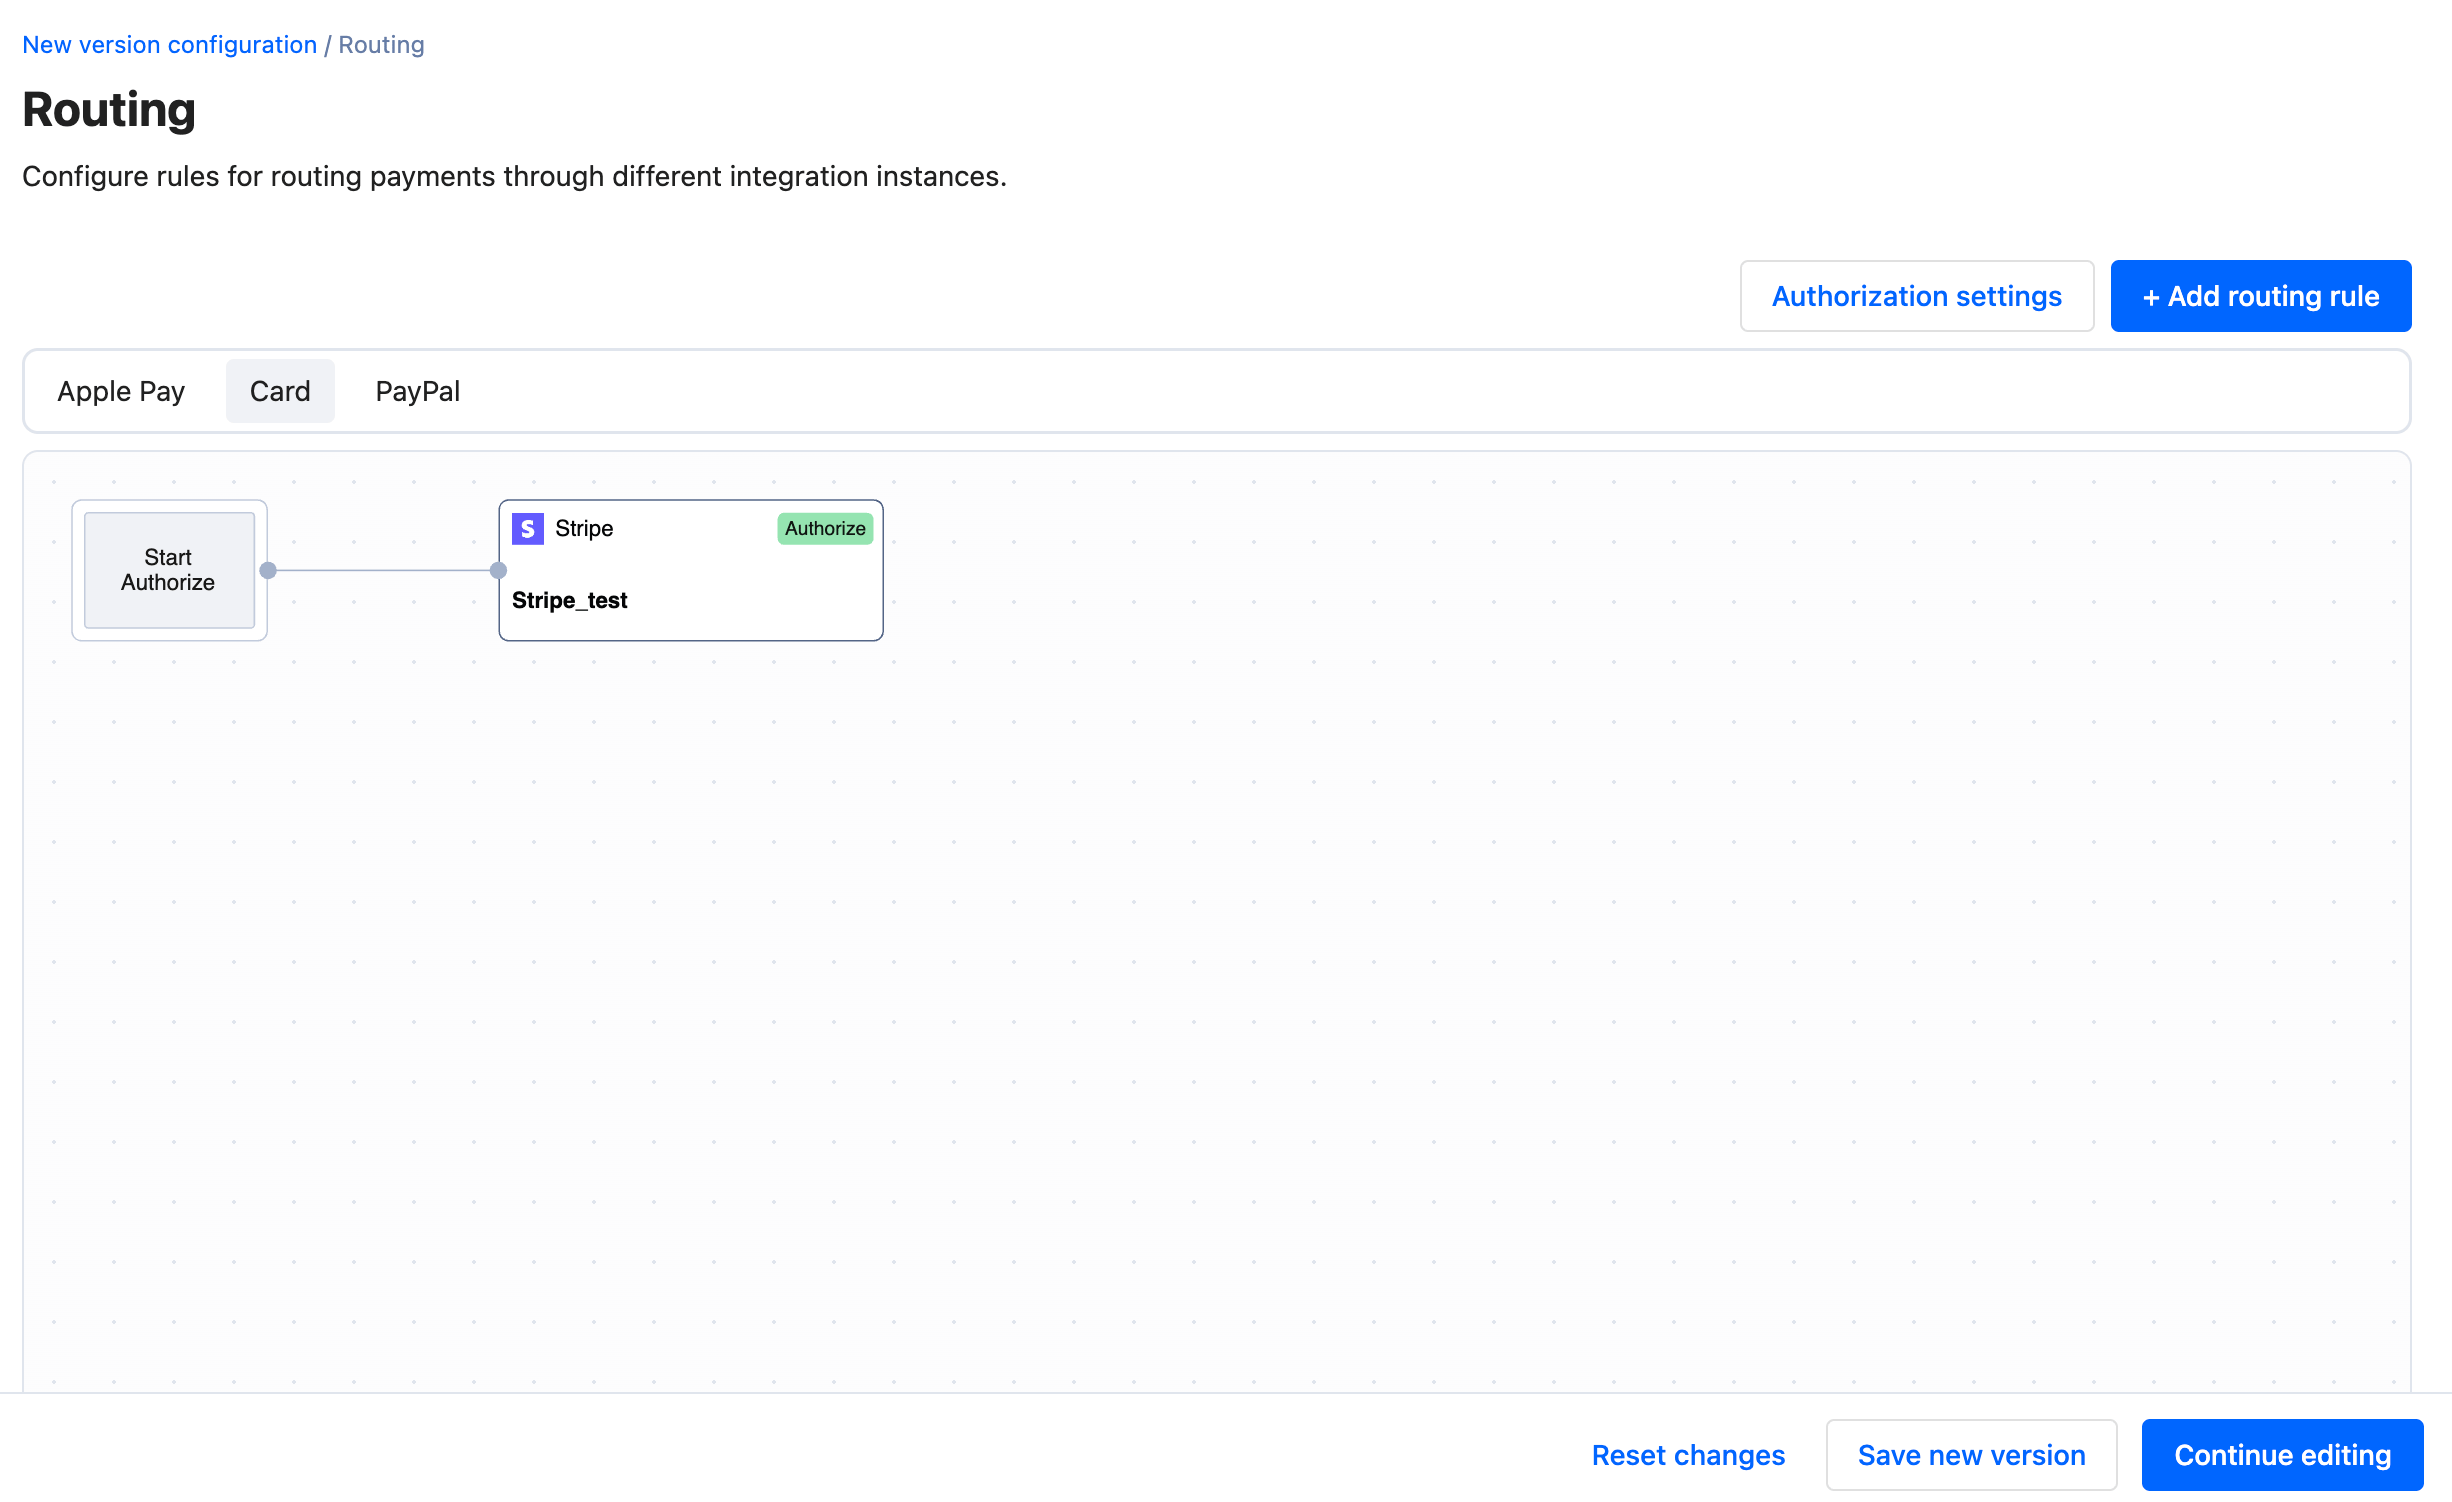 After configuring your default route, you can add more rules. A rule can consist of a single condition, or multiple conditions with an AND operator.
* Example: “**IF** Card Network is equal to Visa **THEN** authorize with Adyen”
* Example: “**IF** Authorization Currency is one of EUR,GBP **THEN** authorize via Stripe”
* Example: “**IF** Card Issuer Country is one of AT,DE,CH AND Authorization Currency is equal to EUR **THEN** authorize via Braintree”
After adding the above rules, your canvas should look like this:
After configuring your default route, you can add more rules. A rule can consist of a single condition, or multiple conditions with an AND operator.
* Example: “**IF** Card Network is equal to Visa **THEN** authorize with Adyen”
* Example: “**IF** Authorization Currency is one of EUR,GBP **THEN** authorize via Stripe”
* Example: “**IF** Card Issuer Country is one of AT,DE,CH AND Authorization Currency is equal to EUR **THEN** authorize via Braintree”
After adding the above rules, your canvas should look like this:
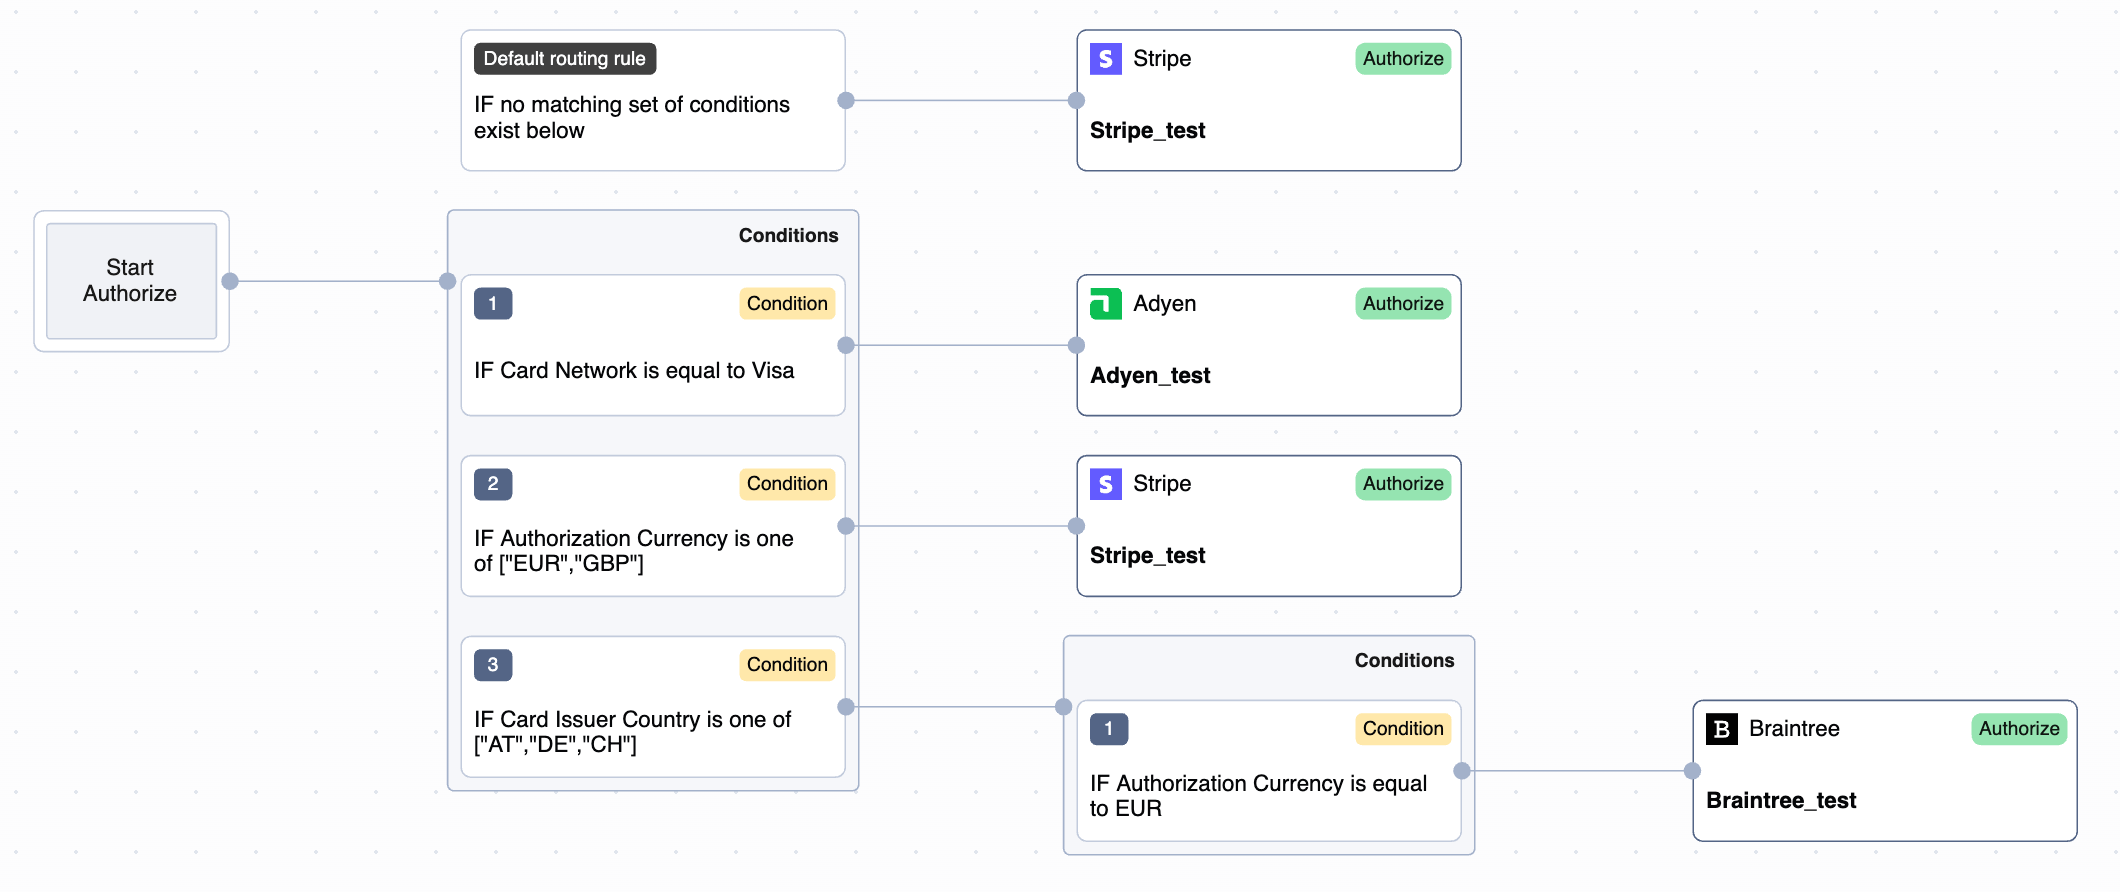
Rules are evaluated in the order of configuration.
In the example above, rule 3 will never happen, because rule 2 already takes care of all the EUR payments. If you want to keep rule 3, you need to have it evaluated before rule 2. To do it, simply drag and drop the rule higher.
 You can configure the Routing rules based on any fields related to the authorization request body or workflow execution context. This includes but is not limited to:
* Authorization request body fields
* [Meta fields](/docs/orchestration/payment-acceptance/meta-fields/index)
* Workflow execution context fields, e.g., `Card Issuer Country` or `Card Network`
You can configure the Routing rules based on any fields related to the authorization request body or workflow execution context. This includes but is not limited to:
* Authorization request body fields
* [Meta fields](/docs/orchestration/payment-acceptance/meta-fields/index)
* Workflow execution context fields, e.g., `Card Issuer Country` or `Card Network`
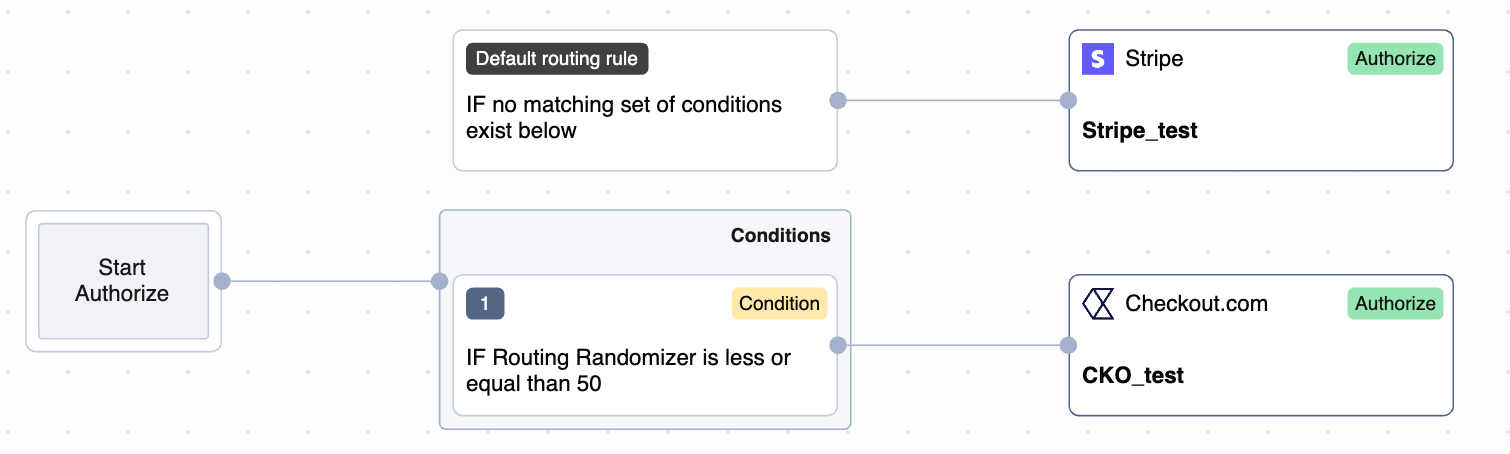
Additionally, Payrails allows you to split the traffic between providers using `Routing Randomizer` field and assigning a value between 0-100. In the below example the traffic is split 50/50 between Stripe and Checkout.com.
### Retries rules
Payrails also supports [Retries](/docs/orchestration/workflow-studio/retries#retries-configuration-in-the-merchant-portal) to automatically retry a failed authorization attempt. Retry rules allow configuring “fallback” providers, to recover failed payment authorizations.
To enable Retries, please reach out to your Payrails account manager.
Once the retry configuration is enabled and set up, you can create Routing rules for the retry authorizations. Retry rules decide when and in what situation a retry should happen (for example, “retry InsufficientFunds decline reason in 24 hours”), whereas Routing rules decide where the retried authorization should be routed (for example, “retry all failed Stripe authorizations with Adyen”).
You can configure a retry either with the same PSP or a different PSP. In case you configure a retry with a different PSP, Payrails will handle transforming the request body and automatically making the authorization request with the configured fallback PSP.
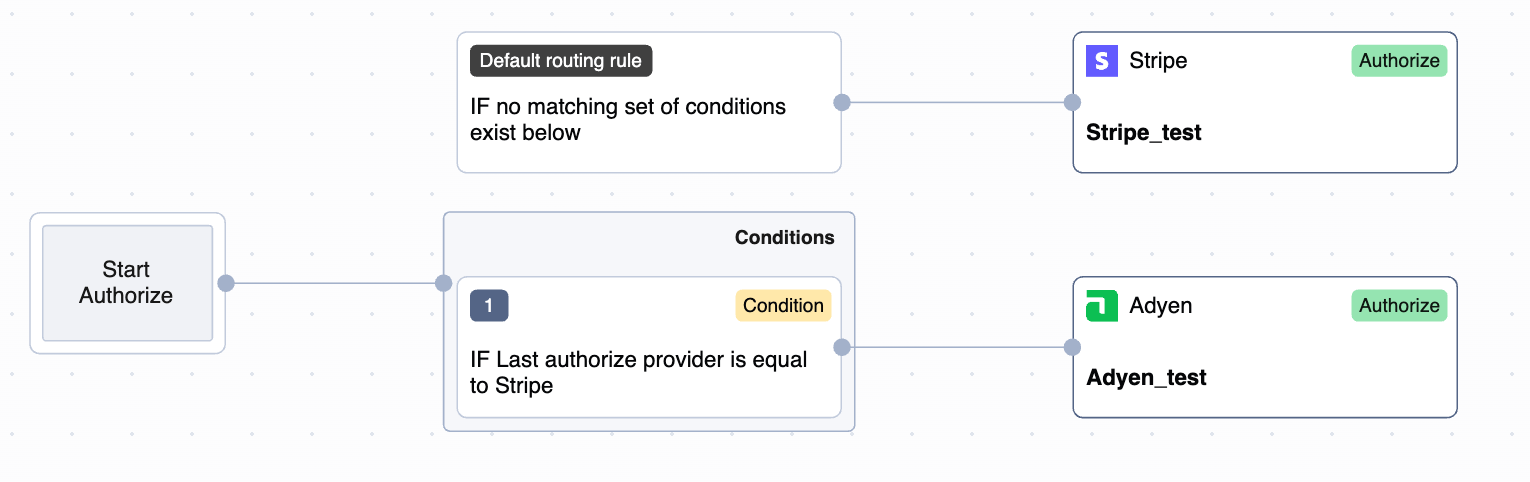
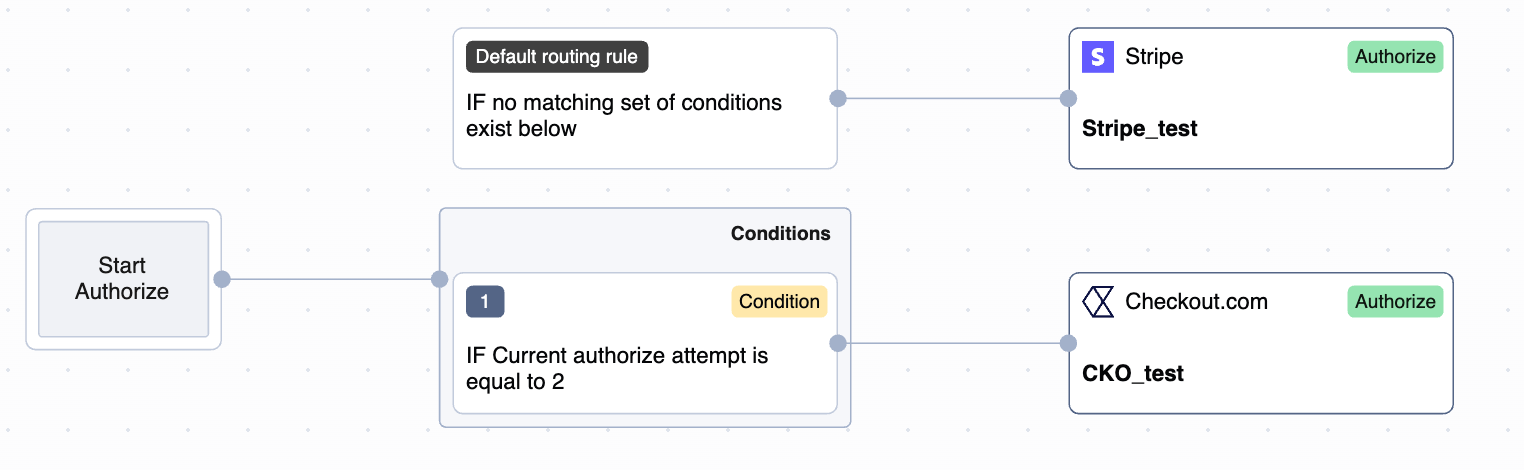
To set up the Routing rules for retries, you can use the following fields to specify the fallback rule:
* `Last authorize provider`
* `Current authorize attempt`
In this example, if the first failed authorization attempt was processed with Stripe, then the authorization retry will happen with Adyen.
In this example, the second authorization attempt will be processed with Checkout.com, regardless of the provider used for the first authorization attempt.
### Tips for routing configuration
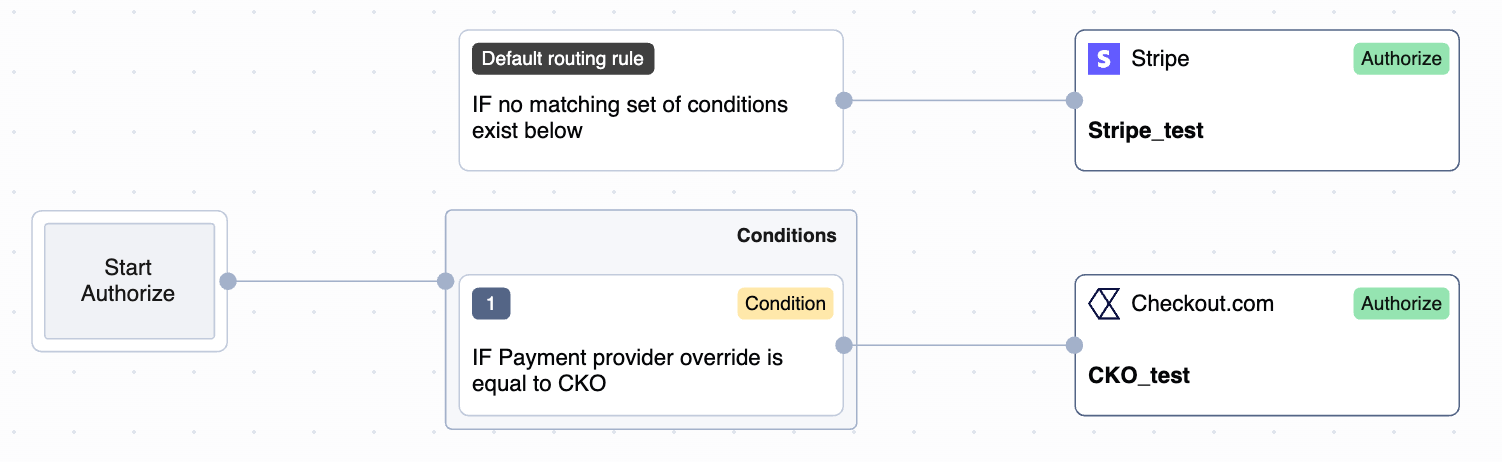
* If you want to use a specific provider for a single authorization attempt, you can override the rules by sending Payment Provider Override in the authorization attempt, and making sure that a related rule is created
 * You can create rules based on Customers’ data, for example `Customer country code` or `Customer email`
* For text values you can use operators like `contains` or `does not contain` as well as `starts with` or `ends with`
## Related topics
- [Dynamic Routing](/docs/overview/routing.md)
- [Provider Routing with Conditions](/docs/orchestration/workflow-studio/examples/provider-routing.md)
- [Managing Connections](/docs/token-vault/vault-proxy/proxy-connections/managing-connections.md)
* You can create rules based on Customers’ data, for example `Customer country code` or `Customer email`
* For text values you can use operators like `contains` or `does not contain` as well as `starts with` or `ends with`
## Related topics
- [Dynamic Routing](/docs/overview/routing.md)
- [Provider Routing with Conditions](/docs/orchestration/workflow-studio/examples/provider-routing.md)
- [Managing Connections](/docs/token-vault/vault-proxy/proxy-connections/managing-connections.md)