

What it does
- Picks the best provider per payment. Static routing rules send every payment that matches a rule to the same provider. Autopilot scores every candidate provider for each payment and routes it to the one with the highest chance of approval.
- Retries declines automatically. After a decline, Autopilot picks again from the providers this payment hasn’t tried. A retry never goes back to the provider that just declined it. You set how many attempts to allow and whether hard declines stop the retries.
- Keeps payments moving. Autopilot picks a provider in a fraction of a second.
- Records every decision. Each workflow execution stores the provider chosen, each candidate’s estimated approval probability, and how much past data backs it. That record explains why each payment went where it did, with the fields listed in execution output.
- Controlled rollout to send it a share of your traffic. Compare the results with your current routing before you widen the rollout.
How the model chooses a provider
A model per merchant
Each merchant has a special model, trained on all past payments. For each payment, it weighs signals about the payment itself, when it happens, and the customer, the merchant, and payment instrument behind it, including how their earlier payments went. These signals let it judge each payment on its own instead of by a fixed rule.A score for every candidate
From these signals, the model estimates each candidate provider’s chance of approving the payment. Payrails calibrates the scores per provider, so they’re comparable probabilities, not only a ranking. The payment goes to the highest-scoring provider.Confidence in each score
Alongside each score, Autopilot tracks how many similar past payments back it. Thedecision recorded for every payment reflects that.
Self improvement over time
Every payment Autopilot routes adds to your history. When Payrails retrains your model, it learns from those outcomes, including the less common payments it explored.Before you start
- Ask Payrails to turn it on. Your Payrails contact gets a model trained and Autopilot enabled for you. The Autopilot card appears in Workflow Studio only after that.
- Pick at least two providers. With one candidate there’s nothing to choose between. The card accepts one, but then behaves like a fixed route.
- Use providers the model has history for. The model can’t score a provider it has no history for, so it skips that provider. If it can’t score any of your candidates, Autopilot doesn’t route the payment and the step fails. Check your candidate list with your Payrails contact.
Set it up in Workflow Studio
The Autopilot card holds three connected steps: the provider choice, an Authorize step that sends the payment to the chosen provider, and a check that retries a decline on the next provider. You configure all of them from the card’s settings. The screenshots use example provider accounts; your own accounts appear in their place.1
Open a new workflow version
Go to Workflows → Payment acceptance and click New version, or duplicate the version you use today. Live payments don’t change until you save the version and send traffic to it.If you start from a blank version, add the Start Authorize trigger and turn on the payment methods you want under Payment options.
2
Add the Autopilot card
Click the next-action button on the step before routing, for example Start Authorize. In What happens next?, under Most used, pick Autopilot.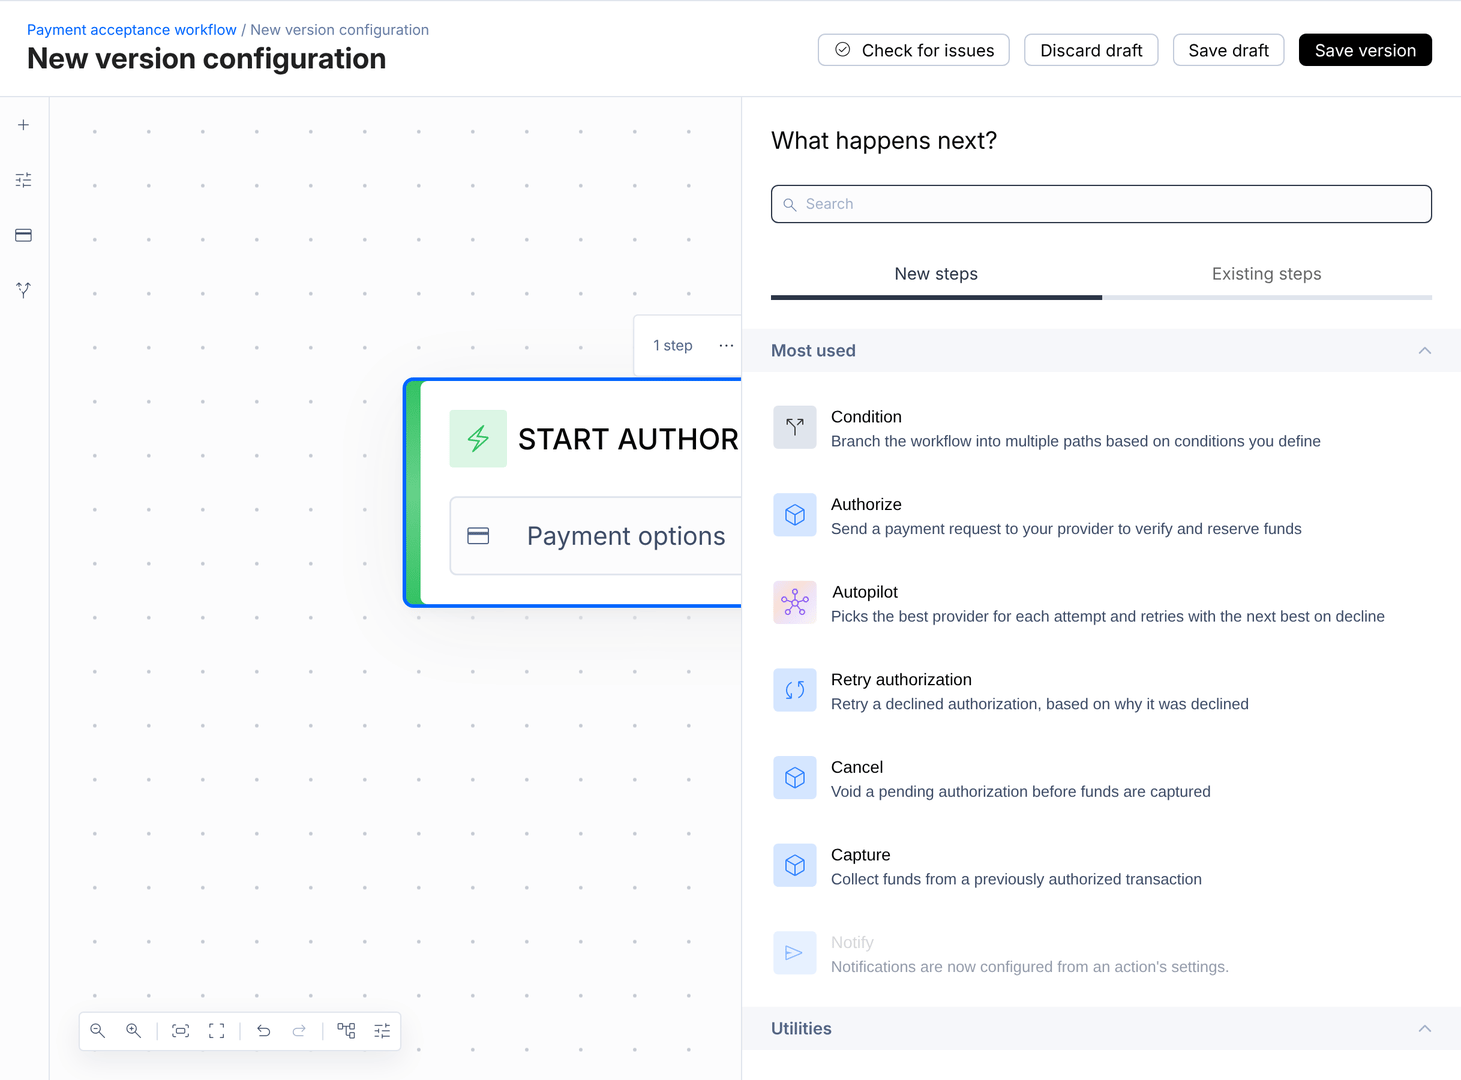
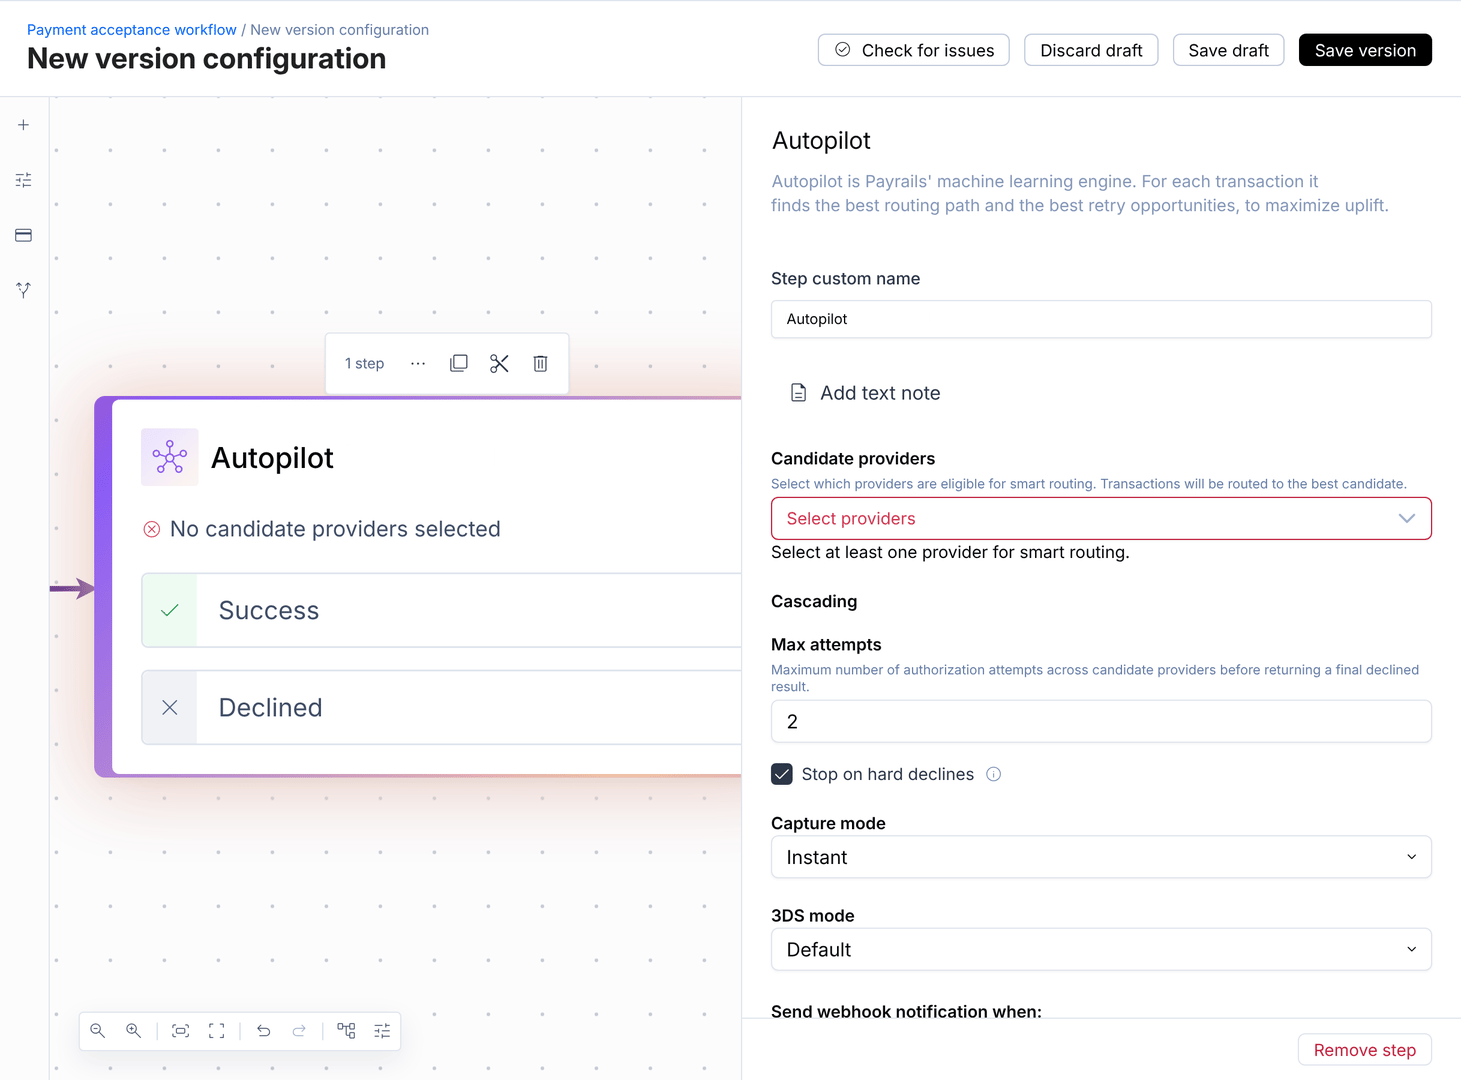
3
Choose the candidate providers
Under Candidate providers, select the provider accounts Autopilot may route between. Each payment goes to the candidate the model rates highest for it. Select at least one; until you do, the field shows Select at least one provider for smart routing.
4
Set how declines cascade
Under Cascading, set how Autopilot retries a declined payment on the next candidate, known as the cascade: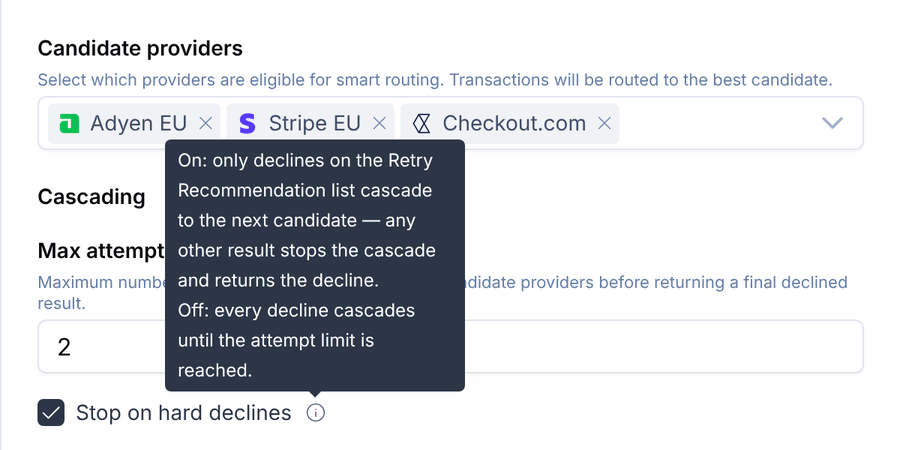
- Max attempts: the total number of authorization attempts across your candidates before the payment returns as declined. The default is
2, the first attempt plus one retry, and it can’t exceed the number of candidates you selected. Each retry goes to a provider this payment hasn’t tried yet. - Stop on hard declines: on by default. When on, only declines on the Retry Recommendation list move on to the next candidate; any other result stops the cascade and returns the decline. When off, every decline moves on until the payment reaches Max attempts.
5
Set the authorization options
Capture mode and 3DS mode apply to the Authorize step inside the card, with the same choices as a standalone Authorize step.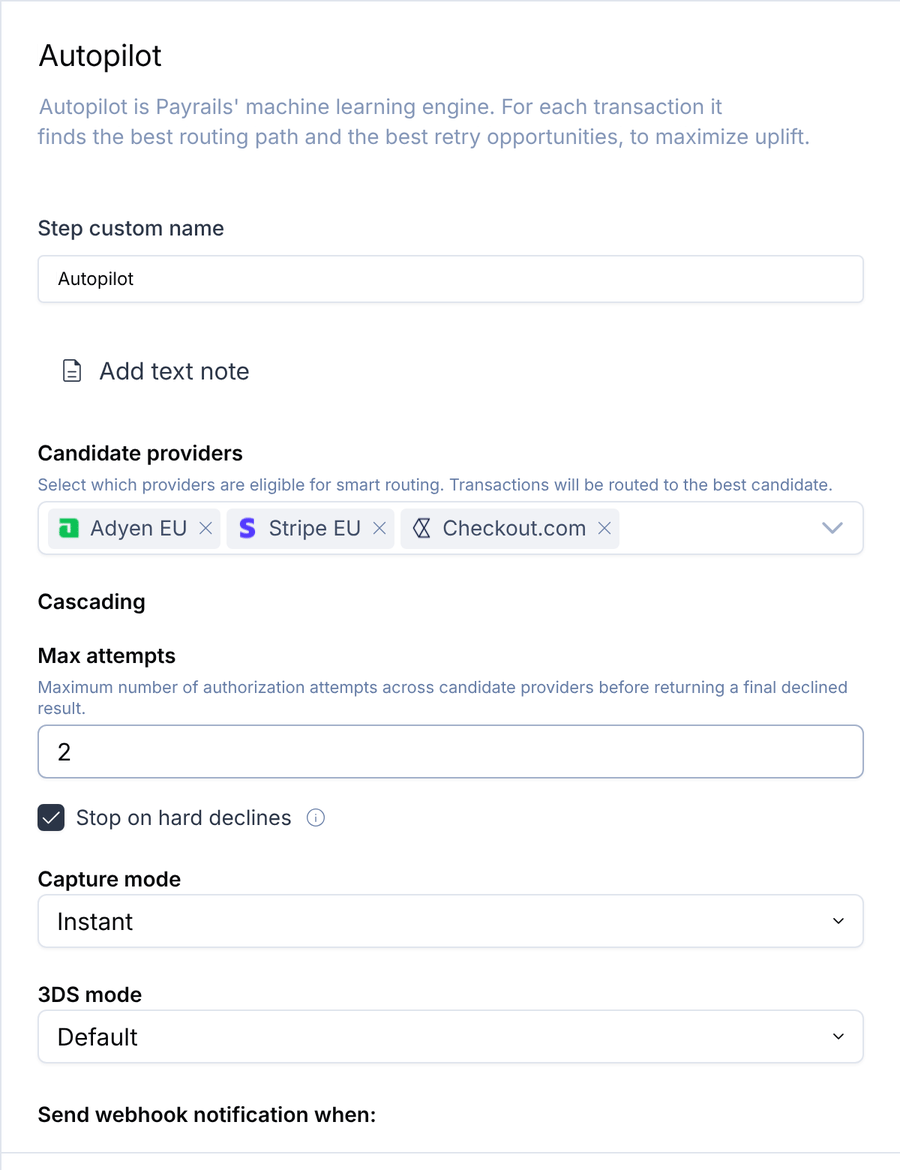
6
Turn on notifications
Further down the settings, under Send webhook notification when:, tick the events that send a notification: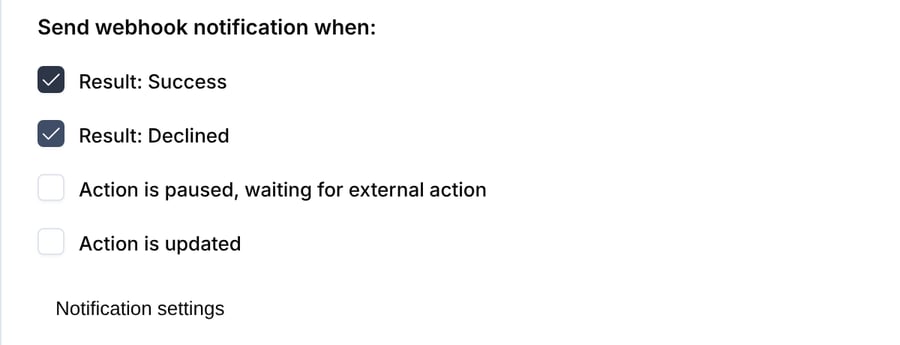
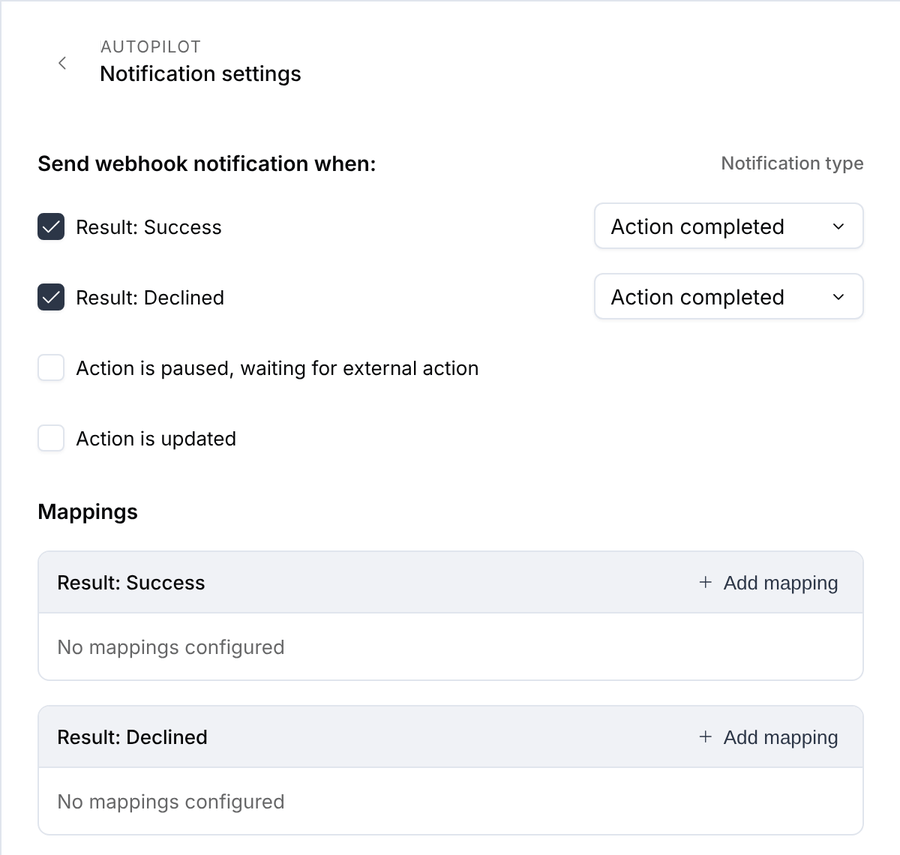
- Result: Success: one of the candidates authorized the payment.
- Result: Declined: the cascade ended without an authorization.
- Action is paused, waiting for external action: for example, a 3DS challenge.
- Action is updated: the result changed after the step finished, for example when a late provider notification arrives.
7
Connect the outputs
The card now lists your candidates and has two outputs: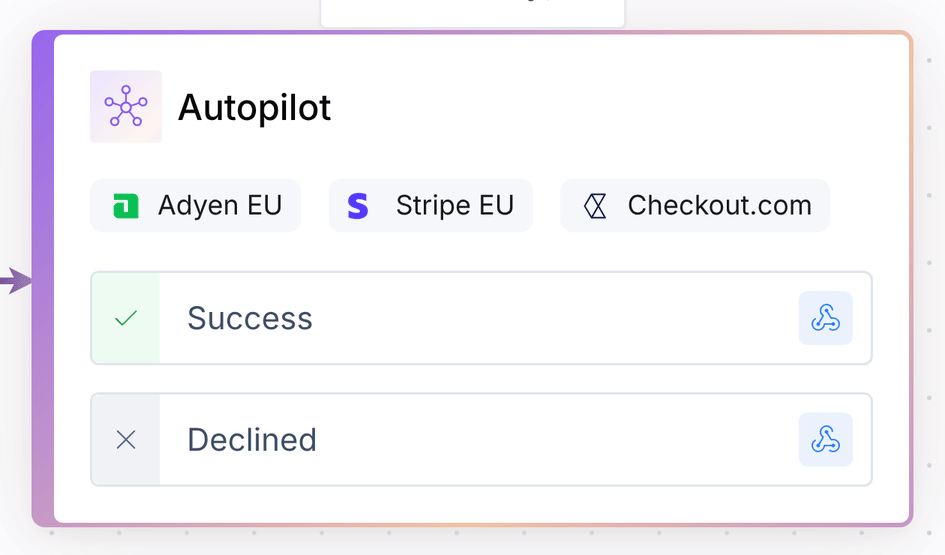
- Success: one of the candidates authorized the payment.
- Declined: every attempt that Max attempts allows ended in a decline, or a hard decline stopped the cascade.
8
Check, save and roll out
Click Check for issues. Workflow Studio flags problems such as:
- Max attempts higher than the number of candidates
- a candidate provider that’s disabled or no longer available
- a payment method that none of the candidates can authorize
Fallback
Autopilot never holds a payment waiting for the model. If the model doesn’t answer quickly, is unavailable, or isn’t set up for you, the step records"decision": "fallback" and carries on:
- First attempt: the step names no provider configuration, so Authorize picks the provider with your workflow’s usual routing rules, exactly as it would without Autopilot.
- Retry: the step picks one of the untried candidate provider configurations at random. Your usual routing rules can’t tell which providers already declined this payment, so the step doesn’t use them here.
Execution output
The step’s output appears on the workflow execution in the execution monitor. Use it to trace why a payment went where it did.Configure it through the API
If you manage workflow versions through the API instead of Workflow Studio, the card is three steps: asmartRouting action, an authorize action, and a condition that loops back to smartRouting on a retryable decline. The smartRouting step passes its pick to Authorize through the mapping output.providerConfigId → settings.providerConfigId:
smartRouting settings: loop back only while authorize.currentAttempt is below your maximum and the decline is retryable. Workflow Studio writes the cascade settings for its own use. Payrails doesn’t read them, nor goal, baseConfig or strategies.