

Introduction
Apple Pay is a mobile payment and digital wallet service that enables customers to pay quickly and securely using their iPhone, iPad, Apple Watch, or Mac — without manually entering payment details. Payrails supports Apple Pay across both mobile and web, and can route transactions to any supported Payment Service Provider (PSP). This guide walks you through the steps to get Apple Pay set up and accepting payments with Payrails. The below diagram illustrates at a high level how Payrails processes Apple Pay transactions on your behalf- Payrails SDK
- Server to Server
- Self decrypted

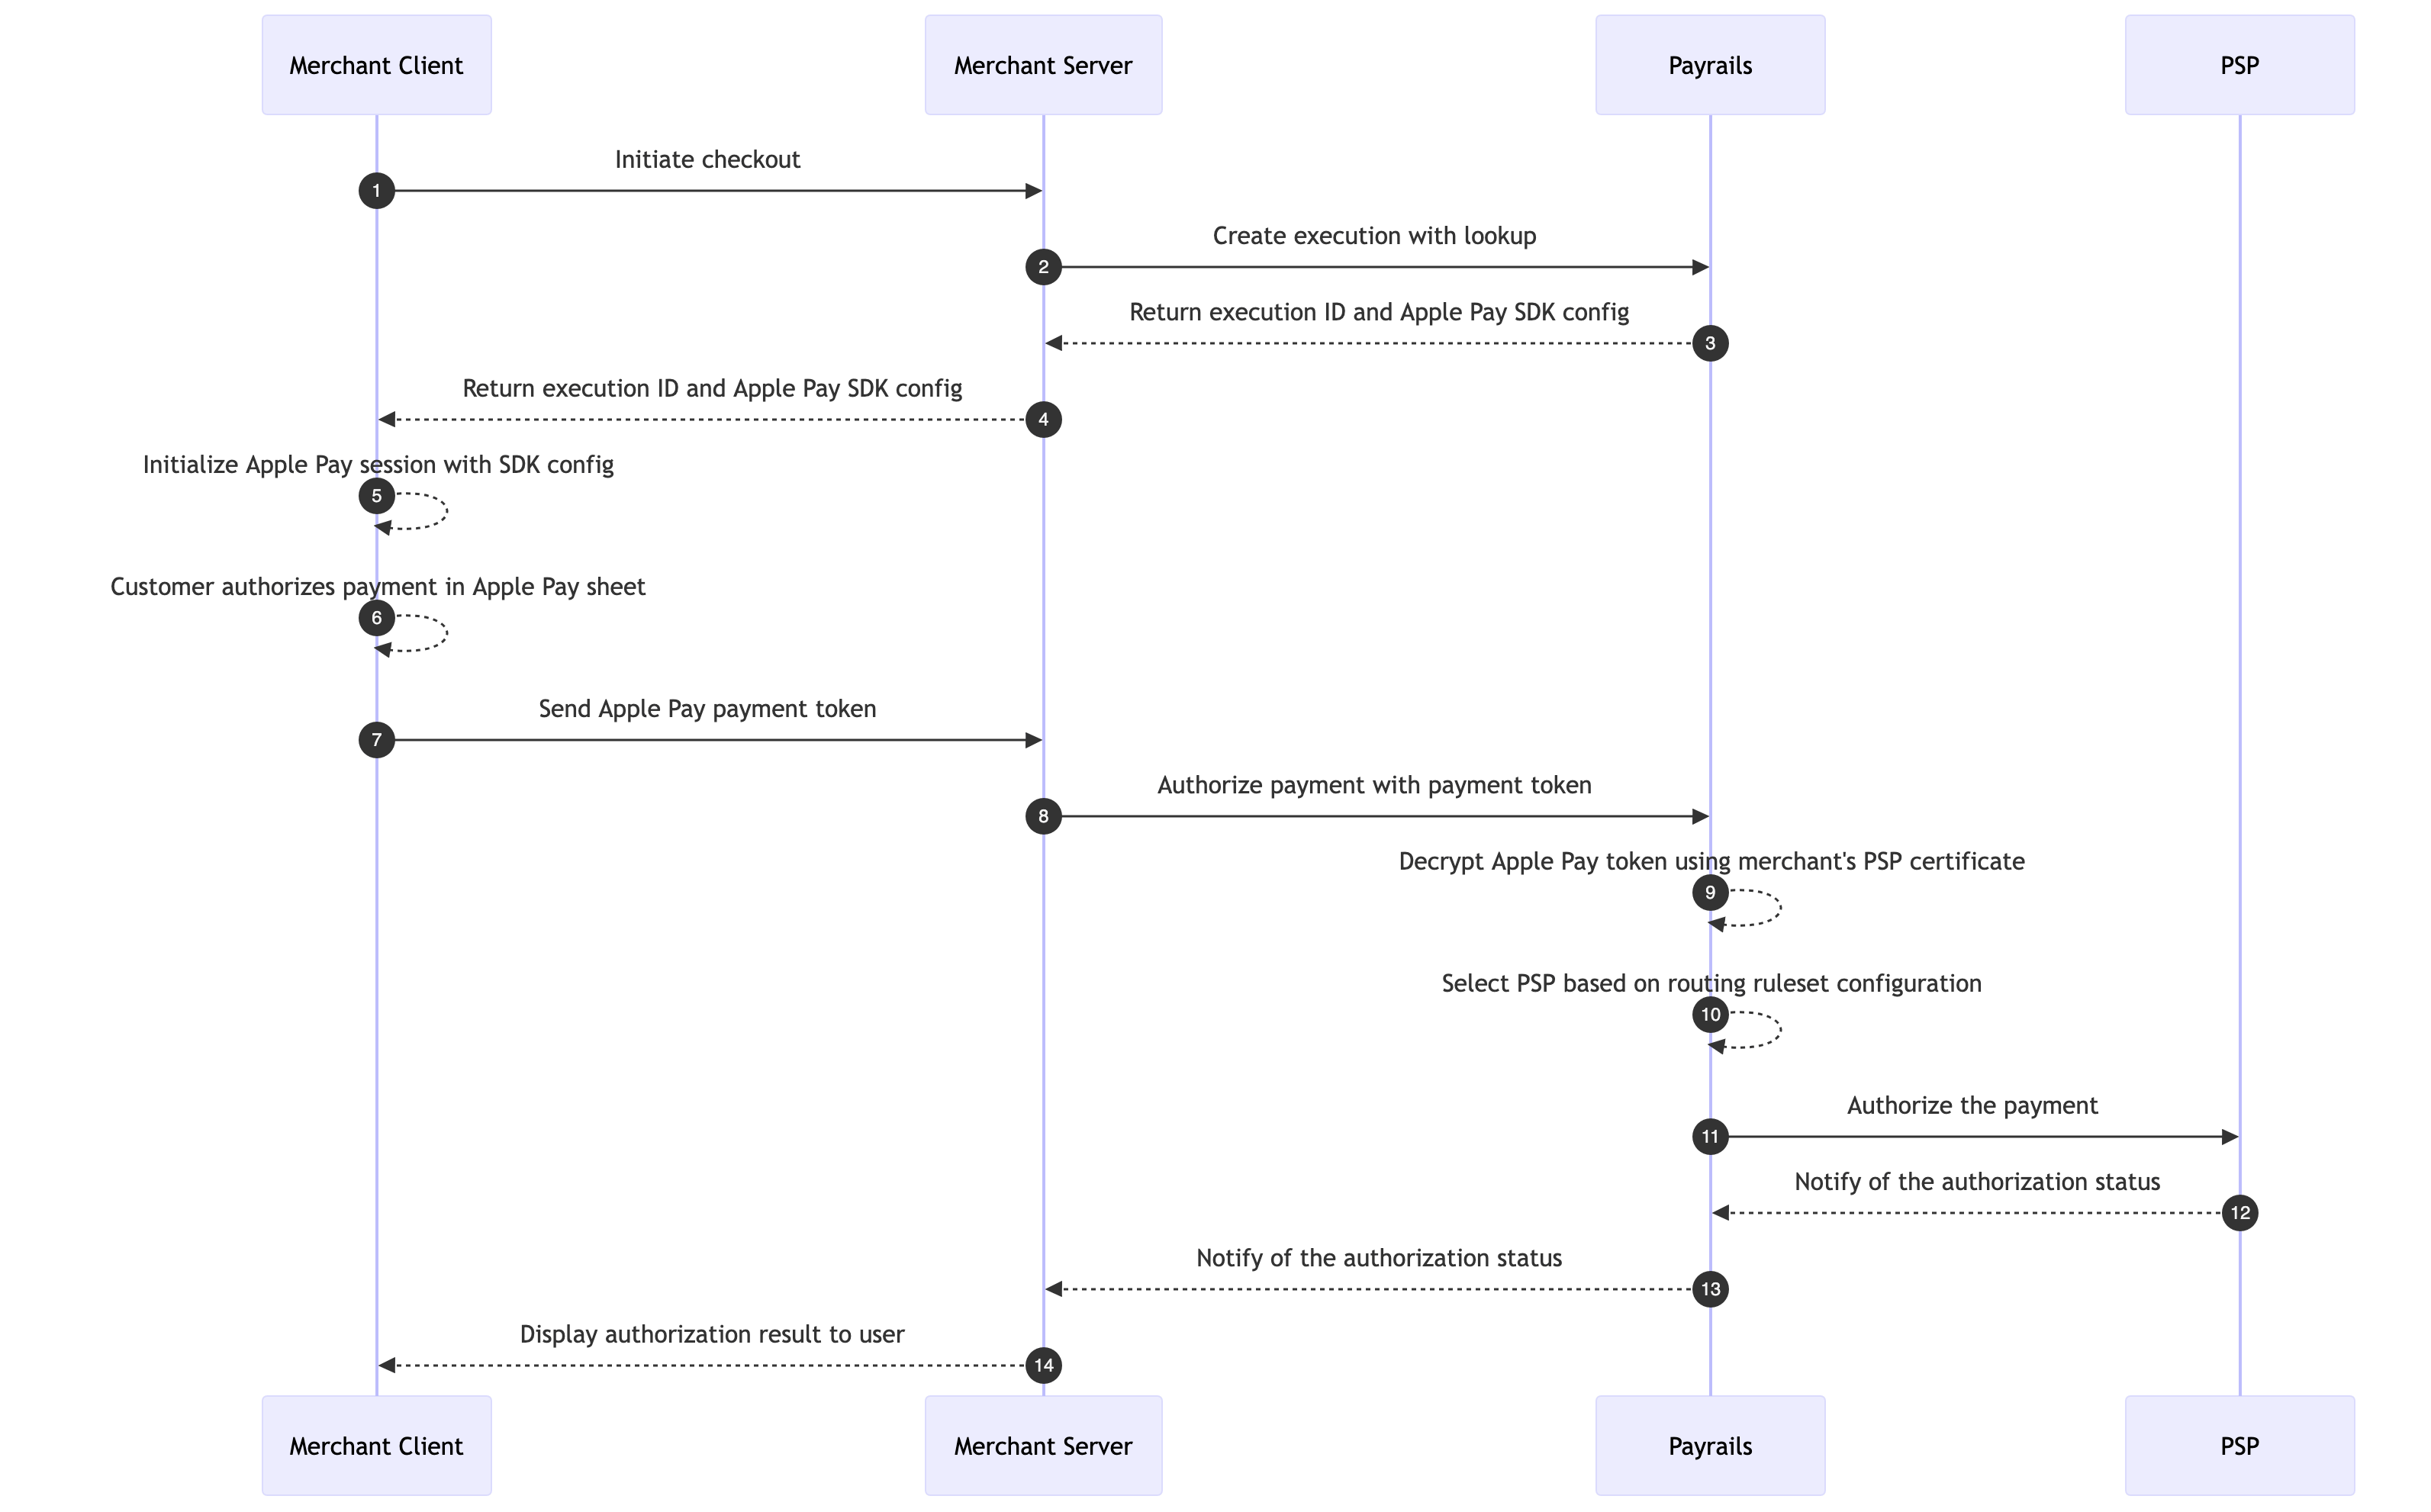
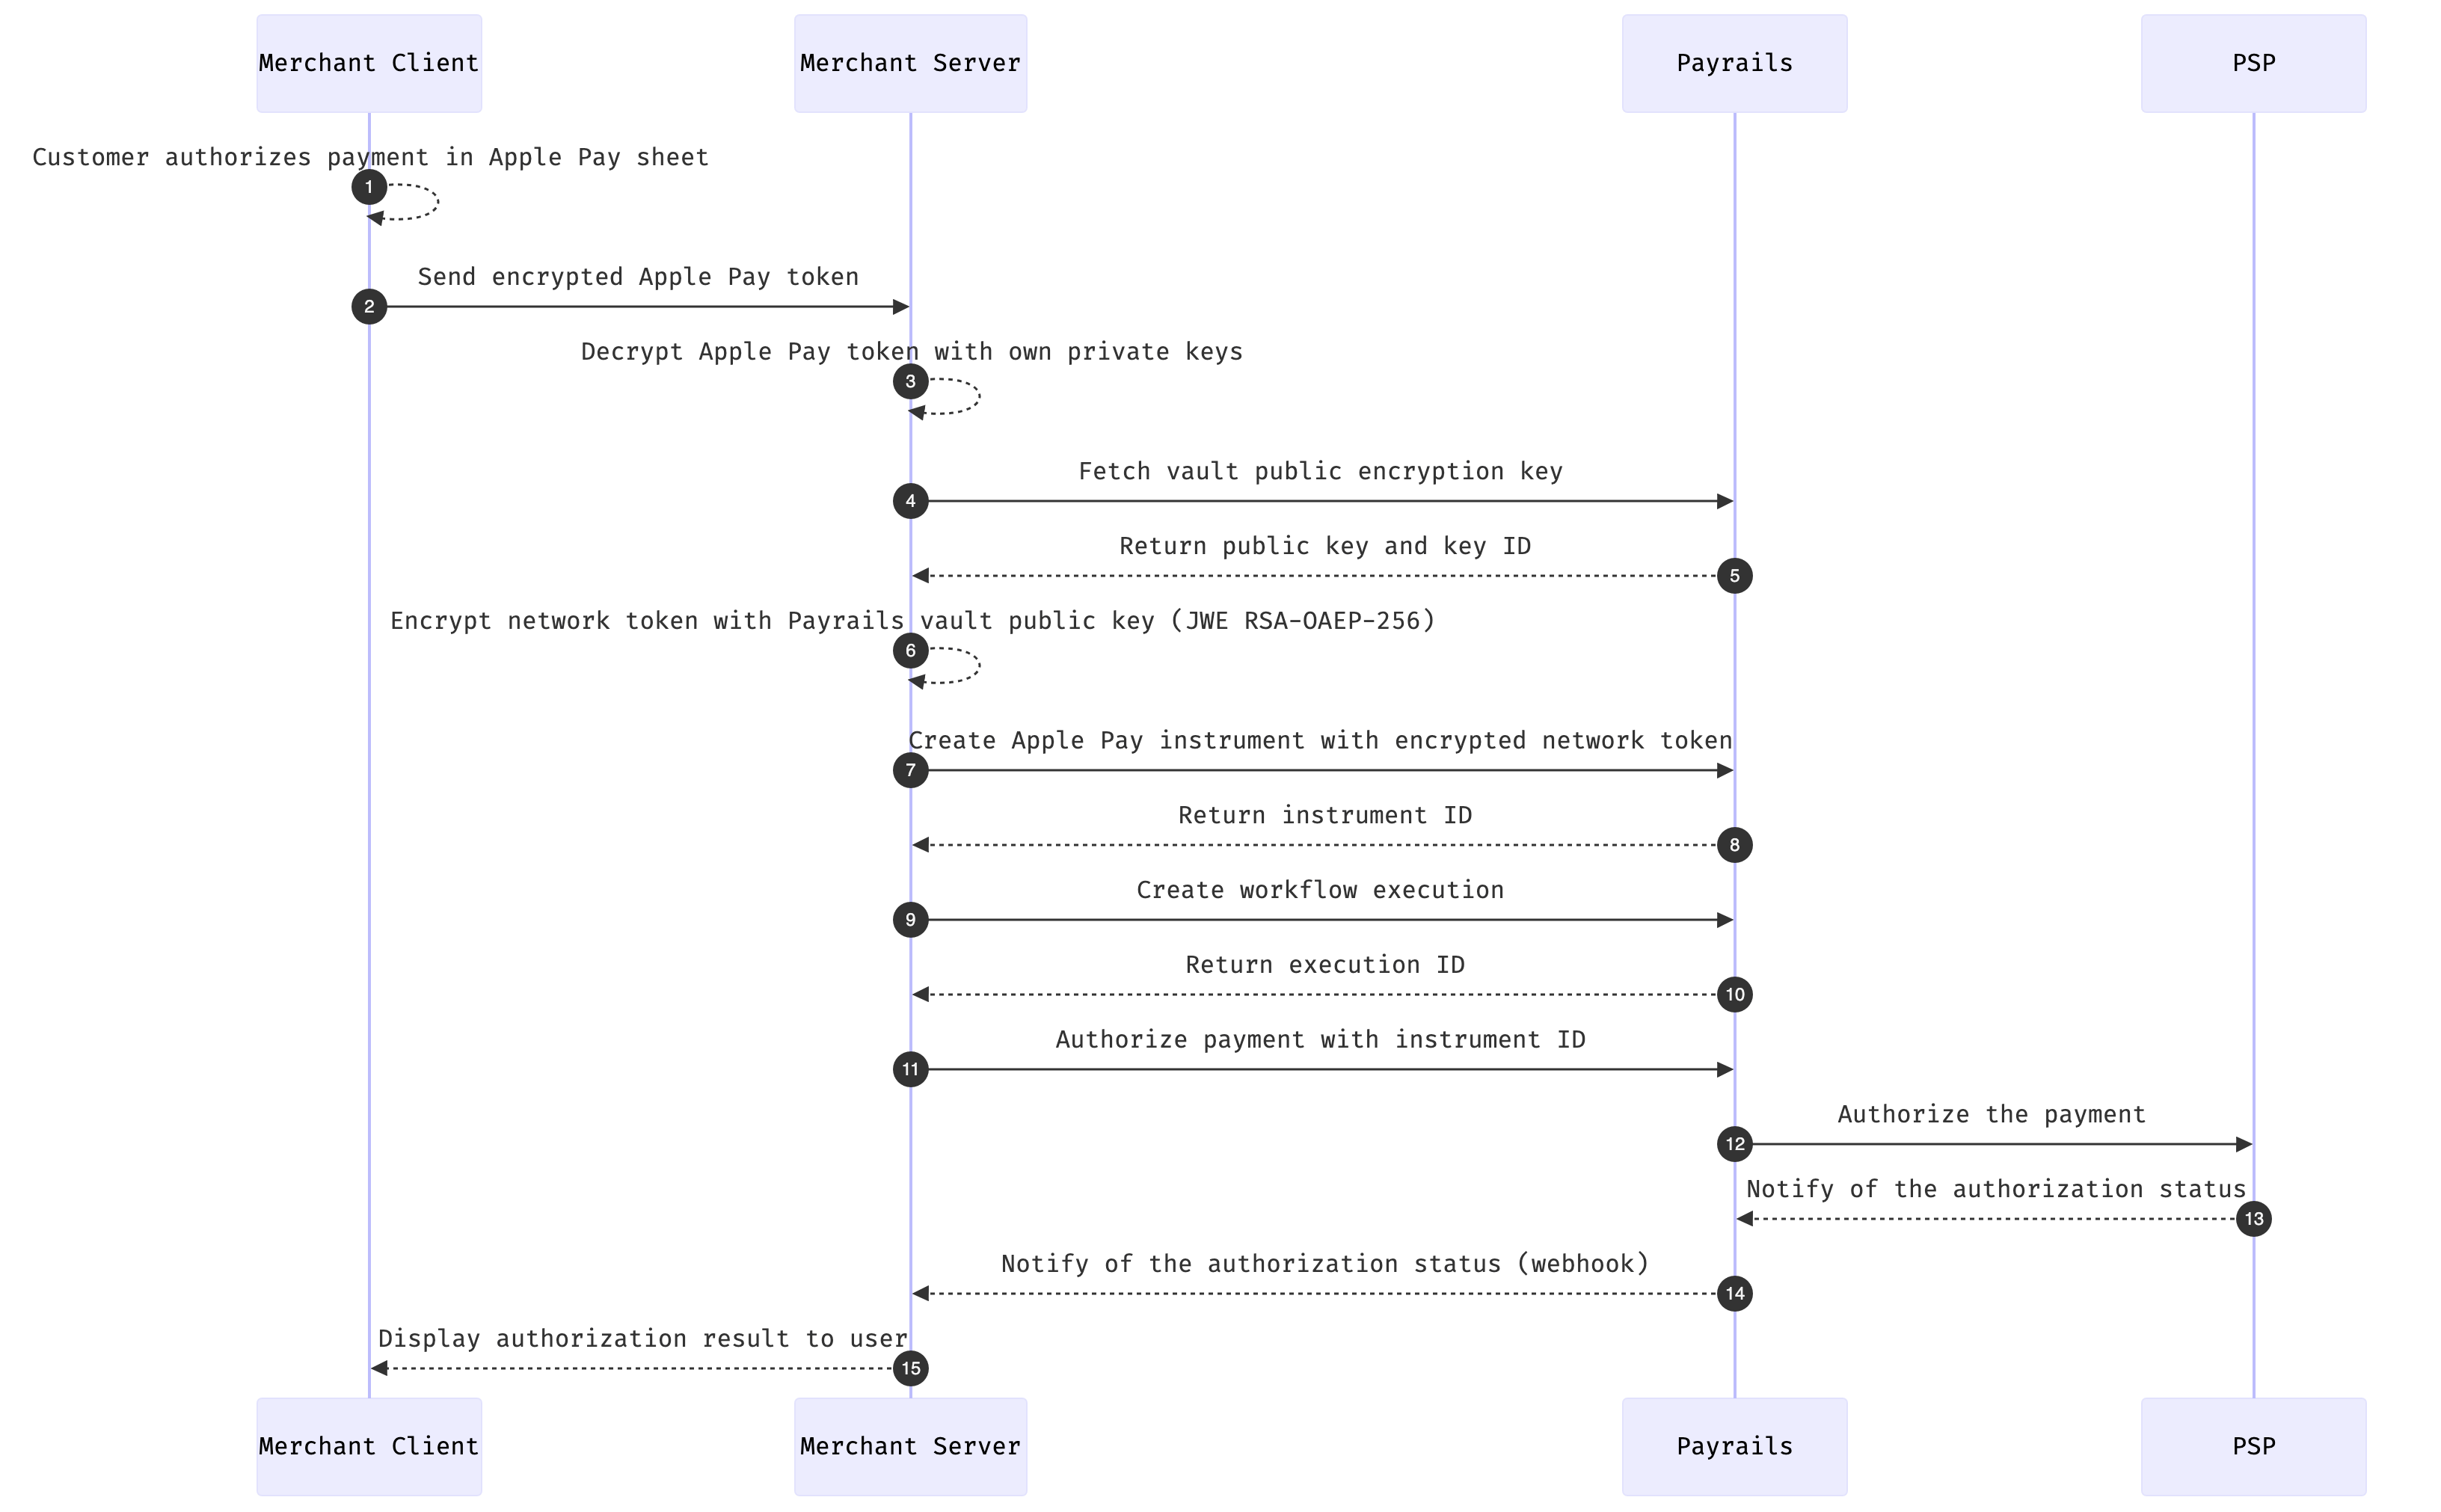
Choose your Integration
Payrails offers multiple integration approaches for Apple Pay, each with different tradeoffs between customization and ease of implementation.
For a full comparison of integration approaches and help choosing the right one for your use case, refer to our integration approach guide.
Setup Apple Pay
- Native + Web
- Web Only
You wish to accept payments on both iOS devices and Web
- Register for an Apple Pay Merchant ID
- Request Certificate Signing Request (CSRs)
- Upload CSR to your Apple Developer Account
- Provide your certificates
- Register your domain
Register for an Apple Pay Merchant ID
Register a new Merchant ID via Apple’s Setting up Apple Pay guide.We recommend creating distinct Apple Merchant IDs for Payrails production and staging environments.
Request Certificate Signing Requests (CSRs)
Contact your Payrails representative to initiate the certificate generation process. Payrails will generate two Certificate Signing Requests (CSRs) for you:apple_pay.csr— Payment Processing Certificate Signing Requestmerchant_id.csr— Merchant Identity Certificate Signing Request
Upload CSR to your Apple Developer Account
- Go to the Merchant ID list in Apple’s Developer Center and select the Merchant ID you registered earlier.
-
Under the Apple Pay Payment Processing Certificate section, click Create Certificate and upload the
apple_pay.csrfile provided by Payrails. Download the generated Payment Processing Certificate.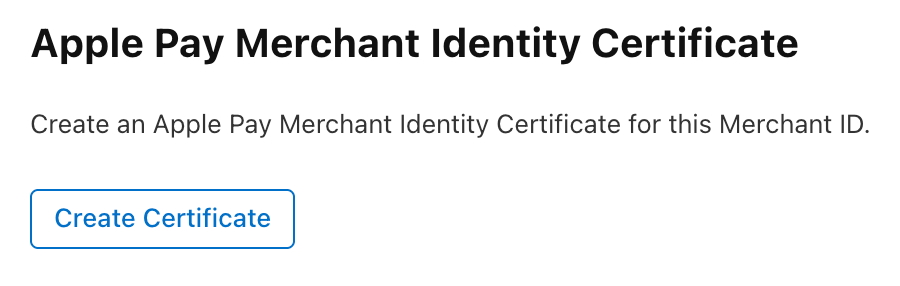
-
Go back to the same Merchant ID and under the Apple Pay Merchant Identity Certificate section, click Create Certificate and upload the
merchant_id.csrfile provided by Payrails. Download the generated Merchant Identity Certificate.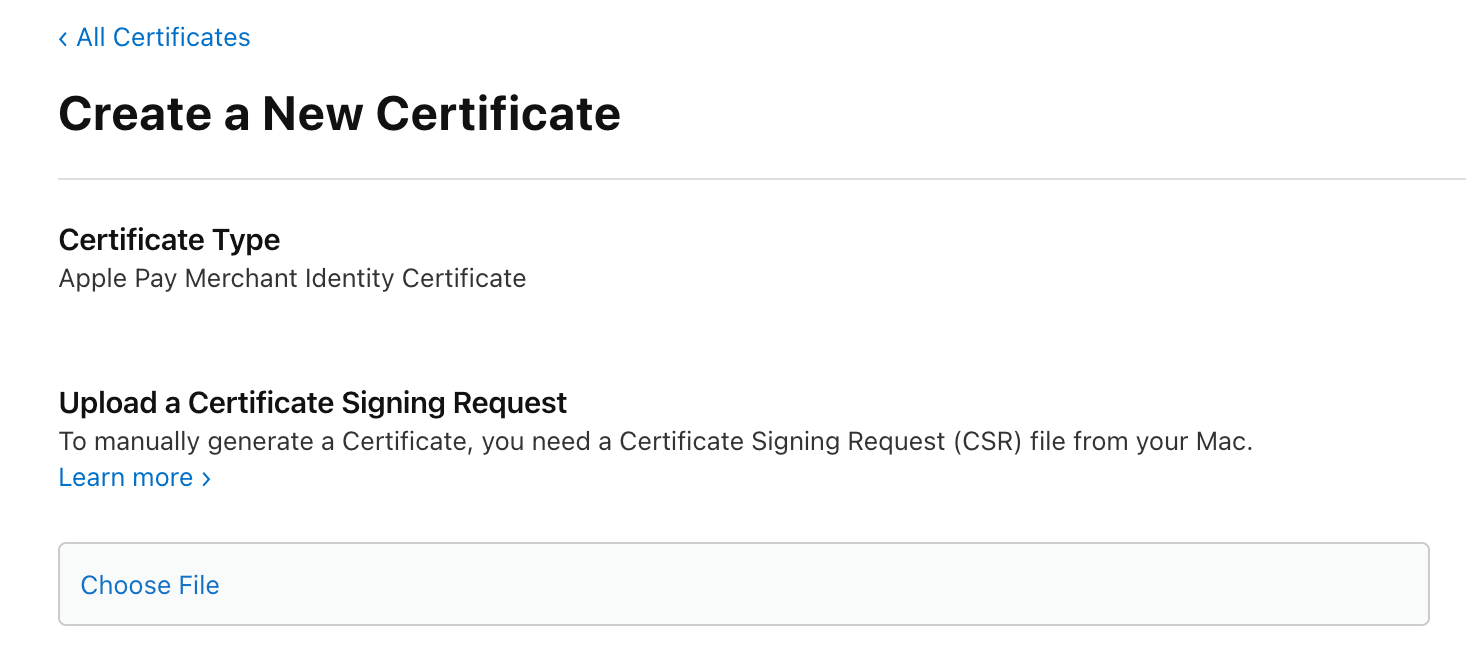
Decide on a Config ID
Payrails allows you to set up multiple Apple Pay key configurations, each identified by a unique Config ID. This is useful for splitting traffic across different regions or environments — for example, routing European payments through one set of keys and US payments through another.Your Config ID can be a UUID or a descriptive string such asregion-eu-west or region-us-east. Share your chosen Config ID with your Payrails representative when providing your certificates — it will be used to associate your Apple Pay keys and can be referenced in payment requests to select which configuration should be used for processing.Provide your Certificates
Send both the Payment Processing Certificate and the Merchant Identity Certificate to your Payrails representative.Once Payrails confirms receipt, go back to the Merchant ID list, select your Merchant ID, and activate the Payment Processing Certificate you just created.Register your Domain
To process Apple Pay payments on the web, Apple requires you to verify ownership of your domain.- Go to the Merchant ID list and select the Merchant ID for which you configured certificates.
-
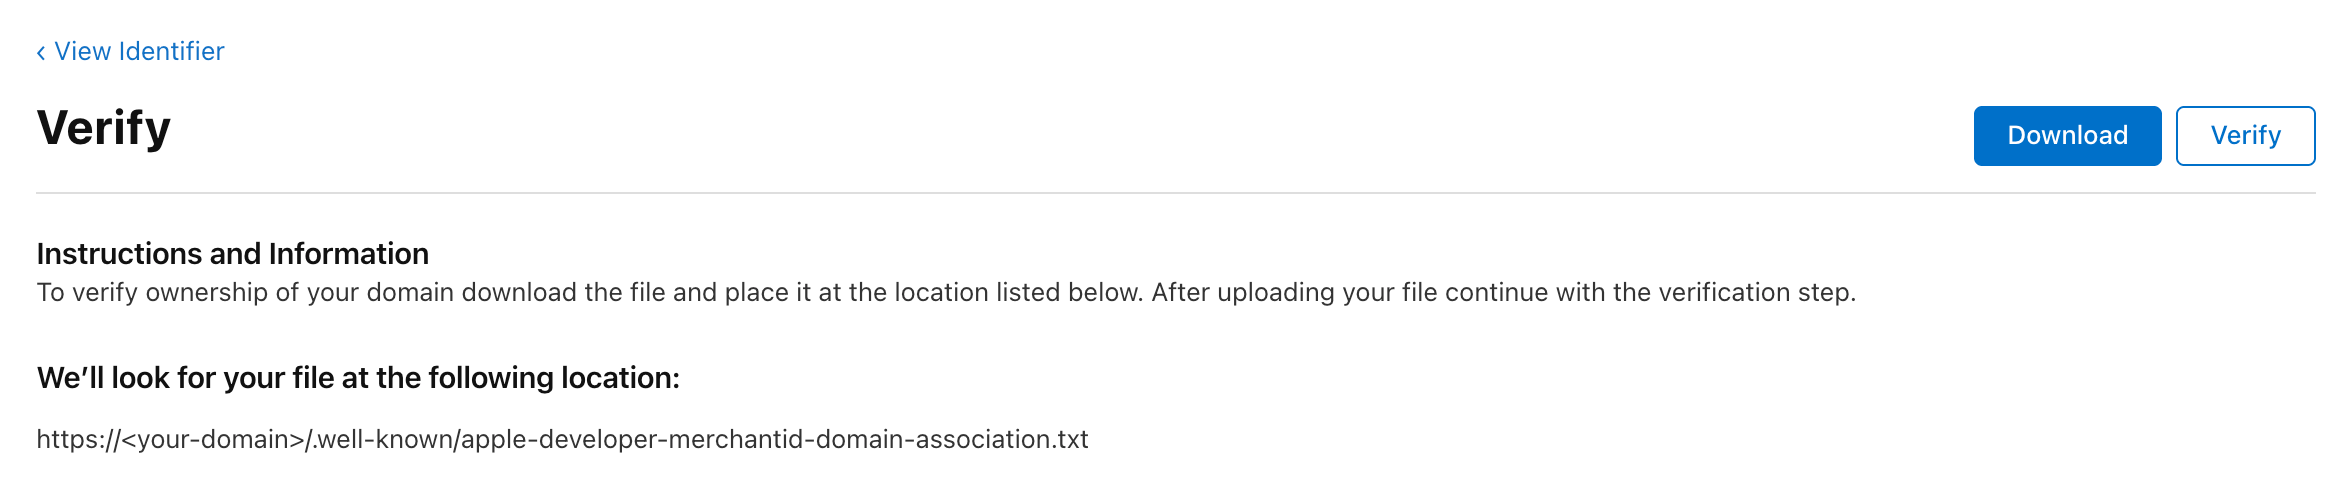
Under the Merchant Domains section, click Add Domain and download the domain association file.
-
Host the file on your domain at the following path:
https://<your-domain>/.well-known/apple-developer-merchantid-domain-association - Click Verify in the Apple Developer Center to complete domain registration.
The domain association file must remain publicly accessible without redirects — Apple regularly re-verifies domains after the initial registration. This step is not required for staging environments.
Accept Apple Pay
- Drop In
- Elements
- Server to Server
- Self-Decrypted
Accept Apple Pay with the Payrails Drop-in
The Payrails Drop-in is the fastest way to accept Apple Pay. It handles the entire payment UI and flow — no additional client-side development is required beyond mounting the component.For the full list of Drop-in configuration options, styling, and event handling, refer to the Drop-in integration guide.Step 1: Create a session (Server-side)
From your server, call the Payrails/client/init endpoint. To enable Apple Pay, pass the applePayConfigId that was agreed upon during your Payrails onboarding.data field — a base64-encoded string — and a version field. Pass both to your client.The
applePayConfigId determines which Apple Pay keys are used for this session. If you have multiple configurations (e.g. per region), pass the appropriate ID here. If omitted, the default config will be used as fallback.Step 2: Initialize the SDK (Client-side)
Pass thedata and version from your server response to Payrails.init():Step 3: Mount the Drop-in (Client-side)
Create and mount the Drop-in component into your checkout page. Apple Pay will appear automatically if the customer’s device and browser support it.The Apple Pay button is only shown when the customer is on a supported device (Safari on iOS/macOS) with a card in their Apple Wallet. No additional checks are needed on your end.
Step 4: Handle payment events
The Drop-in emits the following events relevant to Apple Pay:If you are on
@payrails/web-sdk version 5.36.0 or later, use the generic events (onSuccess, onFailed, onPending, onRequestStart). The older events onAuthorizeSuccess, onAuthorizeFailed, onAuthorizePending, and onAuthorizeRequestStart are deprecated.Recurring payments
As with other payment methods, you can choose to tokenize the payment instrument such that it can be used for future authorizations by setting thestoreInstrument parameter to true. In this case, you can expect to receive a Payrails paymentInstrumentId in the authorize notification as in the below example.
paymentInstrumentId in the paymentComposition as in the below example.
Please note that for Apple Pay payments made with a tokenized payment
instrument, you must appropriately set authorization flags with us to indicate
that the payment is a merchant-initiated transaction (MIT). If you indicate
that the payment is a customer-initiated transaction (CIT), then the payment
will be rejected. To set authorization flags, see
Authorization flags.
Supported regions / countries
Apple Pay is available to customers based in:| Regions | Countries |
|---|---|
| Africa | 🇪🇬 Egypt🇲🇦 Morocco🇿🇦 South Africa |
| Asia Pacific | 🇦🇺 Australia🇭🇰 Hong Kong🇯🇵 Japan🇲🇾 Malaysia🇳🇿 New Zealand🇸🇬 Singapore🇹🇭 Thailand |
| Europe | 🇦🇹 Austria🇧🇪 Belgium🇧🇬 Bulgaria🇭🇷 Croatia🇨🇾 Cyprus🇨🇿 Czech Republic🇩🇰 Denmark🇪🇪 Estonia🇫🇮 Finland🇫🇷 France🇩🇪 Germany🇬🇮 Gibraltar🇬🇷 Greece🇭🇺 Hungary🇮🇸 Iceland🇮🇪 Ireland🇮🇹 Italy🇱🇻 Latvia🇱🇮 Liechtenstein🇱🇹 Lithuania🇱🇺 Luxembourg🇲🇹 Malta🇳🇱 Netherlands🇵🇱 Poland🇵🇹 Portugal🇷🇴 Romania🇸🇰 Slovakia🇸🇮 Slovenia🇪🇸 Spain🇸🇪 Sweden🇨🇭 Switzerland🇬🇧 United Kingdom |
| Latin America | 🇧🇷 Brazil🇲🇽 Mexico🇵🇷 Puerto Rico |
| Middle East | 🇦🇪 United Arab Emirates |
| North America | 🇨🇦 Canada🇺🇸 United States |
Supported workflows and services
| Workflow | Supported |
|---|---|
| Payrails SDK | ✔ |
| Payrails API | ✔ |
| Delayed / Manual Capture | ✔ |
| Instant Capture | ✔ |
| Cancel / Void | ✔ |
| Refund / Reverse | ✔ |
| Save Instruments | ✔ |
| Merchant Initiated Transaction (MIT) | ✔ |
| Interoperability | PSP tokens, Network tokens |
Troubleshoot
Payment session fails due to merchant url validation failed for the requested session url
When the payment session fails due to merchant url validation failed for the requested session url, it usually means that the payment was attempted using a real apple pay account in staging and vice versa.
- In staging, to test apple pay, you must create sandbox tester account and use one of the test cards. If you use a real apple pay account, you’ll get this error.
- In production, you must use a real apple pay account, otherwise you’ll get this error.
- If the session URL is
https://apple-pay-gateway.apple.com/paymentservices/startSession(orhttps://cn-apple-pay-gateway.apple.com/paymentservices/startSessionin China), then a real apple pay account was used. - If the session URL is
https://apple-pay-gateway-cert.apple.com/paymentservices/startSession(https://cn-apple-pay-gateway-cert.apple.com/paymentservices/startSessionin China), then a sandbox tester apple pay account was used.
400: Payment Services Exception merchantId=<merchant ID> not registered for domain=<your domain>
This error means that the domain has not been verified for this certificate.
In order to verify this domain, you must expose the Apple domain verification file on https://<your domain>/.well-known/apple-developer-merchantid-domain-association
- If you are using your own certificates, this file can be found in your own Apple developer center.
- If you are using Apple Pay for Web using Payrails’ certificates, then you must expose Payrails’ domain verification file and then request Payrails to register this domain for you.