Workspaces
Introduction
The Workspaces feature provides you with a flexible and configurable environment within the Payrails portal. Workspaces allow the creation of distinct configurations, payments, executions, and integrations. Think of the workspace as a separate logical "box" to isolate and organize payments by specific business use case.
What are the benefits of using workspaces?
There are mainly 2 reasons for using workspaces: Simplification and Security.
Simplification:
- Workspace helps simplify payment acceptance workflow configuration.
- They let you organize your payment management by business vertical, geographical location, or organizational structure.
- Segregate integration configurations for different locations to avoid having one giant list of integrations on the same screen.
- View and monitor insights of workflows (payments, executions) separately.
Security
In the highly regulated payments environment, different teams should have access only to the country's data or area of their responsibility. For example, a team working on Ride-Hailing payments in France is not allowed to view payment or holder data from Egypt, and vice versa. With workspaces you will be able to assign your team members to a specific workspace, thus separating them from payments data that they can't have access to due to your security policies.
Use cases
The Workspaces feature is flexible and allows you to tailor configuration to your use case. Below are some examples of how you can structure your setup:
- Structure your workspace according to Region, which will contain a single country or a set of countries, and configure individual payment acceptance workflow for each region → North America, South America, EU, DACH, Benelux, etc.
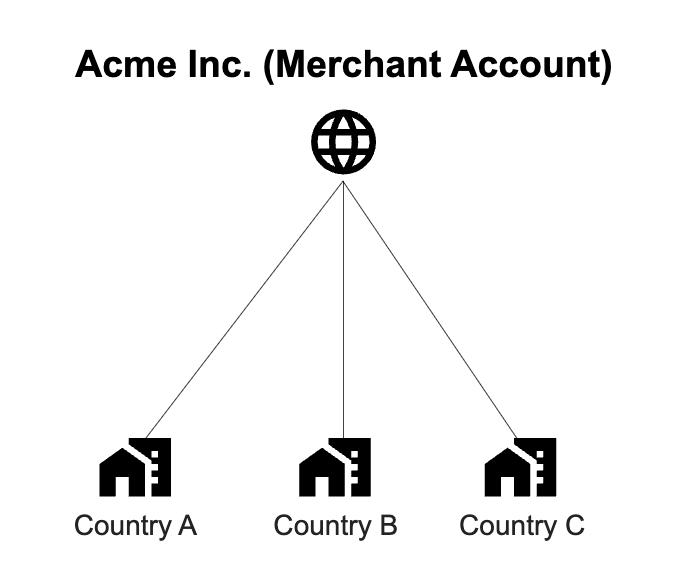
Structure your workspaces according to the region.
- Structure your workspace by verticals (Car Sharing, Taxi, Food Delivery) or currencies (EUR, USD, YEN)
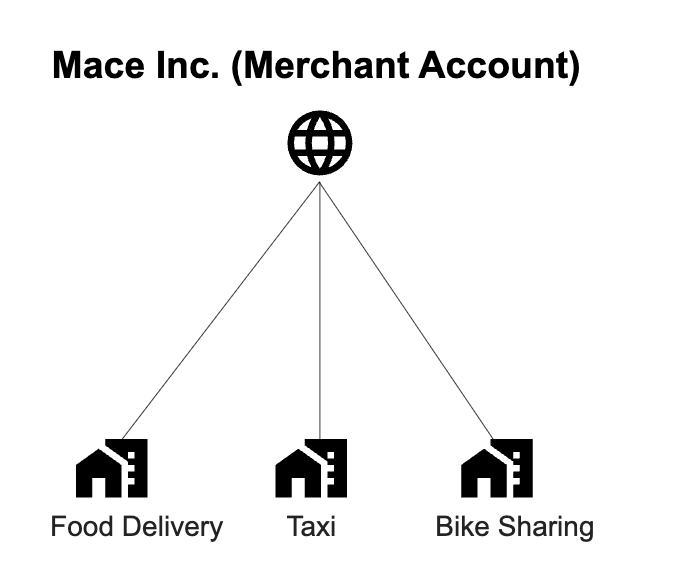
Structure workspaces according to Business Vertical
- Configure a staging environment within your portal to perform tests on specific payment methods or providers → Visa, Mastercard, Amex, etc.
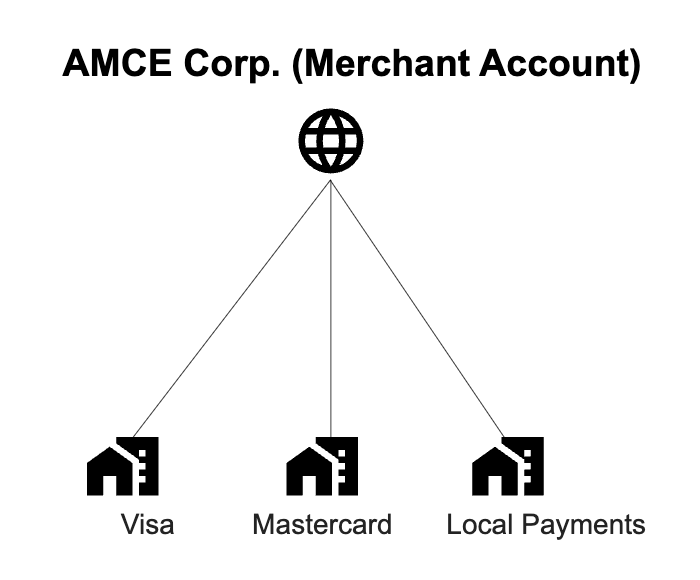
Structure workspaces according to different Payment Methods
Below is a visual representation of the Workspaces within the portal
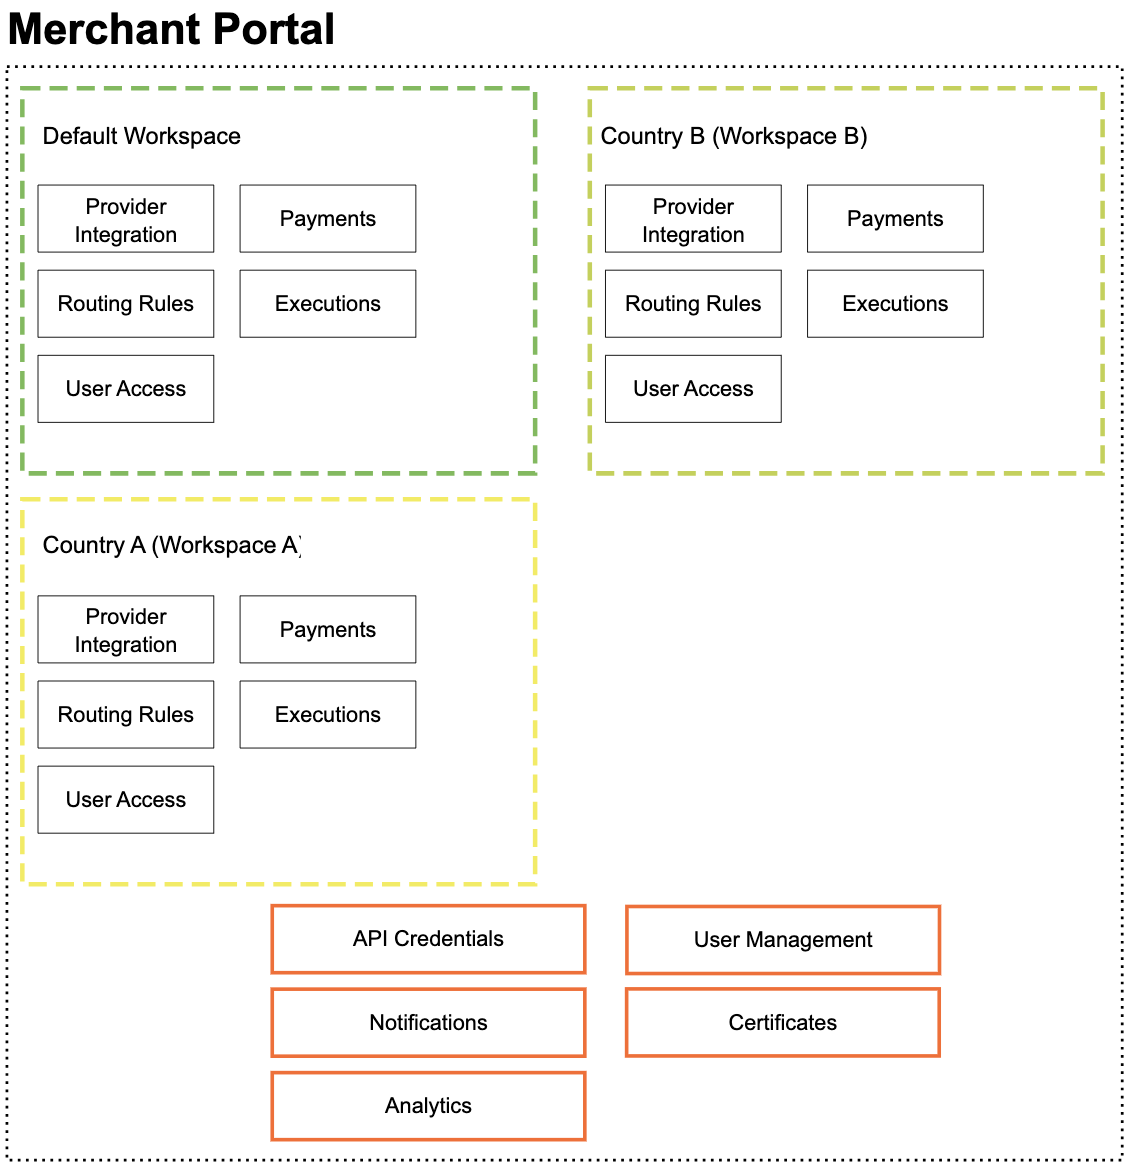
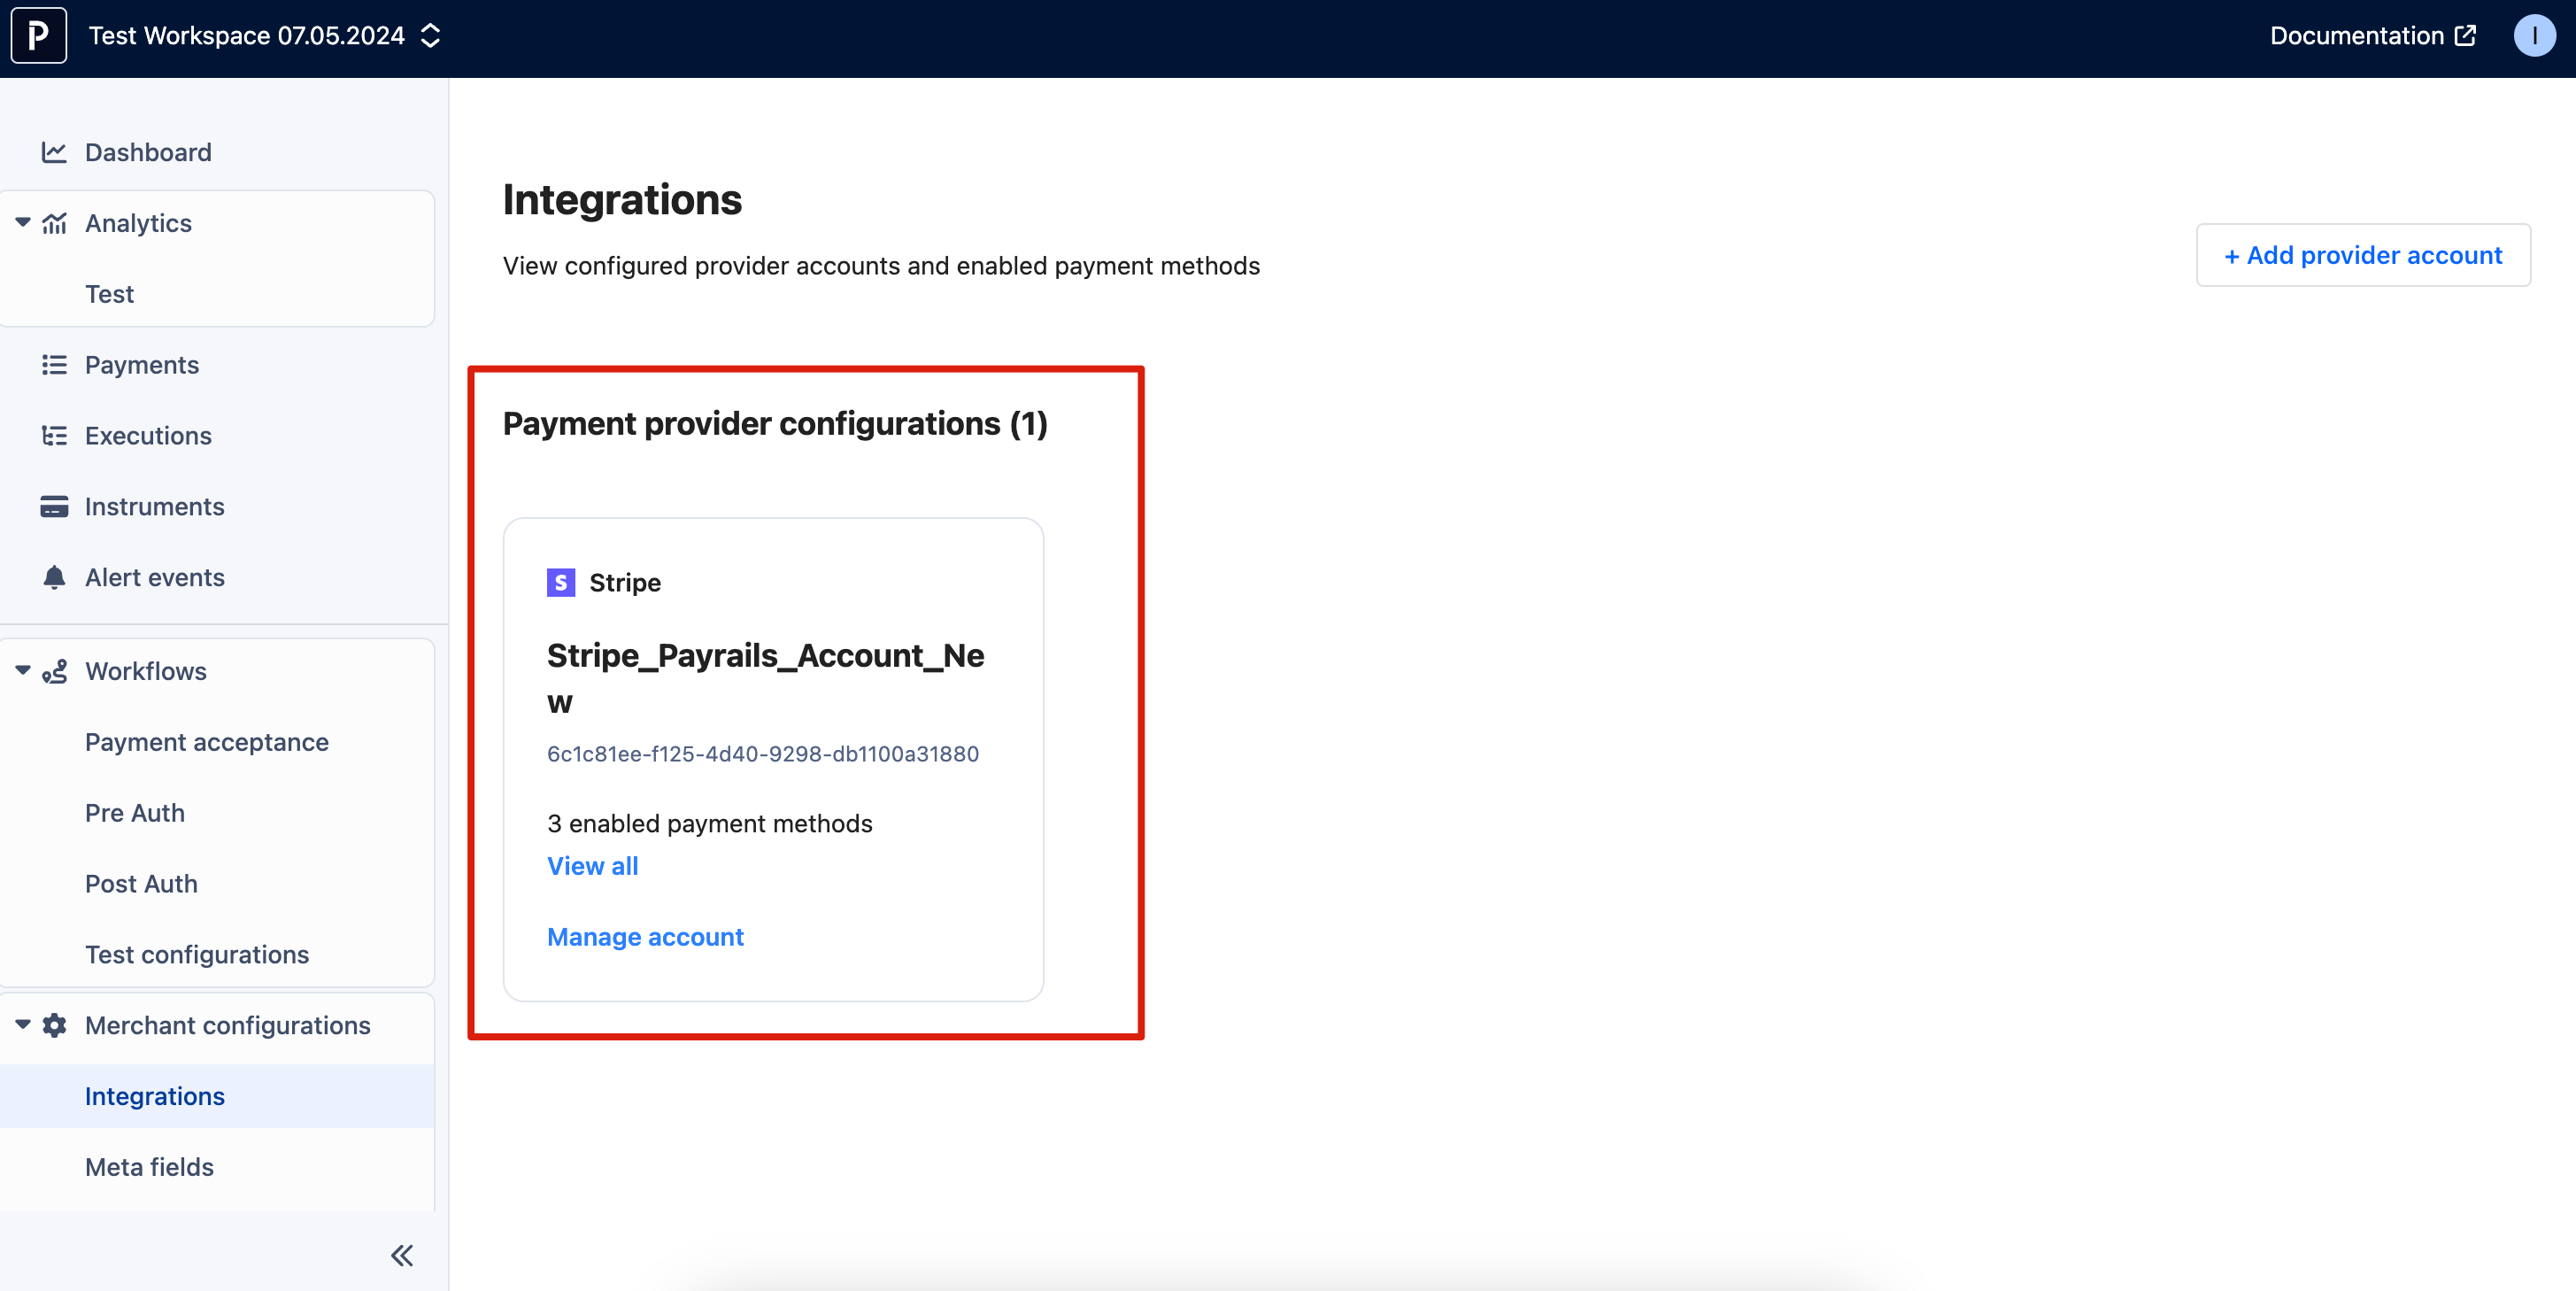
What is included in the Workspace?
- Integration (Payment provider configuration)
- Payment acceptance workflow configuration
- Select payment method and visibility
- Configure routing options
- Payments data
- Executions data
- User access
User Management
How it affects workspaces
User management will be handled at the organization level. This means all merchant users can access the main portal. However, access to each workspace will be controlled in detail.
Default access
- All users have access to workspaces by default.
- Admins can then assign specific users to specific workspaces.
Example
If you have a workspace called "South Africa," where you handle payments for the South African region, you can assign your South Africa team to this workspace. This ensures they only have access to the configuration and payment data for South Africa and not for other regions.
What is the effort required to start using workspaces?
You can start using workspaces in 4 simple steps.
- Create a workspace in Portal. (You need to have an Admin role for that)
- Configure integrations for the workspace.
- Select your payment method and configure routing.
- Copy the workspace ID from the Portal and add them to the execution API calls as described in the API reference. https://docs.payrails.com/reference/createexecution
Below is the detailed guide
How to create a new workspace and configure a new payment acceptance workflow
Prerequisites
- Access to the Payrails portal (to get access, contact your Payrails administrator, who can invite you to the portal)
- Note: Your user should have an Admin role assigned to it.
- After you accept the invite and set up your MFA, you should be able to log in to the portal.
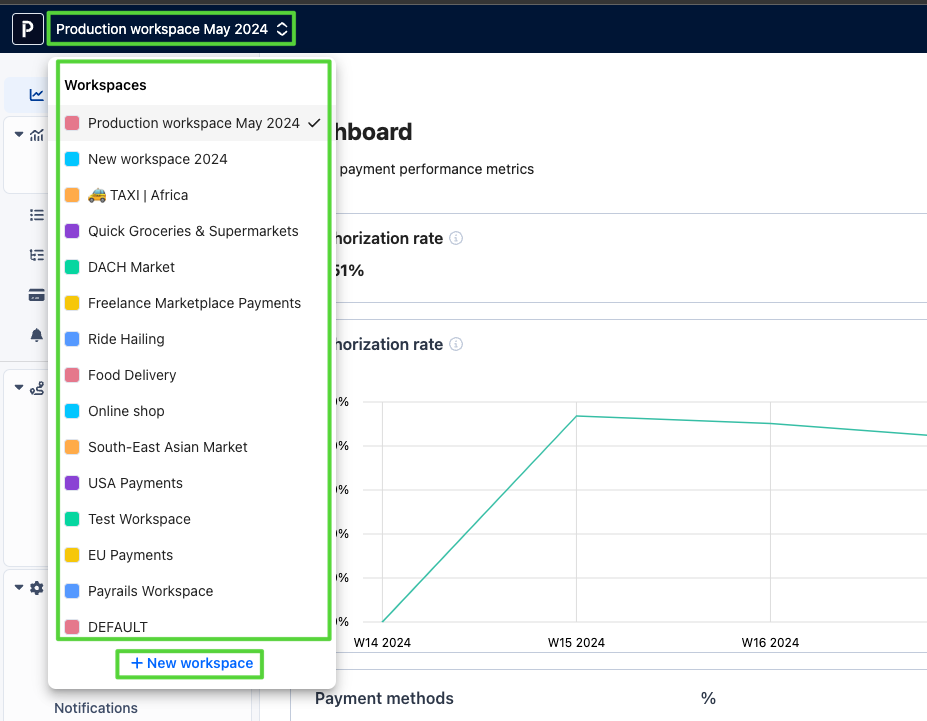
Create a workspace
- Login to the portal.
- In the top-left corner, click on the workspace switcher and select "New Workspace."
- Enter a workspace name; Workspace names are limited to 30 characters. (You can change your workspace name later in the workspace settings).
- After a few moments, the new workspace will be created, and you'll be switched to it.

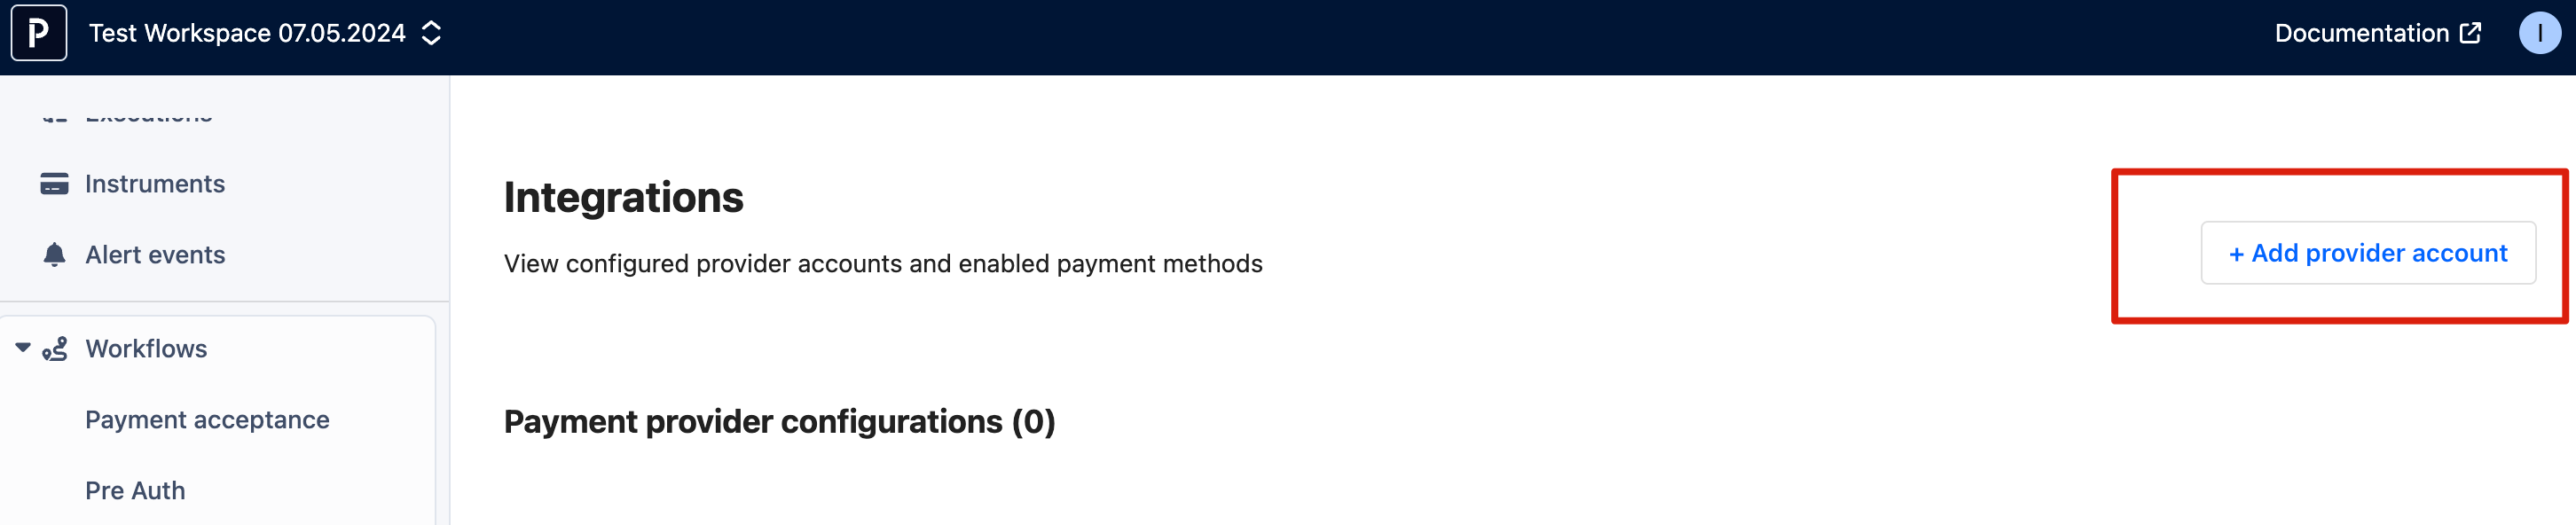
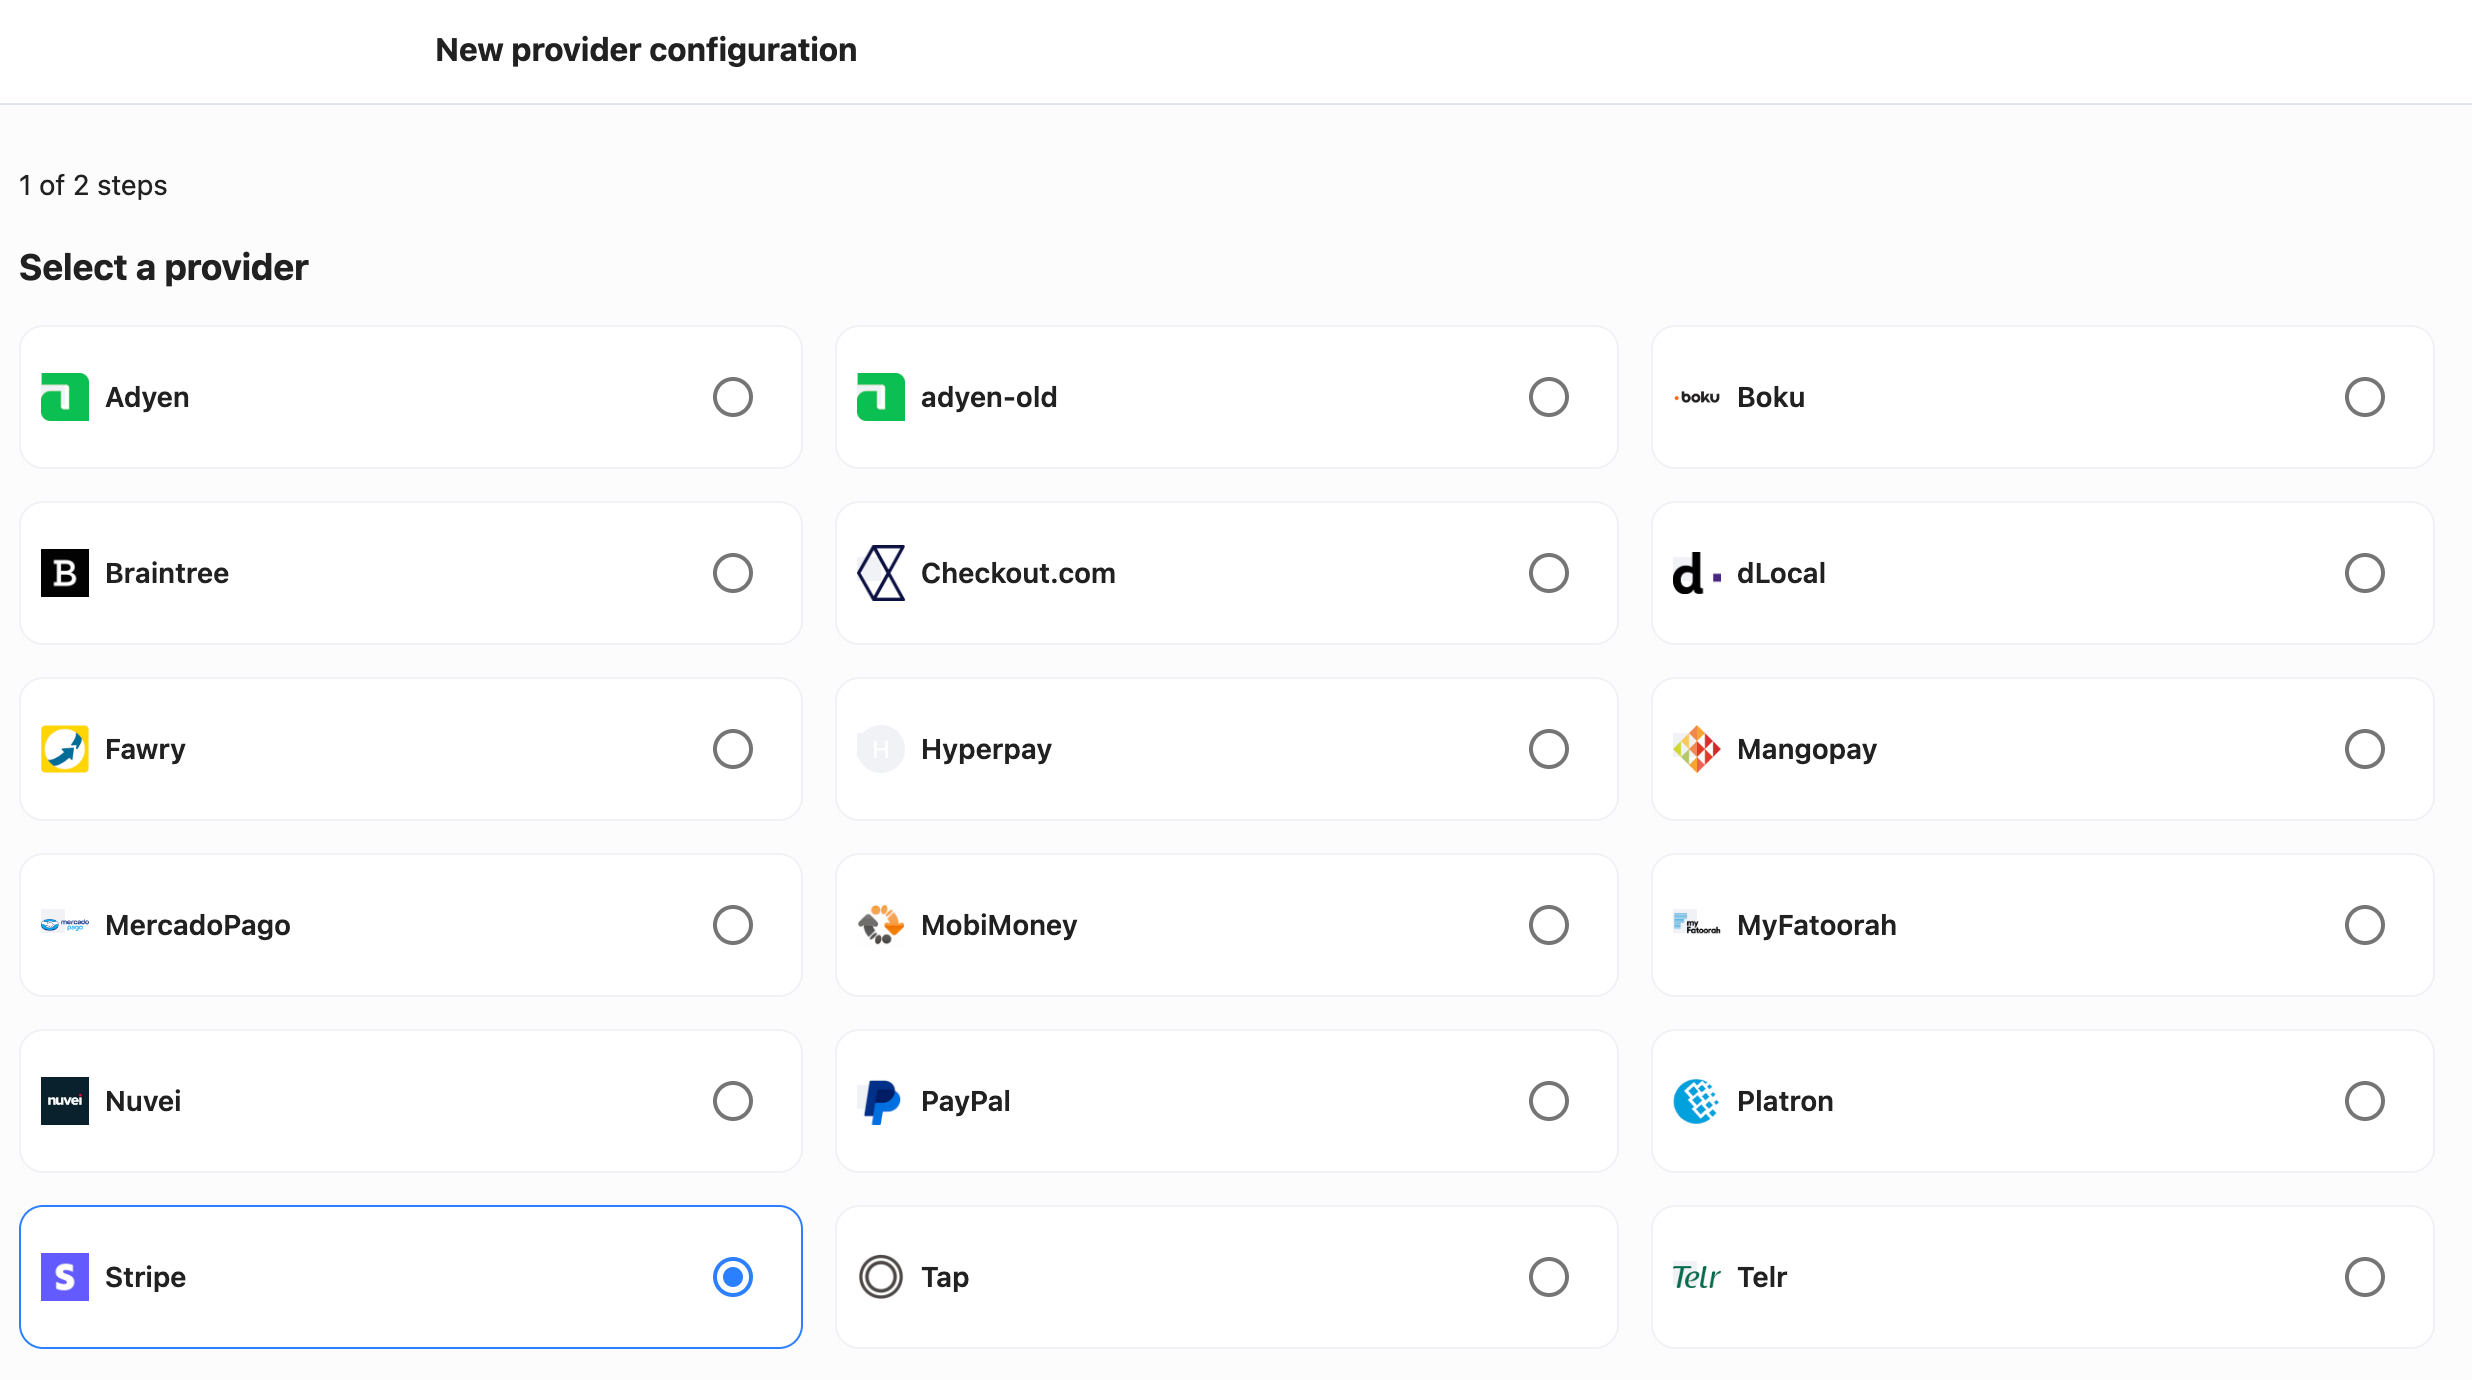
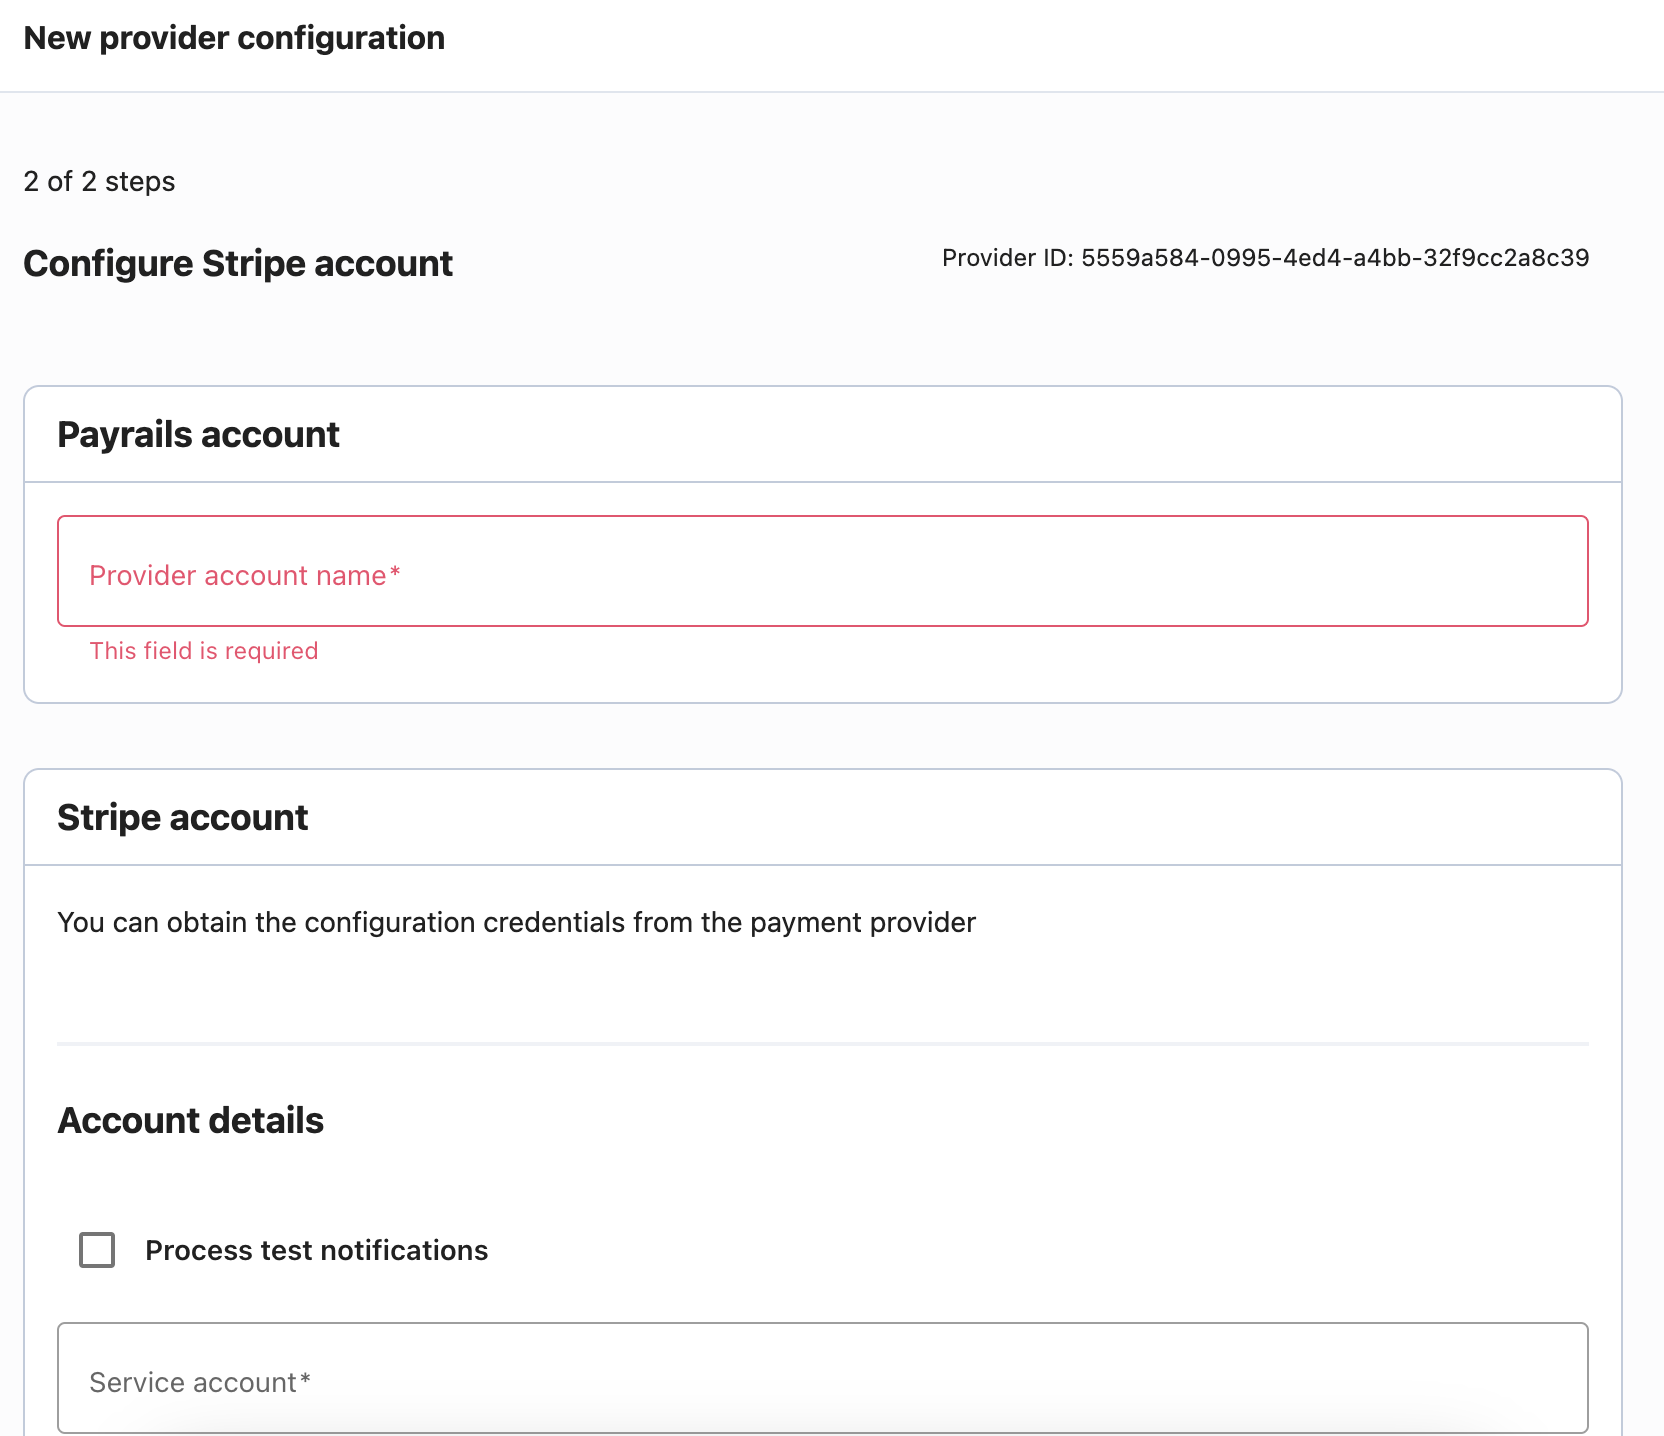
Configure new integration
- Navigate to the integrations page.
- Click on "Add Provider Account."
- Fill in the necessary information. Note: The provider account name must be unique.
- Enable the required payment methods and click "Save Account."
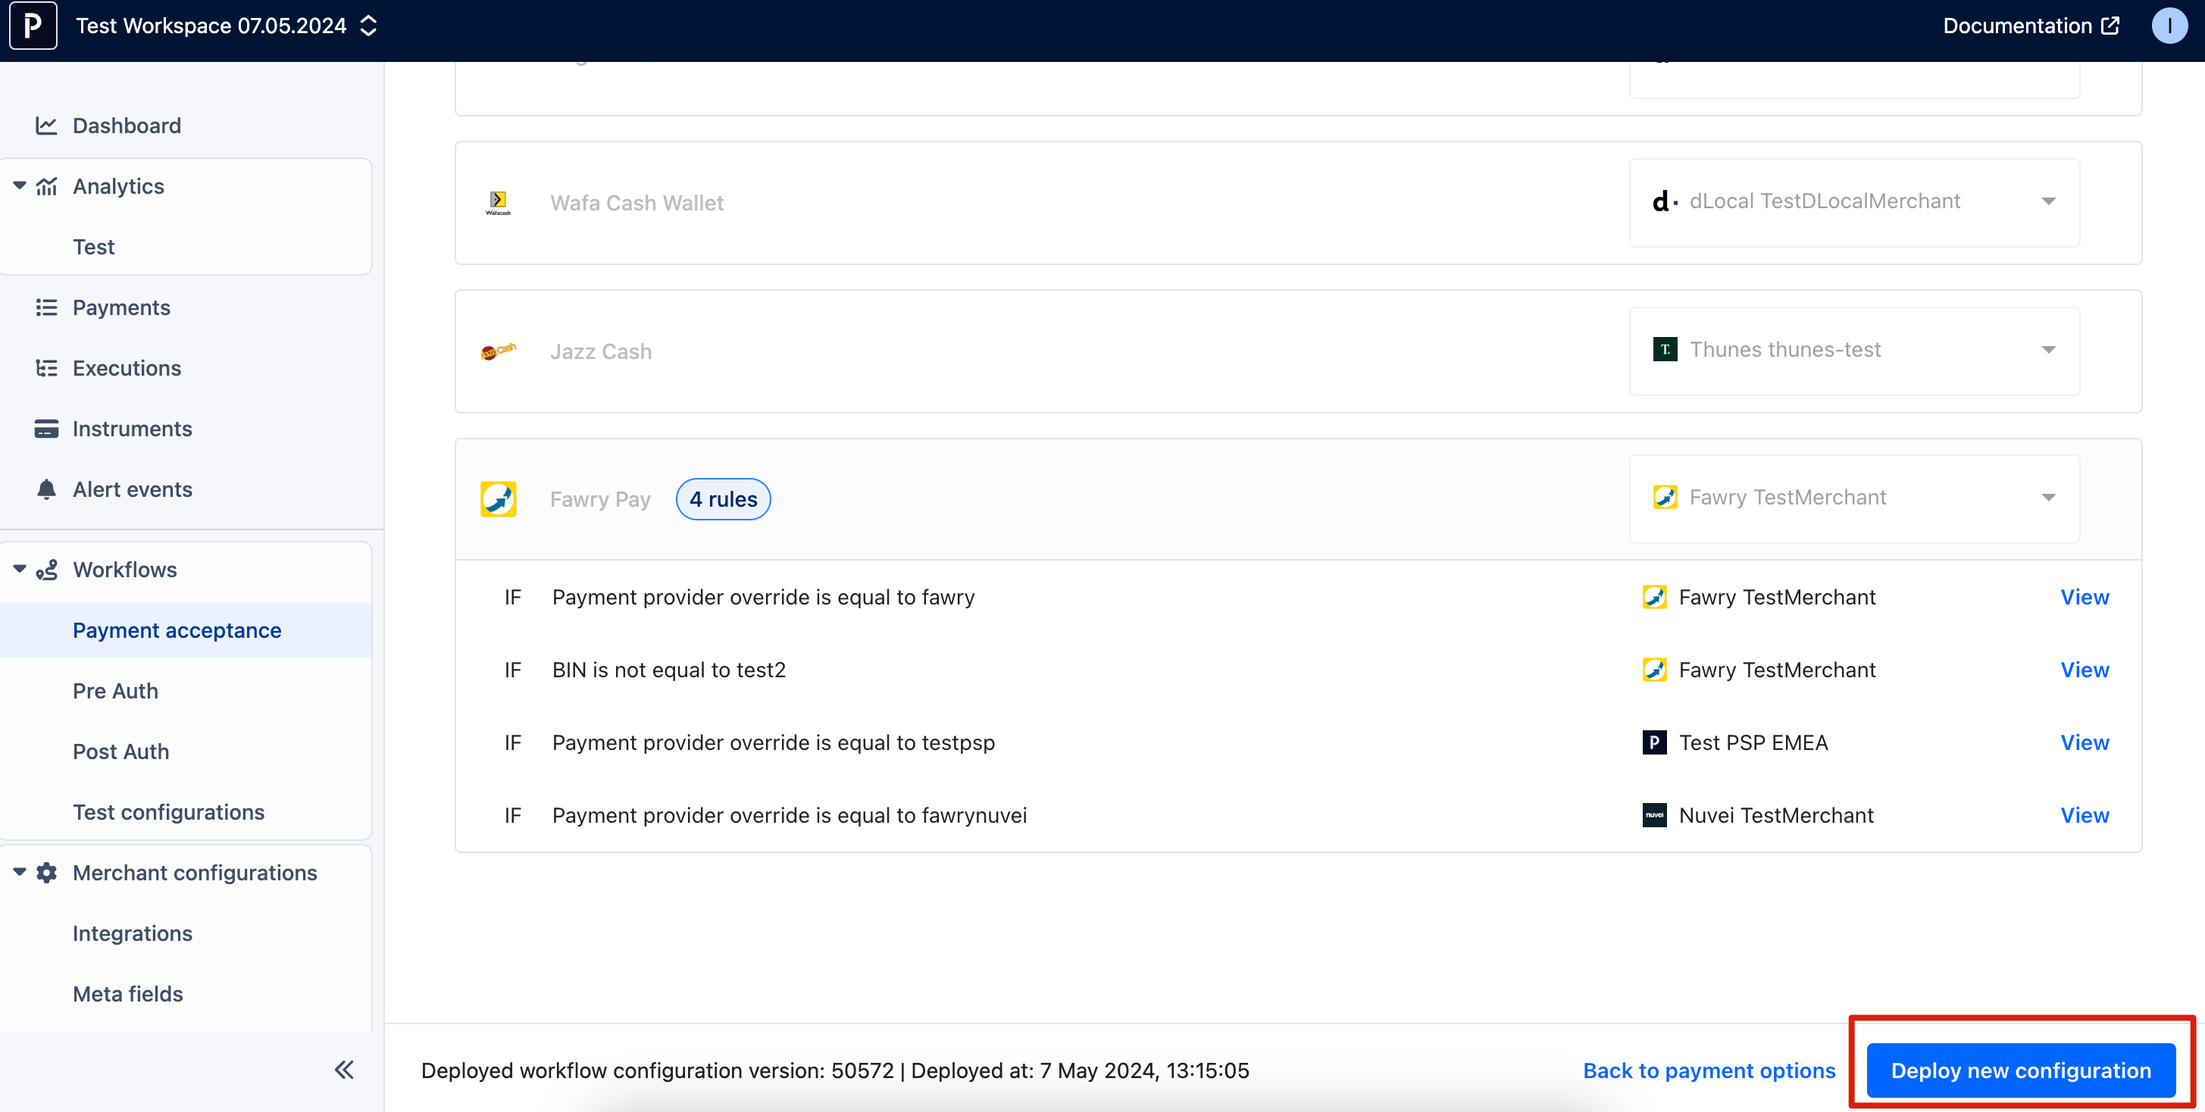
Configure payment acceptance workflow
- In the new workspace, the workflow is empty. Your objective is to configure it, consisting of two parts:
- Select payment options and configure rules for their availability to customers.
- Configure payment routing: Ensure your payment method points to the newly created integration configuration.
Deployment
- Once everything is configured, deploy your new configuration.
Testing
- Make a test payment and verify the result in "Executions" and "Payments."
- Test your new workflow through the portal or via API.
- After execution is created, the execution page should display a record of your payment, and the payment page should also show a record.
How to create a new workspace programmatically and execute a payment
If you prefer to create a workspace automatically, follow the steps below. Once your workspace is set up, you can start executing payments within that workspace.
Create workspace
To create a new workspace automatically, use the following endpoint:
https://demo-api.staging.payrails.io/merchant/workspaces.
For detailed API reference, check this URL:
https://docs.payrails.com/reference/createworkspace.
Get workspace ID
To get a list of all workspaces programmatically, use this endpoint:
https://demo-api.staging.payrails.io/merchant/workspaces/{workspaceId}.
Create an execution
Once you have created your workspace, you can execute a workflow for the particular workspace by passing the workspace ID as a parameter using the following curl command:
curl --request POST \
     --url https://demo-api.staging.payrails.io/merchant/workflows/workflowCode/executions \
     --header 'accept: application/json' \
     --header 'content-type: application/json' \
     --data '
{
  "workspaceId": "some-workspaceID-string"
}
'
For subsequent operations on the execution, such as refunding or canceling a payment, passing the workspace ID is not necessary because the workspace information will be inherited from the execution data.
However, if you want to programmatically create a new provider configuration, you can pass the workspace ID as a parameter to create it within the workspace. For reference, check the API documentation: https://docs.payrails.com/reference/listactiveproviderconfigs.
For a detailed API guide to executions, check the following URL:
https://docs.payrails.com/reference/createexecution.
Note: If no workspace ID parameter is passed, the execution will be performed in the default workspace, which is called "Default Workspace" in the portal.
FAQ
Can I migrate my payment data from one workspace to another?
No, at the moment, this is not possible, but it's part of the future development roadmap.
Are you allowed to copy configuration from one workspace to another?
This is not possible at the moment, but we are developing this possibility.
Do I need separate logins for the different workspace?
No. As long as you have access to the Portal, you can access a workspace within the Portal.
Can I define notifications per workspace?
Yes, notifications (webhooks) can be defined per workspace, default, or other workspace.
Updated about 1 month ago