Apple Pay
Allow customers to securely make payments using Apple Pay
Introduction
Apple Pay is a mobile payment and digital wallet service that enables customers to pay quickly and securely using their iPhone, iPad, Apple Watch, or Mac — without manually entering payment details.
Payrails supports Apple Pay across both mobile and web, and can route transactions to any supported Payment Service Provider (PSP). This guide walks you through the steps to get Apple Pay set up and accepting payments with Payrails.
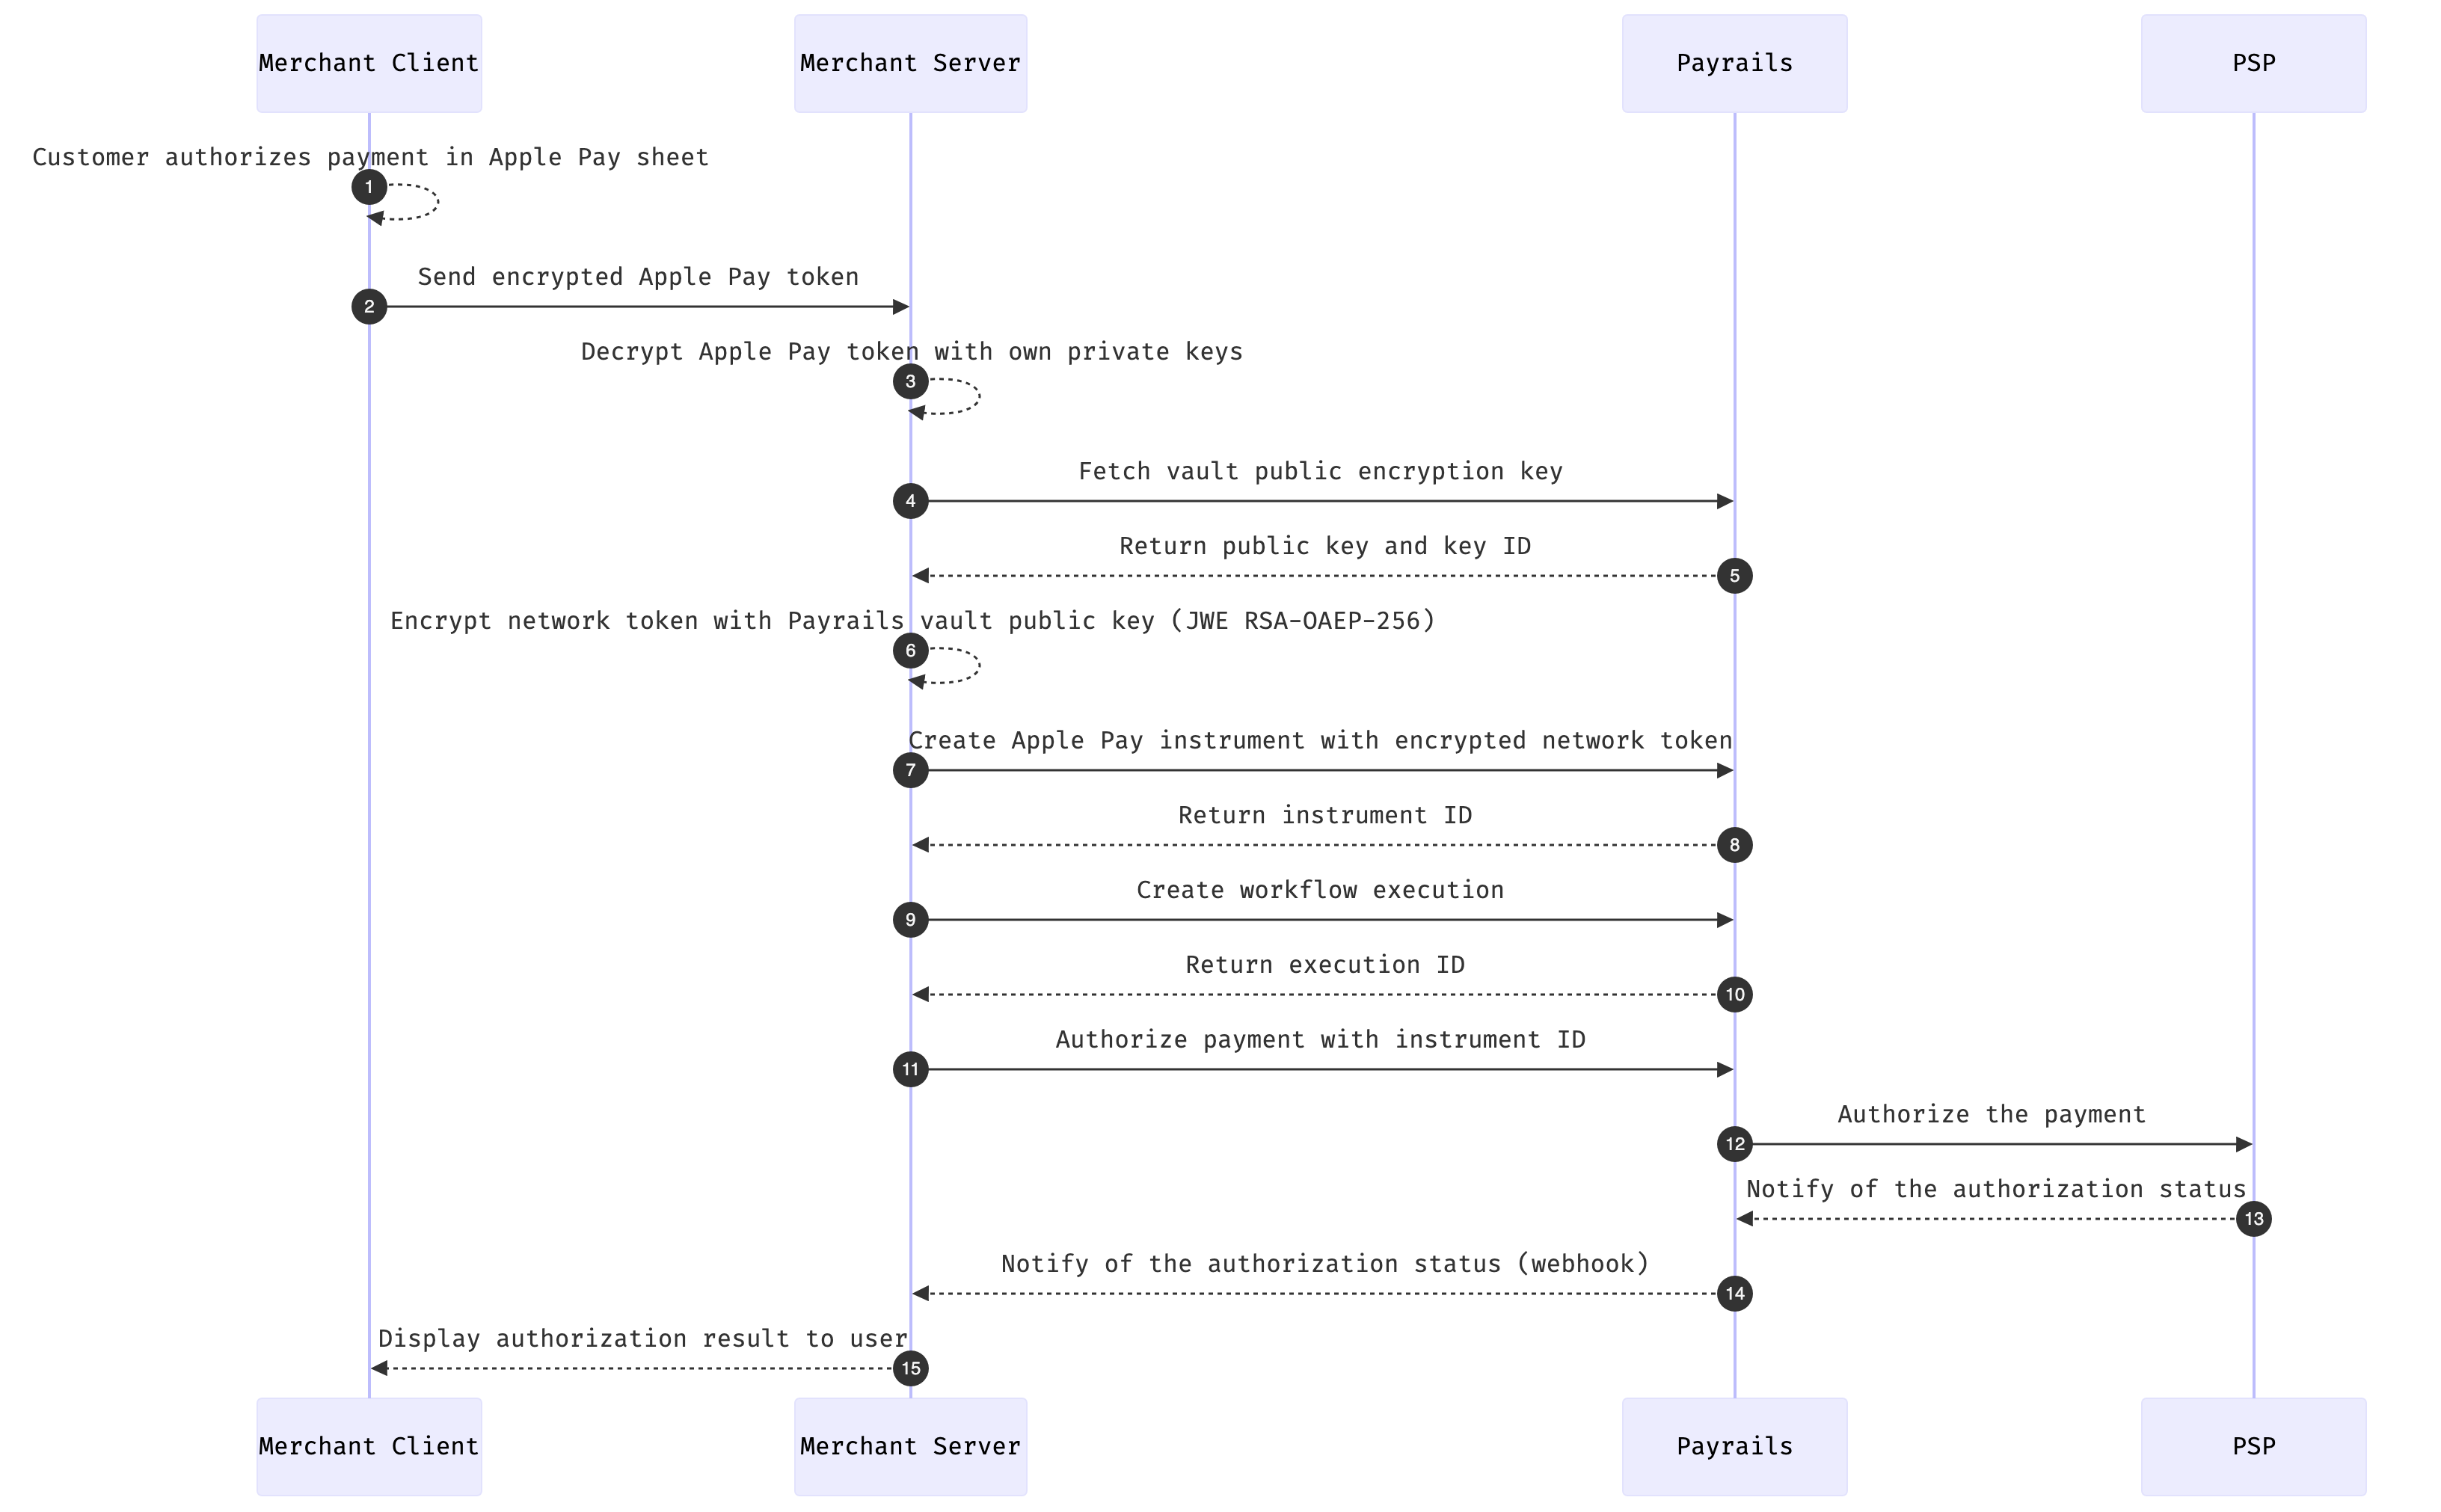
The below diagram illustrates at a high level how Payrails processes Apple Pay transactions on your behalf


Choosing your Integration
Payrails offers multiple integration approaches for Apple Pay, each with different tradeoffs between customization and ease of implementation.
| Approach | Description |
|---|---|
| Drop-in | The fastest way to get started. Payrails renders the Apple Pay button and handles the entire payment flow. No additional frontend code required. |
| Elements | Use the Payrails Apple Pay Element for more control over button placement and styling while keeping payment processing handled by Payrails. |
| Server-to-server | Full control over your client-side Apple Pay implementation. You build the Apple Pay flow using Apple's native SDKs and pass the payment token to Payrails via API. |
For a full comparison of integration approaches and help choosing the right one for your use case, refer to our integration approach guide.
Setup Apple Pay
You wish to accept payments on both iOS devices and Web
-
Register for an Apple Pay Merchant ID
Register a new Merchant ID via Apple's Setting up Apple Pay guide.
We recommend creating distinct Apple Merchant IDs for Payrails production and staging environments.
Request Certificate Signing Requests (CSRs)Contact your Payrails representative to initiate the certificate generation process. Payrails will generate two Certificate Signing Requests (CSRs) for you:
apple_pay.csr— Payment Processing Certificate Signing Requestmerchant_id.csr— Merchant Identity Certificate Signing Request
You will use these in the next step to generate your certificates in the Apple Developer Center.
Upload CSR to your Apple Developer Account-
Go to the Merchant ID list in Apple's Developer Center and select the Merchant ID you registered earlier.
-
Under the Apple Pay Payment Processing Certificate section, click Create Certificate and upload the
apple_pay.csrfile provided by Payrails. Download the generated Payment Processing Certificate.
Create Payment Processing Certificate
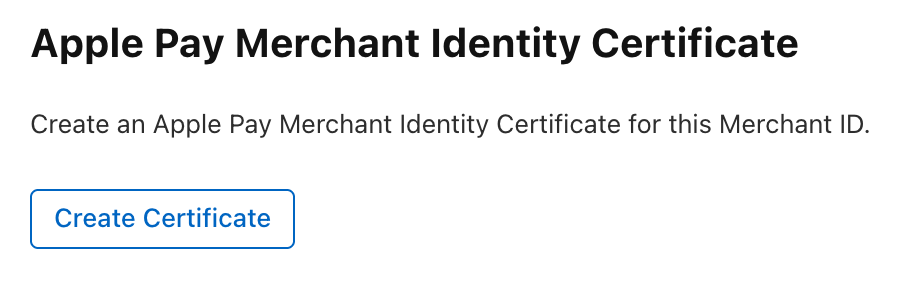
- Go back to the same Merchant ID and under the Apple Pay Merchant Identity Certificate section, click Create Certificate and upload the
merchant_id.csrfile provided by Payrails. Download the generated Merchant Identity Certificate.

Create Merchant Identity Certificate
Decide on a Config IDPayrails allows you to set up multiple Apple Pay key configurations, each identified by a unique Config ID. This is useful for splitting traffic across different regions or environments — for example, routing European payments through one set of keys and US payments through another.
Your Config ID can be a UUID or a descriptive string such as
region-eu-westorregion-us-east. Share your chosen Config ID with your Payrails representative when providing your certificates — it will be used to associate your Apple Pay keys and can be referenced in payment requests to select which configuration should be used for processing.
Provide your CertificatesSend both the Payment Processing Certificate and the Merchant Identity Certificate to your Payrails representative.
Once Payrails confirms receipt, go back to the Merchant ID list, select your Merchant ID, and activate the Payment Processing Certificate you just created.
Register your DomainTo process Apple Pay payments on the web, Apple requires you to verify ownership of your domain.
-
Go to the Merchant ID list and select the Merchant ID for which you configured certificates.
-
Under the Merchant Domains section, click Add Domain and download the domain association file.
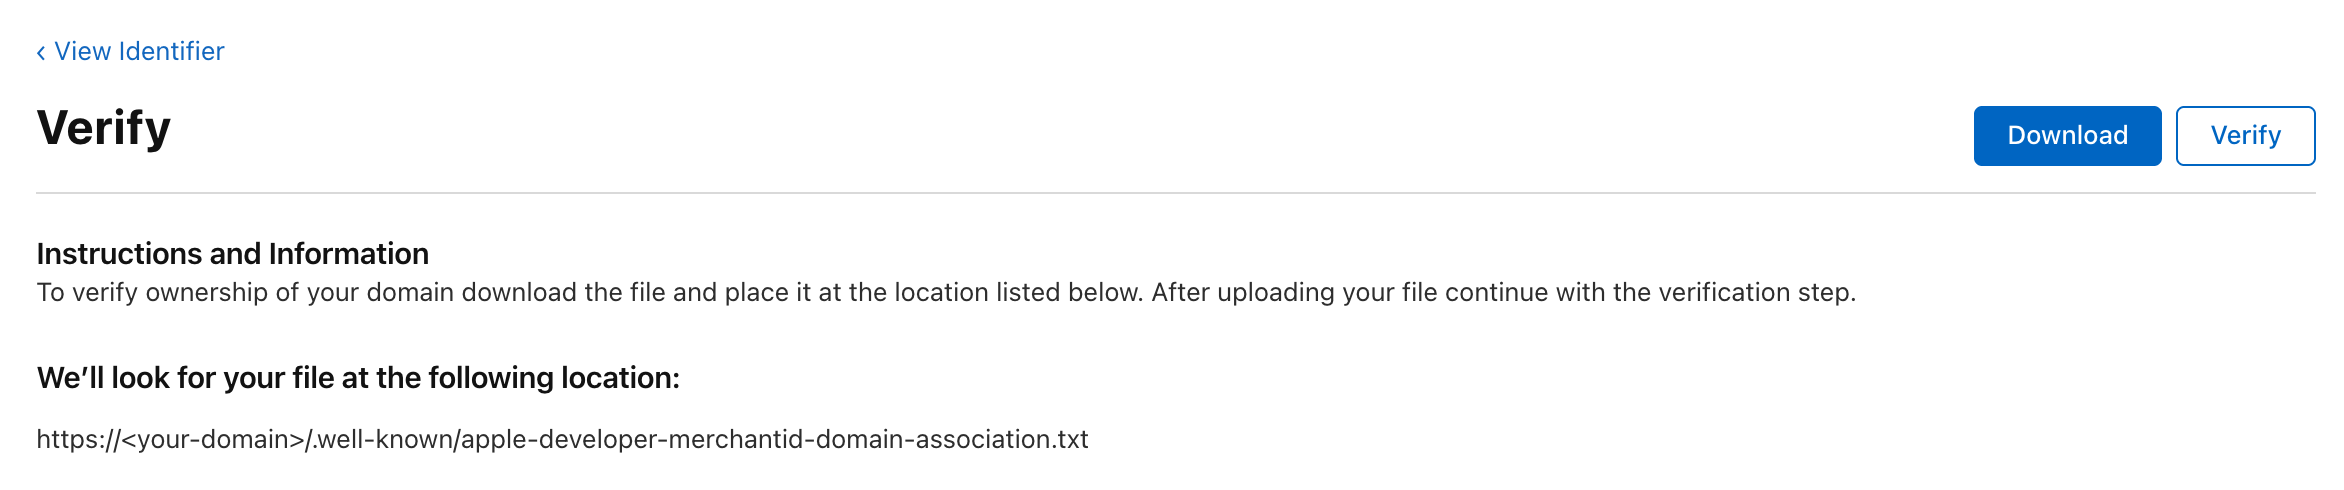
Download domain verification file
-
Host the file on your domain at the following path:
https://<your-domain>/.well-known/apple-developer-merchantid-domain-association -
Click Verify in the Apple Developer Center to complete domain registration.
We render the Apple Pay button inside an iframe — which domain should we register?
Apple requires domain registration to be done on the domain visible in the browser address bar, not the iframe's domain. Registering the iframe domain will cause Apple Pay payments to automatically fail.
The domain association file must remain publicly accessible without redirects — Apple regularly re-verifies domains after the initial registration. This step is not required for staging environments.
You only wish to accept payments on the Web without a Native iOS integration
This setup cannot later be extended for native integrations, If you plan on accepting Apple Pay payments using the native SDK later please perform the Native + Web setup
A web-only integration doesn't require your own Apple Pay Merchant ID. You will, however, need an Apple Developer account to create a sandbox tester account — this is required to test Apple Pay payments on staging before completing the steps below.
-
Register your domain with Payrails
Download Payrails' Domain Association FileDownload Payrails' domain association file from the following URL:
https://api-pub.payrails.io/.well-known/apple-developer-merchantid-domain-association
Host the Domain Association FileHost the file on your domain at the following path:
https://<your-domain>/.well-known/apple-developer-merchantid-domain-associationThis step is not required for staging environments as Apple doesn't verify domains for payments made with test Apple accounts.
The file must remain publicly accessible without redirects — Apple regularly re-verifies domains after the initial registration.
Register your Domain with PayrailsOnce the file is hosted, contact your Payrails representative with the list of domains you wish to register. Payrails will handle the domain registration process with Apple on your behalf.
We render the Apple Pay button inside an iframe — which domain should we register?
Apple requires domain registration to be done on the domain visible in the browser address bar, not the iframe's domain. Registering the iframe domain will cause Apple Pay payments to automatically fail.
Accept Apple Pay
Accept Apple Pay with the Payrails Drop-in
The Payrails Drop-in is the fastest way to accept Apple Pay. It handles the entire payment UI and flow — no additional client-side development is required beyond mounting the component.
For the full list of Drop-in configuration options, styling, and event handling, refer to the Drop-in integration guide.
Step 1: Create a session (Server-side)
From your server, call the Payrails /client/init endpoint. To enable Apple Pay, pass the applePayConfigId that was agreed upon during your Payrails onboarding.
POST /merchant/client/init
Authorization: Bearer <YOUR_JWT>
x-idempotency-key: <UUID>{
"type": "dropIn",
"holderReference": "customer-123",
"workflowCode": "payment-acceptance",
"merchantReference": "order_3573894940903",
"applePayConfigId": "default",
"amount": {
"value": "12.50",
"currency": "EUR"
},
"meta": {
"order": {
"reference": "order_3573894940903"
},
"customer": {
"reference": "customer-123",
"country": {
"code": "DE"
}
},
"clientContext": {
"ipAddress": "217.110.239.132",
"origin": "https://your-domain.com"
}
}
}The response contains a data field — a base64-encoded string — and a version field. Pass both to your client.
{
  "version": "1.2.3",
  "data": "TG9yZW0gaXBzdW0..."
}The
applePayConfigIddetermines which Apple Pay keys are used for this session. If you have multiple configurations (e.g. per region), pass the appropriate ID here. If omitted, the default config will be used as fallback.
Step 2: Initialize the SDK (Client-side)
Pass the data and version from your server response to Payrails.init():
import Payrails from '@payrails/web-sdk';

const payrailsClient = await Payrails.init(
  { data: '<data_from_server>', version: '<version_from_server>' }
);
Step 3: Mount the Drop-in (Client-side)
Create and mount the Drop-in component into your checkout page. Apple Pay will appear automatically if the customer's device and browser support it.
<div id="dropin-container"></div>const dropin = payrailsClient.dropin({
paymentMethodsConfiguration: {
applePay: {
showStoreInstrumentCheckbox: false
}
},
events: {
onSuccess: (event) => {
console.log('Payment successful', event);
// redirect to order confirmation page
},
onFailed: (event) => {
console.log('Payment failed', event);
// show error to customer
}
}
});
dropin.mount('#dropin-container');The Apple Pay button is only shown when the customer is on a supported device (Safari on iOS/macOS) with a card in their Apple Wallet. No additional checks are needed on your end.
Step 4: Handle payment events
The Drop-in emits the following events relevant to Apple Pay:
| Event | Description |
|---|---|
onApplePayAvailable | Fires when Apple Pay is available on the customer's device |
onRequestStart | Fires after the customer approves payment in the Apple Pay sheet, before the authorize request is sent |
onSuccess | Payment was authorized successfully |
onFailed | Payment authorization failed |
onPending | Payment is pending with no further action required |
const dropin = payrailsClient.dropin({
  events: {
    onApplePayAvailable: () => {
      console.log('Apple Pay is available');
    },
    onRequestStart: () => {
      // customer approved in Apple Pay sheet
      // good place to show a loading state
    },
    onSuccess: (action, event) => {
      // action will be 'AUTHORIZE'
      // redirect to confirmation
    },
    onFailed: (action, event) => {
      // action will be 'AUTHORIZE'
      // show error message to customer
    },
    onPending: (action, event) => {
      // action will be 'AUTHORIZE'
    }
  }
});If you are on
@payrails/web-sdkversion 5.36.0 or later, use the generic events (onSuccess,onFailed,onPending,onRequestStart). The older eventsonAuthorizeSuccess,onAuthorizeFailed,onAuthorizePending, andonAuthorizeRequestStartare deprecated.
Accept Apple Pay with the Payrails Apple Pay Element
The Apple Pay Element gives you more control over the placement and styling of the Apple Pay button compared to the Drop-in. Use this approach if you want to embed the Apple Pay button independently in your checkout UI.
- Create a session
- Initialize the SDK
- Check Apple Pay availability
- Mount the Apple Pay Element
- Handle payment events
For the full list of Elements configuration options, styling, and event handling, refer to the Elements integration guide.
Step 1: Create a session (Server-side)
From your server, call the Payrails /client/init endpoint. To enable Apple Pay, pass the applePayConfigId that was agreed upon during your Payrails onboarding.
POST /merchant/client/init
Authorization: Bearer <YOUR_JWT>
x-idempotency-key: <UUID>{
"type": "dropIn",
"holderReference": "customer-123",
"workflowCode": "payment-acceptance",
"merchantReference": "order_3573894940903",
"applePayConfigId": "default",
"amount": {
"value": "12.50",
"currency": "EUR"
},
"meta": {
"order": {
"reference": "order_3573894940903"
},
"customer": {
"reference": "customer-123",
"country": {
"code": "DE"
}
},
"clientContext": {
"ipAddress": "217.110.239.132",
"origin": "https://your-domain.com"
}
}
}The response contains a data field and a version field. Pass both to your client.
{
  "version": "1.2.3",
  "data": "TG9yZW0gaXBzdW0..."
}The
applePayConfigIddetermines which Apple Pay keys are used for this session. If you have multiple configurations (e.g. per region), pass the appropriate ID here. If omitted, the default config will be used as fallback.
Step 2: Initialize the SDK (Client-side)
Pass the data and version from your server response to Payrails.init():
import Payrails from '@payrails/web-sdk';

const payrailsClient = await Payrails.init(
  { data: '<data_from_server>', version: '<version_from_server>' }
);
Step 3: Check Apple Pay availability (Optional)
The Apple Pay button will not render if the customer's browser or device does not support Apple Pay — no additional checks are needed. However, if you need to know availability in advance (for example, to conditionally render surrounding UI), you can use:
const isAvailable = await payrailsClient.isApplePayAvailable(); // returns booleanStep 4: Mount the Apple Pay Element (Client-side)
Add a container to your HTML and mount the Apple Pay button element into it:
<div id="apple-pay-button-container"></div>const applePayElement = payrailsClient.applePayButton({
showStoreInstrumentCheckbox: false,
abortAfterAuthorizeFailed: true,
clientDomain: 'your-domain.com', // optional, see configuration table below
styles: {
type: 'buy',
style: 'black',
locale: 'en-US'
},
events: {
onApplePayAvailable: () => {
// Apple Pay button is initialized and visible
},
onRequestStart: () => {
// customer approved in Apple Pay sheet
// good place to show a loading state
},
onSuccess: (action, event) => {
// action will be 'AUTHORIZE'
// redirect to confirmation
},
onFailed: (action, event) => {
// action will be 'AUTHORIZE'
// show error message to customer
},
onPending: (action, event) => {
// action will be 'AUTHORIZE'
},
onPaymentSessionExpired: () => {
// session expired, re-initialize the client from your server
}
}
});
applePayElement.mount('#apple-pay-button-container');Configuration options
| Property | Type | Required | Description |
|---|---|---|---|
showStoreInstrumentCheckbox | boolean | No | Show a checkbox to let the customer save their Apple Pay method for later |
abortAfterAuthorizeFailed | boolean | No | Hide the Apple Pay sheet if authorization fails |
clientDomain | string | No | The domain visible in the browser address bar. Use this when the Apple Pay button is rendered inside an iframe whose domain differs from the top-level domain |
styles.type | string | No | Button label type — e.g. plain, buy, checkout, subscribe, donate, order |
styles.style | string | No | Button color — black, white, white-outline, automatic |
styles.locale | string | No | Button locale — e.g. en-US, de-DE |
If you are rendering the Apple Pay button inside an iframe, pass the browser's top-level domain in
clientDomain. Apple Pay domain verification is performed against the domain the customer sees in the address bar, not the iframe's domain.
Step 5: Handle payment events
The Apple Pay Element emits the following events:
| Event | Description |
|---|---|
onApplePayAvailable | Fires when the Apple Pay button is initialized and visible |
onRequestStart | Fires after the customer approves payment in the Apple Pay sheet, before the authorize request is sent |
onSuccess | Payment was authorized successfully |
onFailed | Payment authorization failed |
onPending | Payment is pending with no further action required |
onPaymentSessionExpired | Session has expired — re-initialize from your server |
If you are on
@payrails/web-sdkversion 5.36.0 or later, use the generic events (onSuccess,onFailed,onPending,onRequestStart). The older eventsonAuthorizeSuccess,onAuthorizeFailed,onAuthorizePending, andonAuthorizeRequestStartare deprecated.
For the full list of Elements configuration options and styling, refer to the Elements guide.
Accept Apple Pay with the Server-to-Server Integration
With the server-to-server integration, you have full control over your client-side Apple Pay implementation and use the Payrails API directly to process payments. This approach requires building the Apple Pay flow yourself using Apple's native SDKs, then passing the resulting payment token to Payrails for processing.
- Create a workflow execution with lookup
- Perform merchant validation (web only)
- Authorize the payment
Step 1: Create a workflow execution with lookup
Create an execution and include a lookup initial action to retrieve the available payment options and Apple Pay SDK configuration in a single request. Pass applePayConfigId to specify which Apple Pay key configuration to use.
POST /merchant/workflows/{workflowCode}/executions
Authorization: Bearer <YOUR_JWT>
x-idempotency-key: <UUID>{
"merchantReference": "order_3573894940903",
"holderReference": "customer-123",
"applePayConfigId": "default",
"meta": {
"order": {
"reference": "order_3573894940903"
},
"customer": {
"reference": "customer-123",
"country": {
"code": "DE"
}
},
"clientContext": {
"ipAddress": "217.110.239.132",
"origin": "https://your-domain.com"
}
},
"initialActions": [
{
"action": "lookup",
"method": "POST",
"body": {
"amount": {
"value": "12.50",
"currency": "EUR"
},
"meta": {
"customer": {
"reference": "customer-123",
"country": {
"code": "DE"
}
}
}
}
}
]
}The response includes the execution id and an initialResults array containing the lookup result. Inside initialResults, find the applePay entry in paymentCompositionOptions — this contains the SDK configuration needed to initialize the Apple Pay session on your client.
{
  "id": "5d0e7a85-c982-499f-bb7f-296b75bcbe10",
  "status": [{ "code": "created", "time": "2022-02-03T14:38:41.557Z" }],
  "merchantReference": "order_3573894940903",
  "holderReference": "customer-123",
  "initialResults": [
    {
      "httpCode": 200,
      "body": {
        "name": "lookup",
        "actionId": "1aa0ef20-36cb-4485-b60e-0526c3699014",
        "executedAt": "2022-02-03T14:38:40.557Z",
        "data": {
          "paymentCompositionOptions": [
            {
              "paymentMethodCode": "applePay",
              "integrationType": "api",
              "description": "ApplePay",
              "config": {
                "parameters": {
                  "countryCode": "DE",
                  "merchantCapabilities": ["supports3DS", "supportsCredit", "supportsDebit"],
                  "merchantIdentifier": "merchant.payrails.testing",
                  "supportedNetworks": ["AMEX", "DISCOVER", "INTERAC", "JCB", "VISA", "MASTERCARD"]
                },
                "type": "CARD"
              }
            }
          ]
        },
        "links": {
          "authorize": {
            "method": "POST",
            "href": "https://api.staging.payrails.io/merchant/workflows/payment-acceptance/executions/5d0e7a85-c982-499f-bb7f-296b75bcbe10/authorize"
          },
          "startPaymentSession": {
            "method": "POST",
            "href": "https://api.staging.payrails.io/merchant/workflows/payment-acceptance/executions/5d0e7a85-c982-499f-bb7f-296b75bcbe10/startPaymentSession"
          }
        }
      }
    }
  ],
  "links": {
    "self": "https://api.staging.payrails.io/merchant/workflows/payment-acceptance/executions/5d0e7a85-c982-499f-bb7f-296b75bcbe10"
  }
}
Use the config.parameters from the Apple Pay composition option to initialize your Apple Pay session on the client — passing merchantIdentifier, supportedNetworks, and merchantCapabilities to the Apple Pay SDK. Use the execution id in all subsequent requests.
Step 2: Perform merchant validation (web only)
This step is only required for web (Safari) payments. For native iOS or Android app integrations, skip to Step 3.
When the customer initiates Apple Pay in a browser, Apple calls your onvalidatemerchant handler with a validationURL. Forward this URL to Payrails via the startPaymentSession endpoint to complete merchant validation.
POST /merchant/workflows/{workflowCode}/executions/{executionId}/startPaymentSession
Authorization: Bearer <YOUR_JWT>
x-idempotency-key: <UUID>{
"integrationType": "api",
"paymentMethodCode": "applePay",
"amount": {
"value": "12.50",
"currency": "EUR"
},
"returnInfo": {
"success": "https://your-domain.com/success"
},
"meta": {
"sessionURL": "https://apple-pay-gateway-cert.apple.com/paymentservices/startSession",
"clientContext": {
"host": "your-domain.com"
}
}
}The response contains an opaque Apple Pay session object in the data field. Pass this directly to the Apple Pay JS SDK's completeMerchantValidation method.
{
  "name": "startPaymentSession",
  "actionId": "1aa0ef20-36cb-4485-b60e-0526c3699014",
  "executedAt": "2022-02-03T14:38:40.557Z",
  "data": {
    "id": "SSH268E...",
    "data": {
      "displayName": "Test Merchant",
      "domainName": "https://your-domain.com",
      "epochTimestamp": 1717486879562,
      "expiresAt": 1717490479562,
      "merchantIdentifier": "E92FBE...",
      "merchantSessionIdentifier": "SSH268E...",
      "nonce": "fd3...",
      "signature": "30800..."
    }
  },
  "links": {
    "execution": "https://api.staging.payrails.io/merchant/workflows/payment-acceptance/executions/5d0e7a85-c982-499f-bb7f-296b75bcbe10"
  }
}
Step 3: Authorize the payment
Once the customer authorizes the payment in the Apple Pay sheet, Apple provides a PKPaymentToken containing a paymentData object. Pass the entire token as a JSON string in paymentInstrumentData.paymentToken.
POST /merchant/workflows/{workflowCode}/executions/{executionId}/authorize
Authorization: Bearer <YOUR_JWT>
x-idempotency-key: <UUID>{
"amount": {
"value": "12.50",
"currency": "EUR"
},
"returnInfo": {
"success": "https://your-domain.com/success",
"error": "https://your-domain.com/error"
},
"paymentComposition": [
{
"paymentMethodCode": "applePay",
"integrationType": "api",
"amount": {
"value": "12.50",
"currency": "EUR"
},
"paymentInstrumentData": {
"paymentToken": "{\"paymentData\":{\"data\":\"V0D4ZZq5XBJoORaiwCxQKq4P1WtrRdiRY3PmF9BX0l3BRplz1XMKNJcbqstekoqDaNFtAFyxUkvwXLsxU81KcQ9P8AQoYjj5KMXPgO\\/jeIqgnKGwaF3+cPEmoYUnmfLVpnrGGDiH8An6E9DjdX48nUMyC4rzAwBhXcjqFW3s93D5lUgbjKdgKK0vs8M\\/UGWJ+dGNrVshiG48fWCcO8iiUgTvaJqnERnkmVs\\/Fu6\\/CBIZqB1ytQh+osuvSrEb8YurrRHHc\\/Y1JbeTBSpSi\\/fWrMljXAjthF3JiO00g9EgYb0p+e3+dVvb+P0bvvmo5l4GRsRVaysgW0nX8MbzR\\/nUfIoGc6NlaUhTP6vkOi8ccBX63urdoa\\/LD7bXCnkEJ9tag+uTCgKWlAOS34ls\",\"signature\":\"MIAGCSqGSIb3DQEH...\",\"header\":{\"publicKeyHash\":\"ZJSKMBJDW9HqdVlxZeNWBooGagS9Ef2+yyPZwV17HmY=\",\"ephemeralPublicKey\":\"MFkwEwYHKoZIzj0CAQYIKoZIzj0DAQcDQgAE9\\/m6C48ZHg25pmAQRadr4W1jPMYSQbO9b1nW\\/D3+rC\\/WSEcw7NygSMkQkAU\\/0En5AZ0\\/c8hgDWPknFVNlN8pcQ==\",\"transactionId\":\"642e2f06b74fc4cfc301553a37905ff16cf163173a46a25d022ffdd1cc0ad6a5\"},\"version\":\"EC_v1\"},\"paymentMethod\":{\"displayName\":\"MasterCard 0049\",\"network\":\"MasterCard\",\"type\":\"credit\"},\"transactionIdentifier\":\"642e2f06b74fc4cfc301553a37905ff16cf163173a46a25d022ffdd1cc0ad6a5\"}"
}
}
]
}A successful response returns 202 Accepted with an actionId and links to track the payment outcome.
{
  "name": "authorize",
  "actionId": "1aa0ef20-36cb-4485-b60e-0526c3699014",
  "executedAt": "2022-04-22T17:53:36.814Z",
  "links": {
    "execution": "https://api.staging.payrails.io/merchant/workflows/payment-acceptance/executions/5d0e7a85-c982-499f-bb7f-296b75bcbe10",
    "consumerWait": "https://api.staging.payrails.io/public/redirect/...",
    "cancel": {
      "method": "POST",
      "href": "https://api.staging.payrails.io/merchant/workflows/payment-acceptance/executions/5d0e7a85-c982-499f-bb7f-296b75bcbe10/cancel"
    }
  }
}
Authorization is processed asynchronously. The final payment outcome is delivered via webhook notification containing the actionId from this response.
This integration requires PCI DSS compliance as you will be handling decrypted Apple Pay token data on your servers. If you prefer Payrails to handle decryption, use the Server-to-Server integration instead.
With this approach, you decrypt the Apple Pay token on your own servers, re-encrypt the decrypted network token using the Payrails vault public key, and send it to Payrails for processing. This gives you full control over the decryption flow but requires managing your own Apple Pay private keys and certificates.
- Decrypt the Apple Pay token
- Fetch the Payrails vault public key
- Encrypt the network token
- Create an Apple Pay instrument
- Create a workflow execution
- Authorize the payment
Step 1: Decrypt the Apple Pay token
Once the customer authorizes the payment in the Apple Pay sheet, Apple provides an encrypted PKPaymentToken. Decrypt it on your server using your Apple Pay private keys. The decrypted token contains the card network token data in the following format:
{
  "cardNumber": "4111111111111111",
  "expiryMonth": "03",
  "expiryYear": "30",
  "securityCode": "ApplePayCryptogram==",
  "holderName": "John Doe",
  "holderReference": "customer-123"
}
The decrypted Apple Pay token contains PCI-sensitive data. Ensure this data is handled exclusively on your server and never exposed to the client.
Step 2: Fetch the Payrails vault public key
Before sending the decrypted token to Payrails, fetch the current vault public encryption key.
GET /payment/vault/info
Authorization: Bearer <YOUR_JWT>{
"encryptionPublicKey": "MIIBIjANBgkqhkiG9w0BAQEFAAOCAQ8AMIIBCgKCAQEA0MqUlEo2bC9iJi4LEHQ6...",
"encryptionKeyId": "b24ff007-728c-455d-b51c-556108ccdf59",
"expiresIn": 3300
}Cache the public key and refresh it before
expiresInseconds to avoid unnecessary API calls.
Step 3: Encrypt the network token
Encrypt the decrypted Apple Pay network token JSON using JWE with the following parameters:
- Encryption algorithm:
RSA-OAEP-256 - Content encryption:
A256CBC-HS512 - Include the
encryptionKeyIdas thekidJWE header
from jose import jwe
import json

data = {
  "cardNumber": "4111111111111111",
  "expiryMonth": "03",
  "expiryYear": "30",
  "securityCode": "ApplePayCryptogram==",
  "holderName": "John Doe",
  "holderReference": "customer-123"
}

json_data = json.dumps(data).encode('utf-8')

encrypted_token = jwe.encrypt(
  plaintext=json_data,
  algorithm='RSA-OAEP-256',
  encryption='A256CBC-HS512',
  key=vault_key_info['encryptionPublicKey'],
  keyID=vault_key_info['encryptionKeyId']
)
# eyJhbGciOiJSU0EtT0FFUC0yNTYiLCJlbmMiOiJBMjU2Q0JDLUhTNTEyIn0...recipient := jose.Recipient{
Algorithm: jose.RSA_OAEP_256,
Key: publicKey,
KeyID: vaultKeyInfo.EncryptionKeyID,
}
e, err := jose.NewEncrypter(jose.A256CBC_HS512, recipient, nil)
encrypted, err := e.Encrypt(jsonData)
encryptedToken, err := encrypted.CompactSerialize()
// eyJhbGciOiJSU0EtT0FFUC0yNTYiLCJlbmMiOiJBMjU2Q0JDLUhTNTEyIn0...Step 4: Create an Apple Pay instrument
Send the encrypted network token to Payrails to create a stored Apple Pay instrument.
POST /merchant/instruments
Authorization: Bearer <YOUR_JWT>{
"paymentMethod": "applePay",
"displayName": "Visa 4443",
"data": {
"encryptedData": ".......encryptedApplePayNetworkToken.......",
"encryptedDataType": "networkToken",
"network": "visa",
"eci": "07",
"billingAddress": {
"street": "Berlin street",
"doornumber": "345",
"postalCode": "30103",
"city": "Berlin",
"country": "DE"
}
}
}The response contains the id of the newly created Apple Pay instrument.
{
  "id": "32749353-263f-4510-9572-c782ab64e599",
  "paymentMethod": "applePay",
  "displayName": "Visa 4443",
  "status": "created"
}
To achieve full interoperability across providers, always include
eci,billingAddress,network, anddisplayNamewhen creating the instrument.
Step 5: Create a workflow execution
Create an execution to initiate the payment flow.
POST /merchant/workflows/{workflowCode}/executions
Authorization: Bearer <YOUR_JWT>
x-idempotency-key: <UUID>{
"merchantReference": "order_3573894940903",
"holderReference": "customer-123",
"meta": {
"order": {
"reference": "order_3573894940903"
},
"customer": {
"reference": "customer-123",
"country": {
"code": "DE"
}
},
"clientContext": {
"ipAddress": "217.110.239.132"
}
}
}{
"id": "5d0e7a85-c982-499f-bb7f-296b75bcbe10",
"status": [{ "code": "created", "time": "2022-02-03T14:38:41.557Z" }],
"links": {
"authorize": {
"method": "POST",
"href": "https://api.staging.payrails.io/merchant/workflows/payment-acceptance/executions/5d0e7a85-c982-499f-bb7f-296b75bcbe10/authorize"
}
}
}Step 6: Authorize the payment
Use the instrument ID from Step 4 and execution ID from Step 5 to authorize the payment.
POST /merchant/workflows/{workflowCode}/executions/{executionId}/authorize
Authorization: Bearer <YOUR_JWT>
x-idempotency-key: <UUID>{
"amount": {
"value": "12.50",
"currency": "EUR"
},
"returnInfo": {
"success": "https://your-domain.com/success",
"error": "https://your-domain.com/error"
},
"paymentComposition": [
{
"paymentMethodCode": "applePay",
"integrationType": "api",
"paymentInstrumentId": "32749353-263f-4510-9572-c782ab64e599",
"amount": {
"value": "12.50",
"currency": "EUR"
}
}
]
}A successful response returns 202 Accepted. Authorization is processed asynchronously and the final outcome is delivered via webhook.
{
  "name": "authorize",
  "actionId": "1aa0ef20-36cb-4485-b60e-0526c3699014",
  "executedAt": "2022-04-22T17:53:36.814Z",
  "links": {
    "execution": "https://api.staging.payrails.io/merchant/workflows/payment-acceptance/executions/5d0e7a85-c982-499f-bb7f-296b75bcbe10",
    "cancel": {
      "method": "POST",
      "href": "https://api.staging.payrails.io/merchant/workflows/payment-acceptance/executions/5d0e7a85-c982-499f-bb7f-296b75bcbe10/cancel"
    }
  }
}
Recurring payments
As with other payment methods, you can choose to tokenize the payment instrument such that it can be used for future authorizations by setting the storeInstrument parameter to true. In this case, you can expect to receive a Payrails paymentInstrumentId in the authorize notification as in the below example.
{
   "event":"executionActionCompleted",
   "time":"2023-10-26T08:48:50.057448Z",
   "details":{
      "action":"authorize",
      "actionId":"d1d7eec1-6c4d-561b-b924-e05abd1c564c",
      "amount":{...},
      "execution":{...},
      "paymentComposition":[
         {
            "amount":{...},
            "integrationType":"api",
            "operationProviderReference":"pi_3O5PFEG5MqUZQUfk1exfNecz",
            "operationResult":"Success",
            "operationType":"Authorize",
            "paymentId":"f5b277c8-db9b-4521-8625-f9bb8dd07de1",
            "paymentInstrument":{...},
            "paymentInstrumentId":"32749353-263f-4510-9572-c782ab64e599",
            "paymentMethodCode":"applePay",
            "providerConfigId":"d83d0617-784d-4181-8d28-290c948e590a",
            "providerId":"5559a584-0995-4ed4-a4bb-32f9cc2a8c39",
            "storeInstrument":true,
            "success":true
         }
      ],
      "success":true
   }
}
In order to make a subsequent authorization request using the tokenized Apple Pay payment instrument, pass the saved paymentInstrumentId in the paymentComposition as in the below example.
Please note that for Apple Pay payments made with a tokenized payment instrument, you must appropriately set authorization flags with us to indicate that the payment is a merchant-initiated transaction (MIT). If you indicate that the payment is a customer-initiated transaction (CIT), then the payment will be rejected. See our guide here on how to set authorization flags.
"paymentComposition":[
   {
      "amount":{
         "currency":"USD",
         "value":"1.00"
      },
      "integrationType":"api",
      "paymentInstrumentId":"32749353-263f-4510-9572-c782ab64e599",
      "paymentMethodCode":"applePay"
   }
]
Supported regions / countries
| Region(s) | Countries |
|---|---|
| Europe | 🇦🇹 Austria, 🇧🇪 Belgium, 🇧🇬 Bulgaria, 🇭🇷 Croatia, 🇨🇾 Cyprus, 🇨🇿 Czech Republic, 🇩🇰 Denmark, 🇪🇪 Estonia, 🇫🇮 Finland, 🇫🇷 France, 🇩🇪 Germany, 🇬🇮 Gibraltar, 🇬🇷 Greece, 🇭🇺 Hungary, 🇮🇸 Iceland, 🇮🇪 Ireland, 🇮🇹 Italy, 🇱🇻 Latvia, 🇱🇮 Liechtenstein, 🇱🇹 Lithuania, 🇱🇺 Luxembourg, 🇲🇹 Malta, 🇳🇱 Netherlands, 🇵🇱 Poland, 🇵🇹 Portugal, 🇷🇴 Romania, 🇸🇰 Slovakia, 🇸🇮 Slovenia, 🇪🇸 Spain, 🇸🇪 Sweden, 🇨🇭 Switzerland, 🇬🇧 UK, others.. |
| North and Central America | 🇺🇸 USA, 🇲🇽 Mexico, 🇨🇦 Canada, 🇵🇷 Puerto Rico, others.. |
| South America | 🇧🇷 Brazil, others.. |
| Africa | 🇪🇬 Egypt, 🇲🇦 Morocco, 🇿🇦 South Africa |
| Asia Pacific | 🇦🇺 Australia, 🇭🇰 Hong Kong, 🇯🇵 Japan, 🇲🇾 Malaysia, 🇳🇿 New Zealand, 🇸🇬 Singapore, 🇹🇭 Thailand, 🇦🇪 UAE, others.. |
Supported workflows and services
| Workflow | Supported |
|---|---|
| Available via Payrails SDK | ✔️ |
| Available via Payrails API | ✔️ |
| Delayed / Manual Capture | ✔️ |
| Instant Capture | ✔️ |
| Cancel / Void | ✔️ |
| Refund / Reverse | ✔️ |
| Save Instruments | ✔️ |
| Merchant Initiated Transaction (MIT) | ✔️ |
| Interoperability | PSP tokens, Network tokens |
Troubleshoot
Payment session fails due to merchant url validation failed for the requested session url
merchant url validation failed for the requested session urlWhen the payment session fails due to merchant url validation failed for the requested session url, it usually means that the payment was attempted using a real apple pay account in staging and vice versa.
- In staging, to test apple pay, you must create sandbox tester account and use one of the test cards. If you use a real apple pay account, you'll get this error.
- In production, you must use a real apple pay account, otherwise you'll get this error.
One way to verify if you used a tester account or real account is to check the session URL:
- If the session URL is
https://apple-pay-gateway.apple.com/paymentservices/startSession(orhttps://cn-apple-pay-gateway.apple.com/paymentservices/startSessionin China), then a real apple pay account was used. - If the session URL is
https://apple-pay-gateway-cert.apple.com/paymentservices/startSession(https://cn-apple-pay-gateway-cert.apple.com/paymentservices/startSessionin China), then a sandbox tester apple pay account was used.
Updated 28 days ago