Payment Options
Introduction
Configuring Payment options is one of two necessary steps of configuring a workflow to make payment options available to your customers and decide routing rules for your payments.
Once you created a new workflow configuration, the next step is to configure the details of your payment options.
Select payment options
To make a payment option available to your customers, click on Select payment options and select it from the list. This list of payment options is dependent on your integrated and configured PSPs.
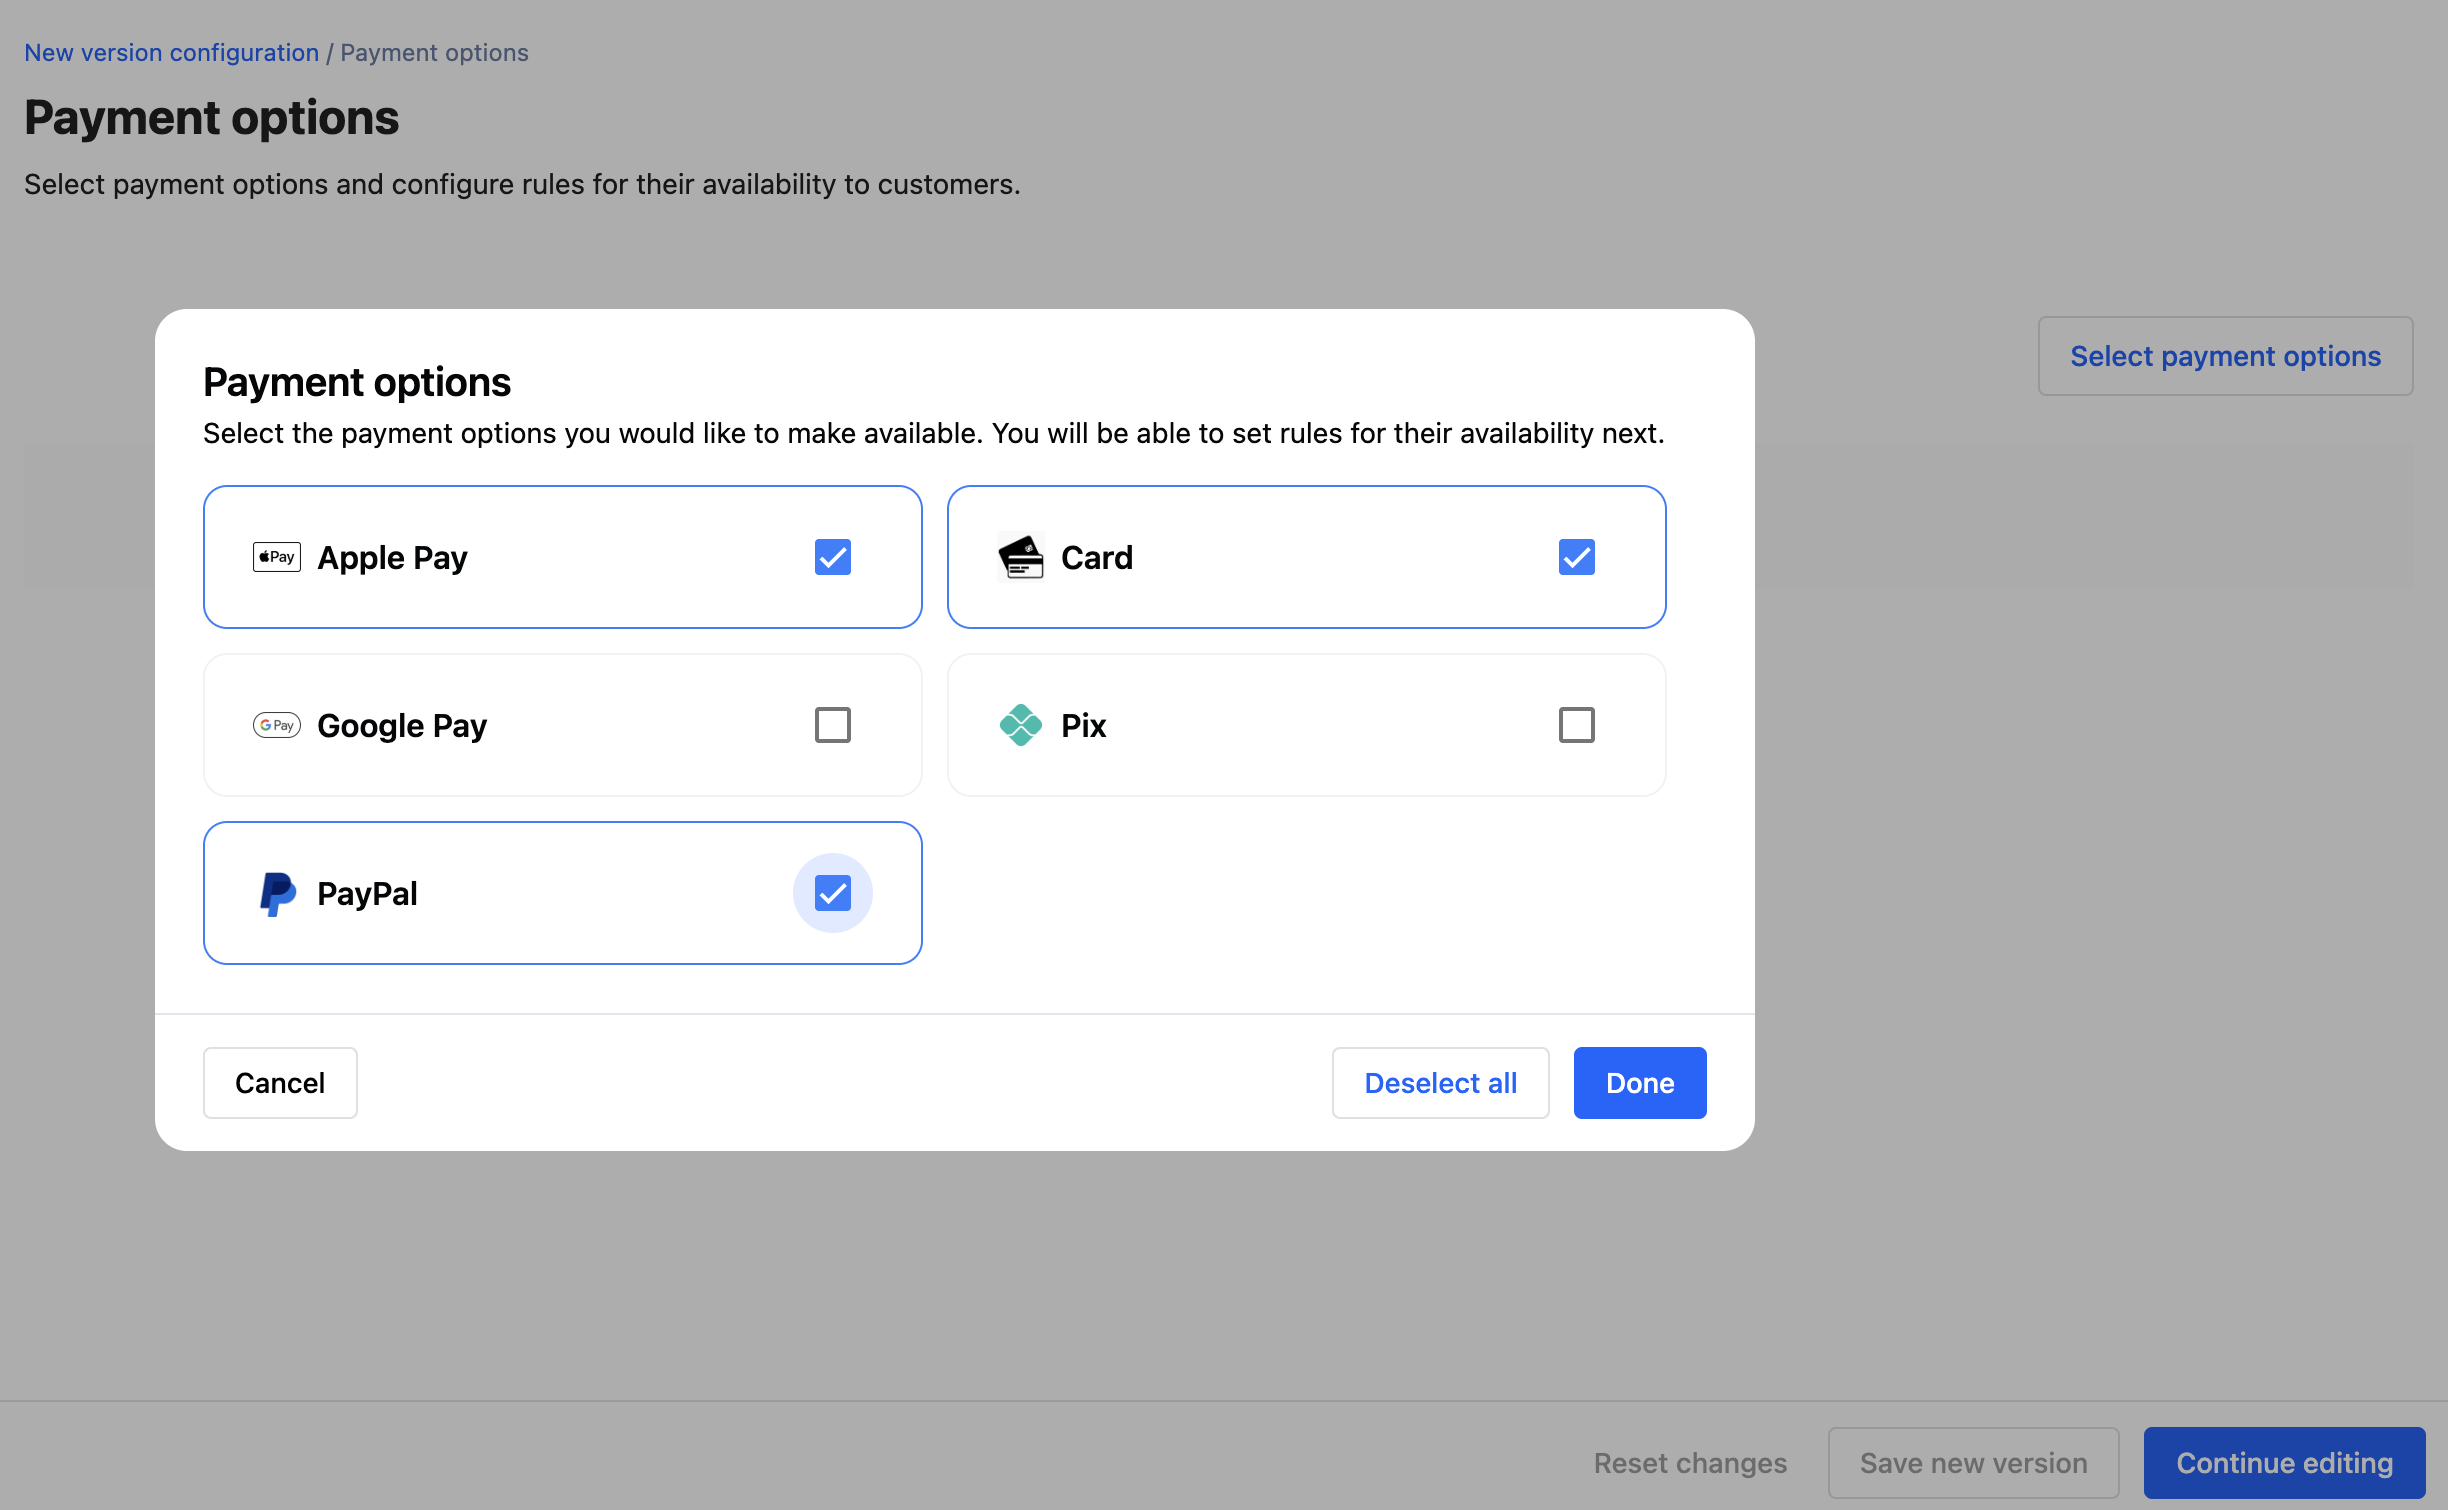
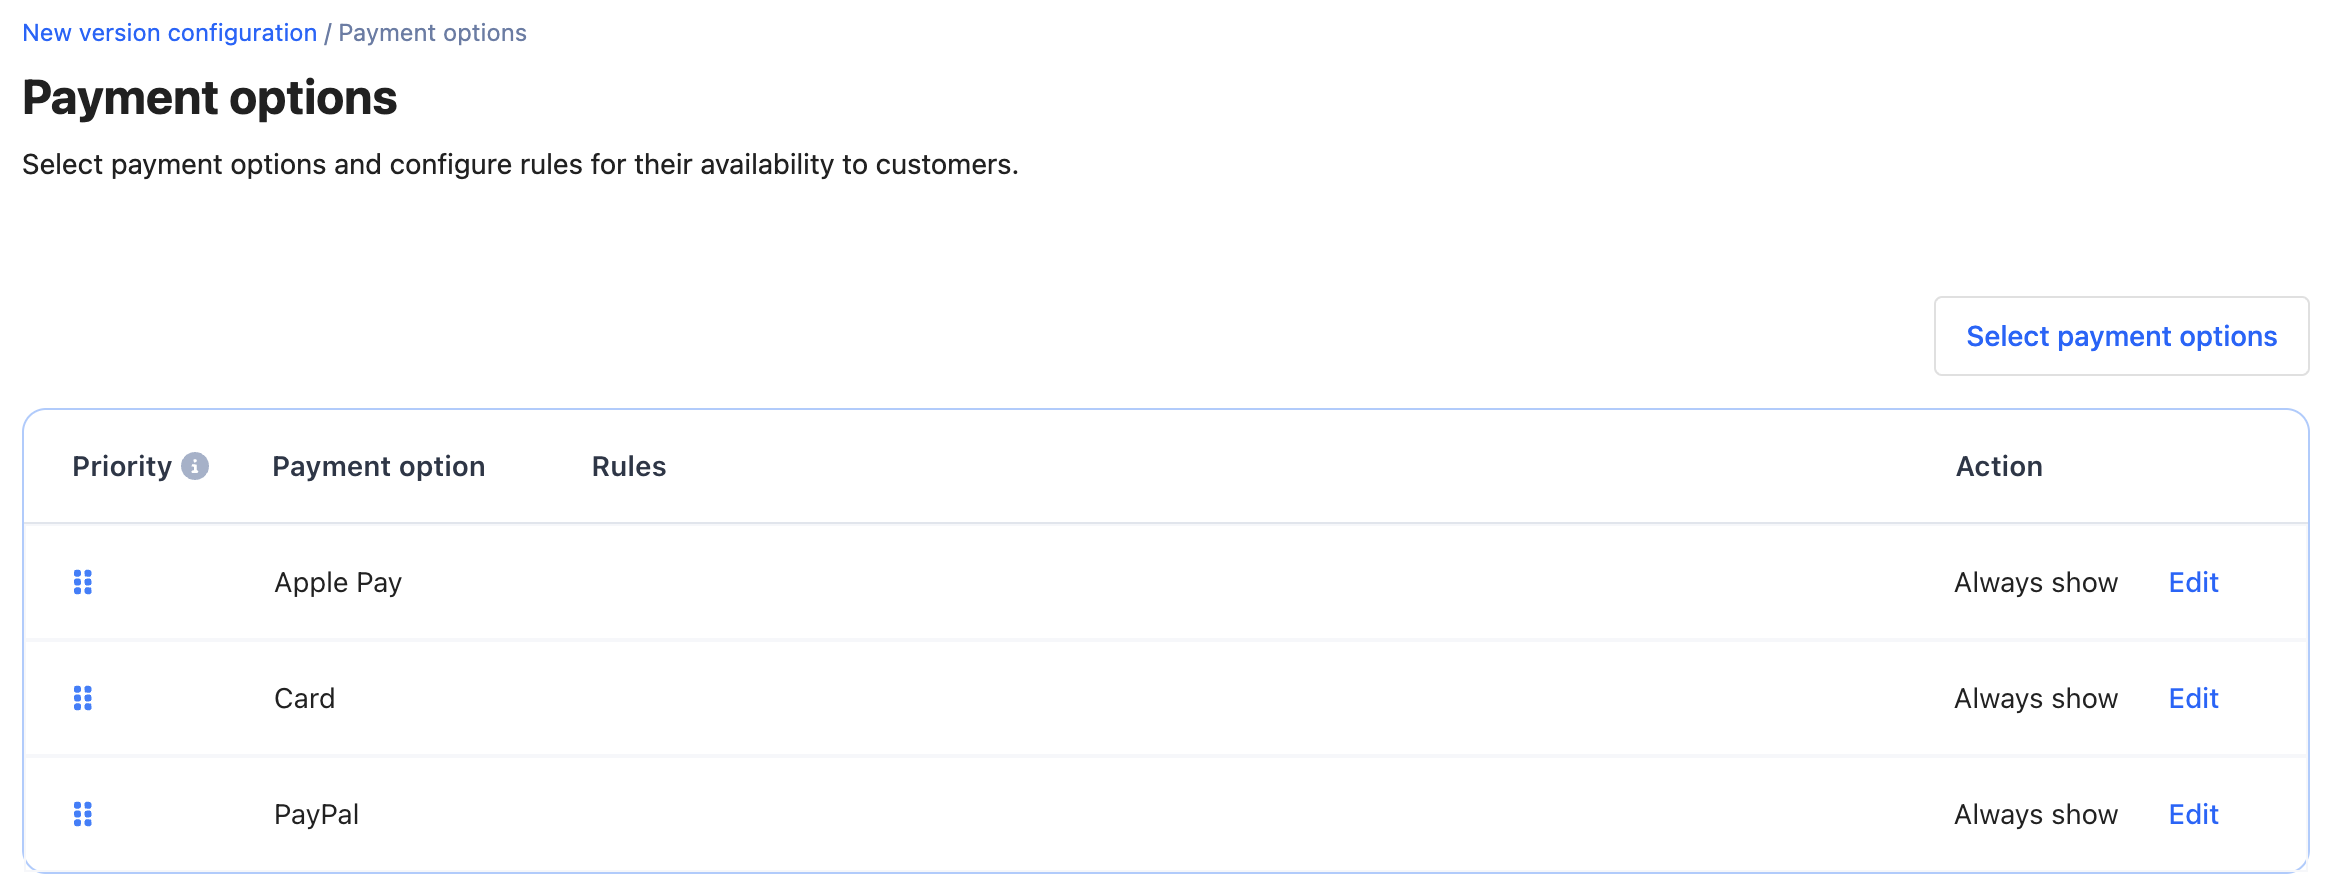
By default, your selected payment options will be marked 'Always show' in the configuration table and be available to every customer.
Add rules
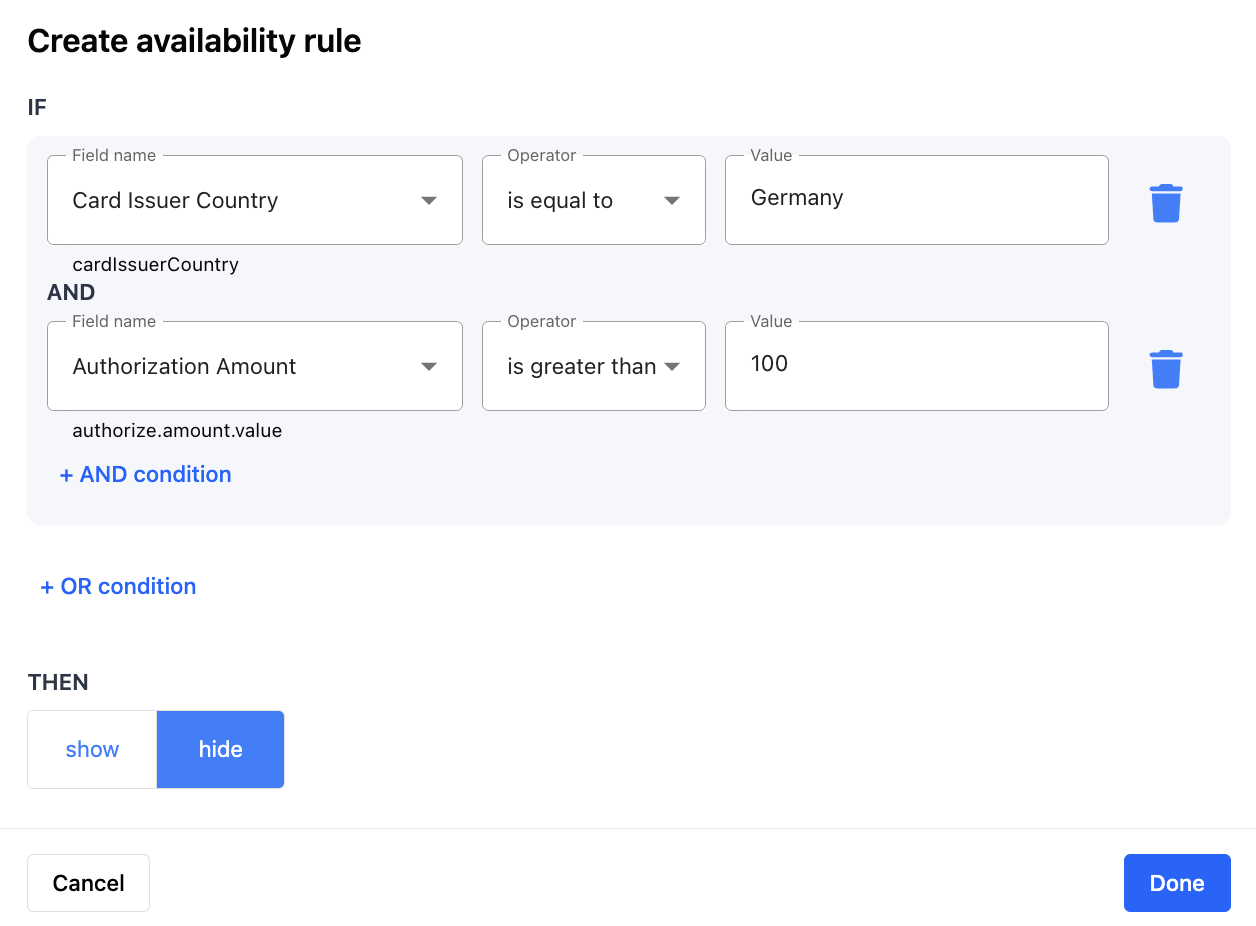
You can configure rules based on any fields related to the authorization request body or workflow execution context. This includes but is not limited to:
- Authorization request body fields
- Meta fields
- Workflow execution context fields, e.g.,
Shopper countryorOrder amount
A rule can consist of a single condition, or multiple conditions with AND and OR operators.
- Example: “IF user device type is iOS THEN show Apple Pay”
- Example: “IF shopper country is Germany AND order amount is greater than 25 EUR THEN show PayPal”
- Example: “IF shopper country is Germany OR shopper country is United States THEN show Cards”
Click on Edit in each payment option row to add rules for showing or hiding them under specific conditions.
Set order of payment options on customer checkout
The order of payment options in the configuration table is the order in which available payment options will be shown to your customers on checkout.
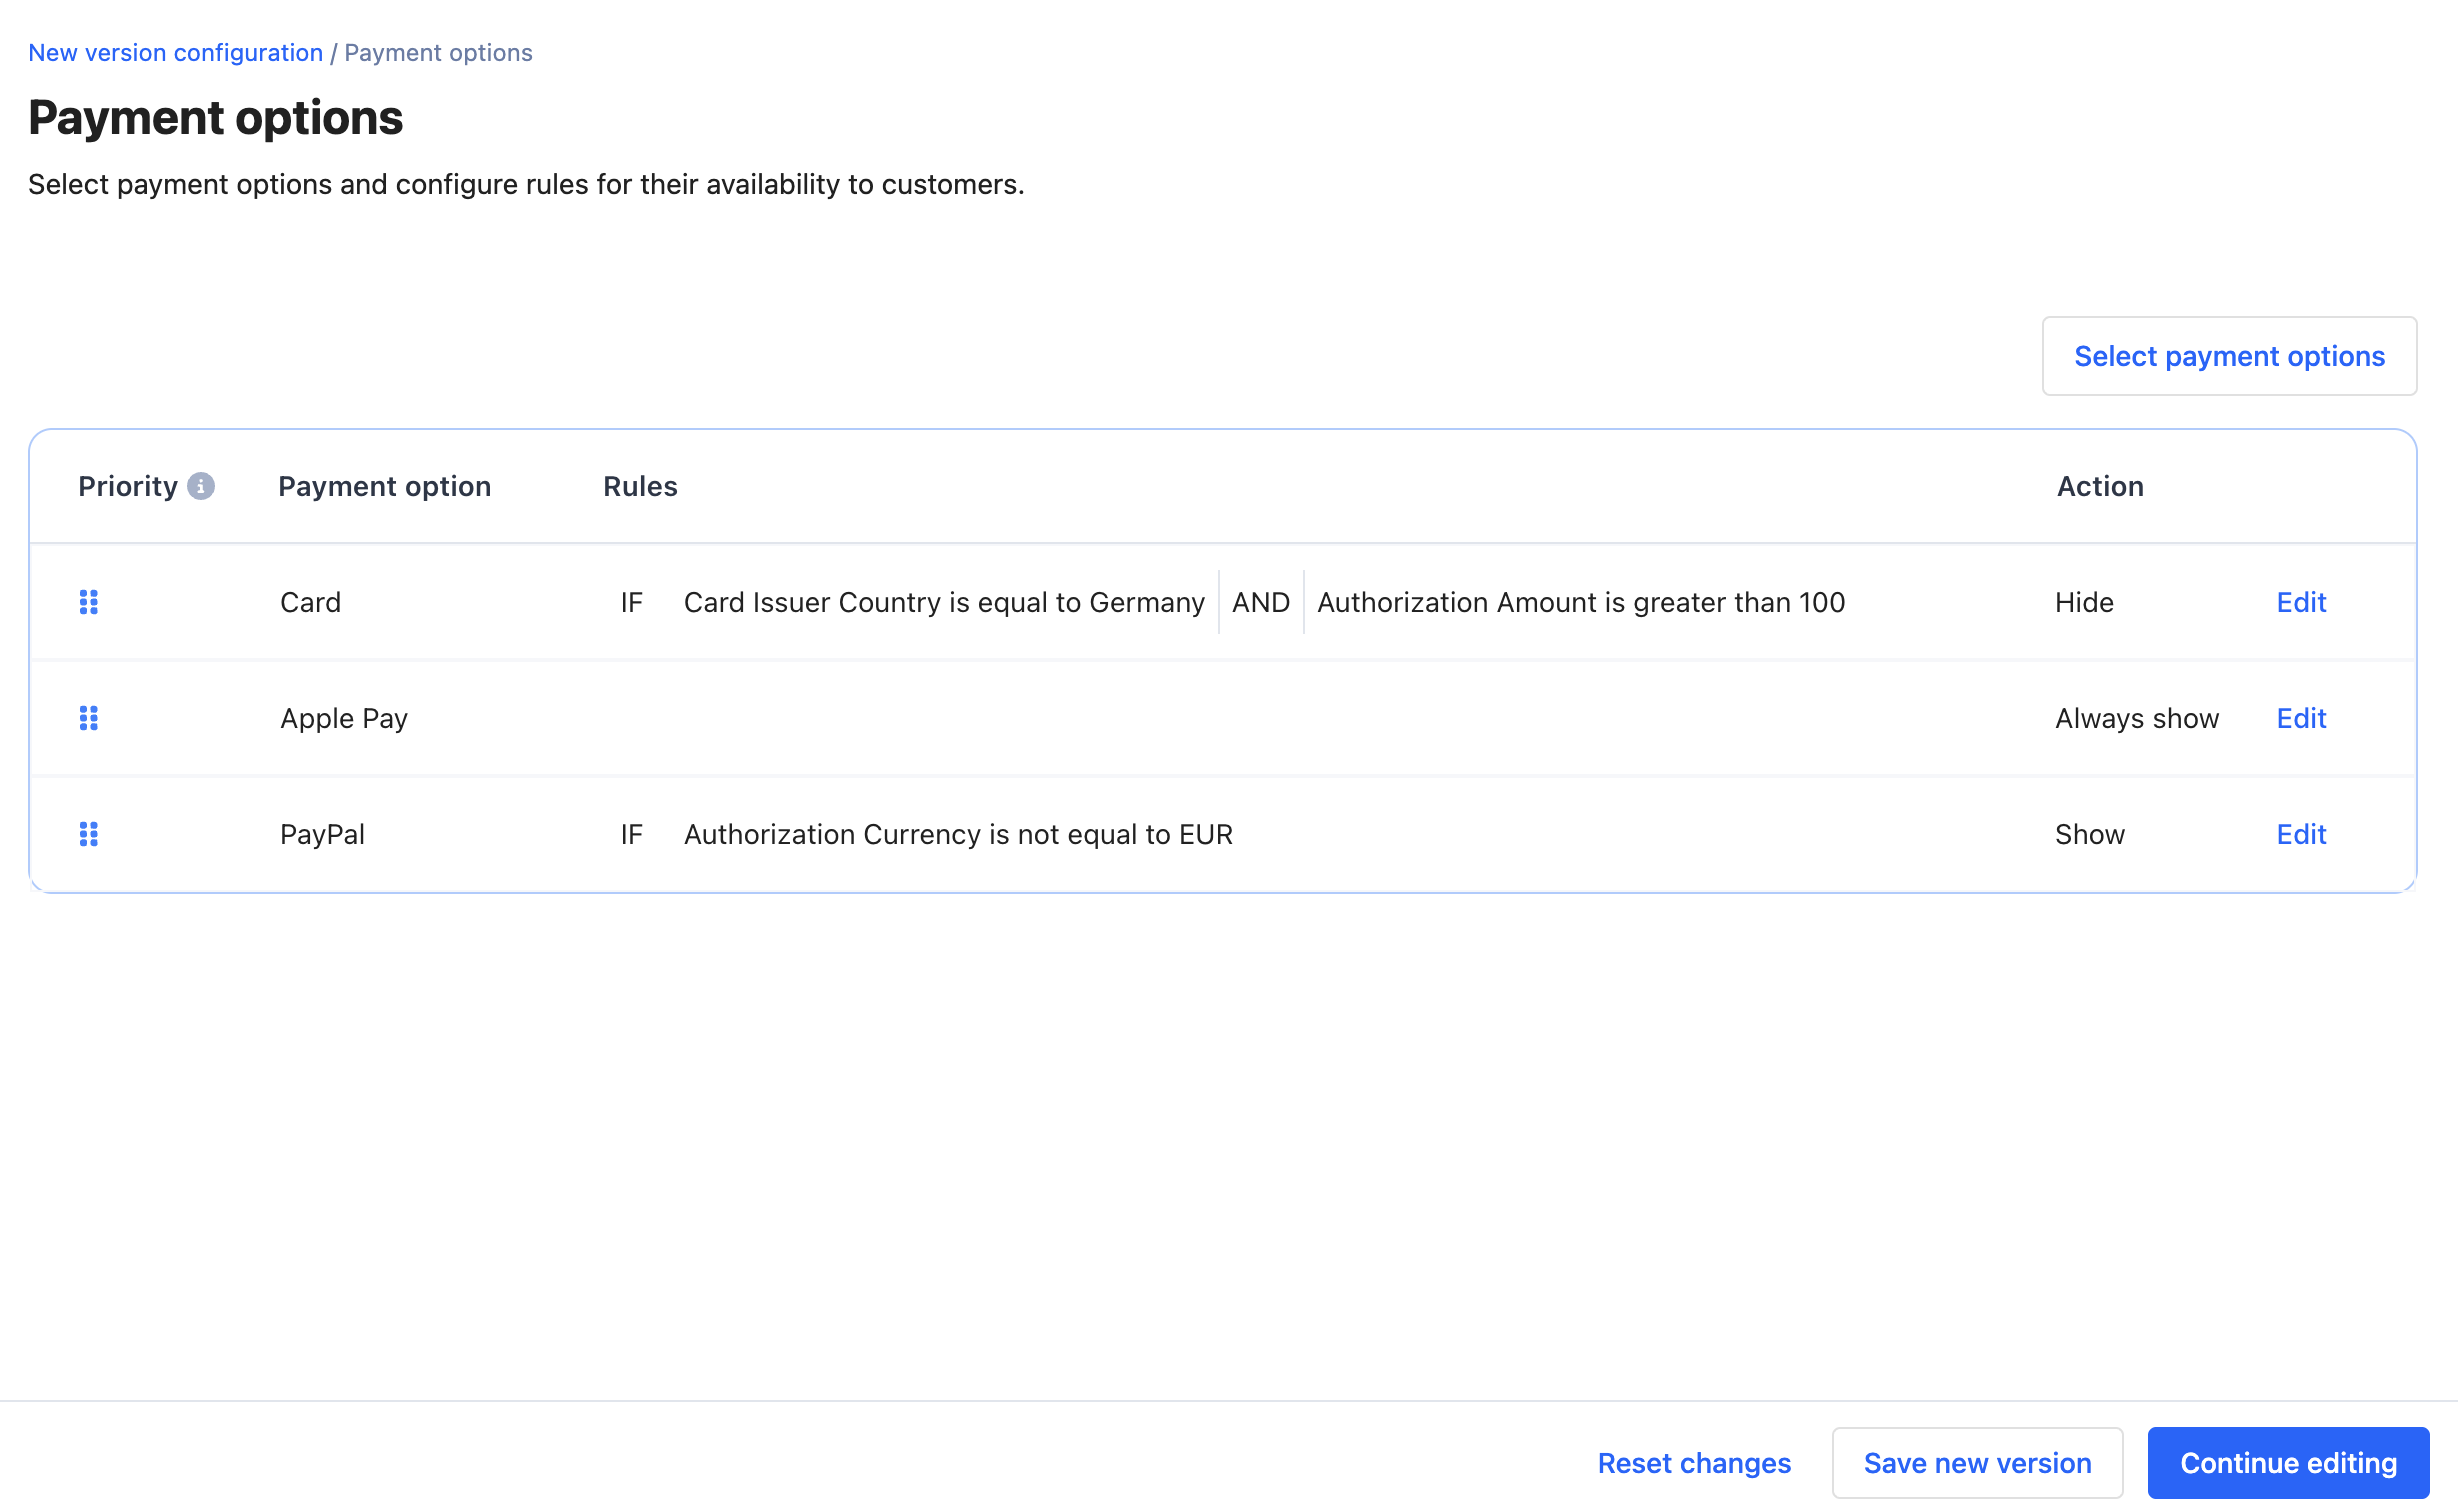
In this example, customers to which all three payment options are shown will see them in this order: Cards, ApplePay, PayPal.
After you finish configuring your changes, you can either “Save a new version” or “Continue editing”. Saving the new version with only Payment options configured will not allow you to set the workflow version as a “Default”. You need to configure both payment options and routing rules for the workflow version to be completed and ready for processing payments.
“Continue editing” will redirect you back to the “New version configuration” page with a label showing that payment options are configured but not yet saved.
Updated 3 months ago