Checkout
This guide will help you obtain your Checkout API credentials and connect Checkout.com as a data source in Payrails to ingest settlement and payment data. With the self-serve flow you configure the integration yourself in the Payrails portal.
Prerequisites
A Checkout.com account & Developer or Admin permissions.
Step-by-step instructions
We recommend that you create a limited access set of API keys for Payrails reporting.
Step 1: Log into Checkout live environment
Step 2: Create API keys
- Follow the instructions in the Checkout documentation to create a set of secret API keys.
- Use “Customize“ option to limit the scopes to the following:
reports,reports:view,financial-actions,financial-actions:view,payments:search. - Under processing channels, select "Allow any processing channel"
- After creating the key, validate its the correct by making sure the key type is "SECRET" and the key value starts with "sk_".
- Create API keys for each of the entities you would like Payrails to have access to.
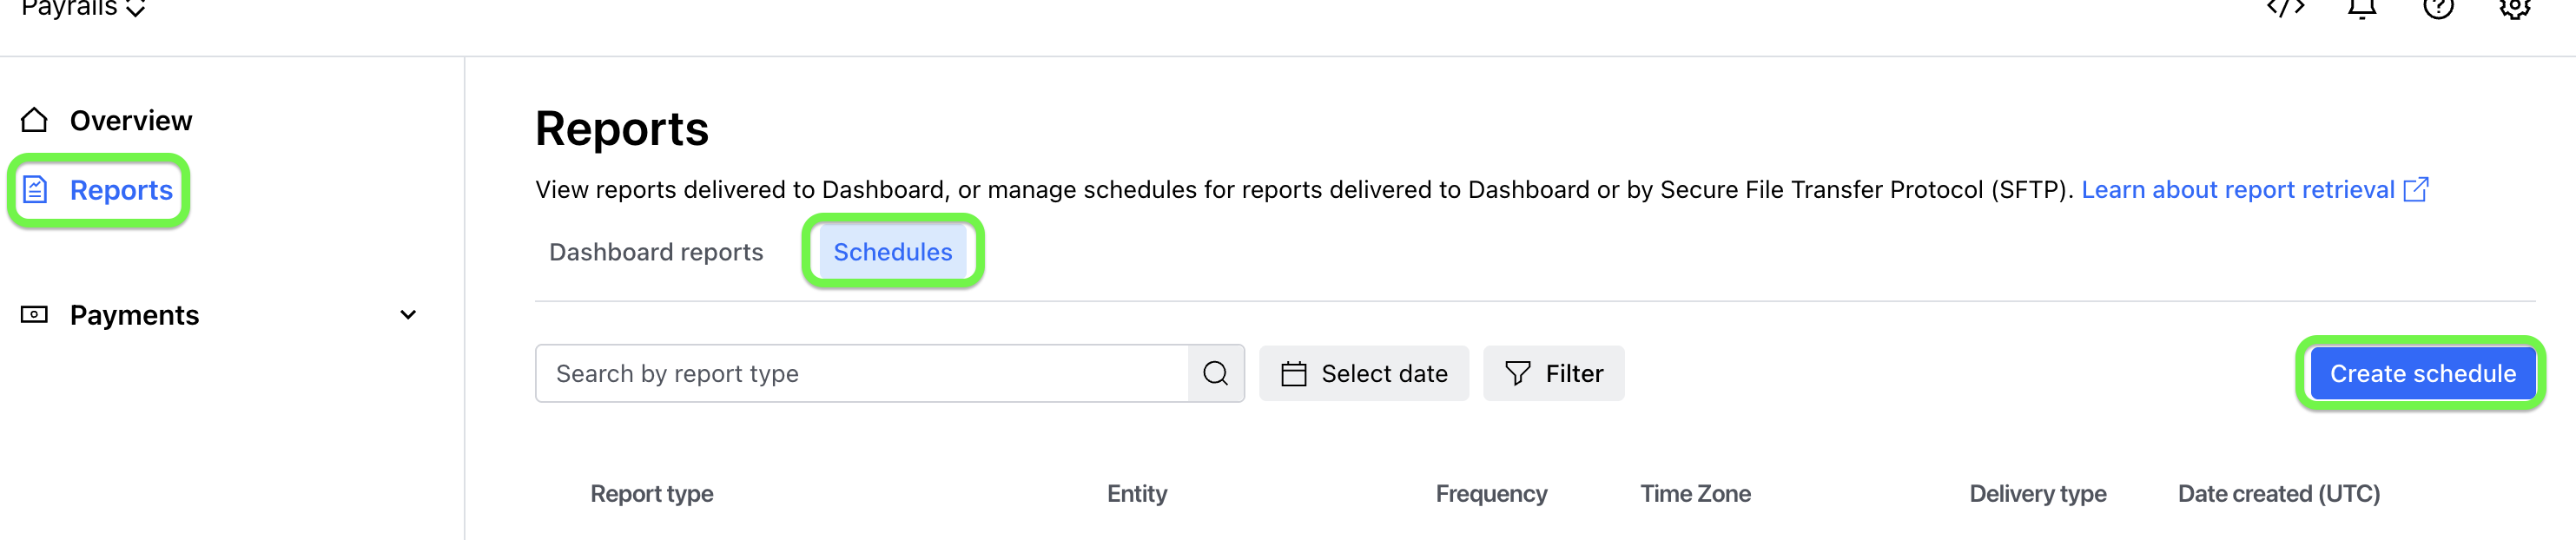
Step 3: Enable scheduled reports download
- Select reports, go to Schedules and click on
Create schedule
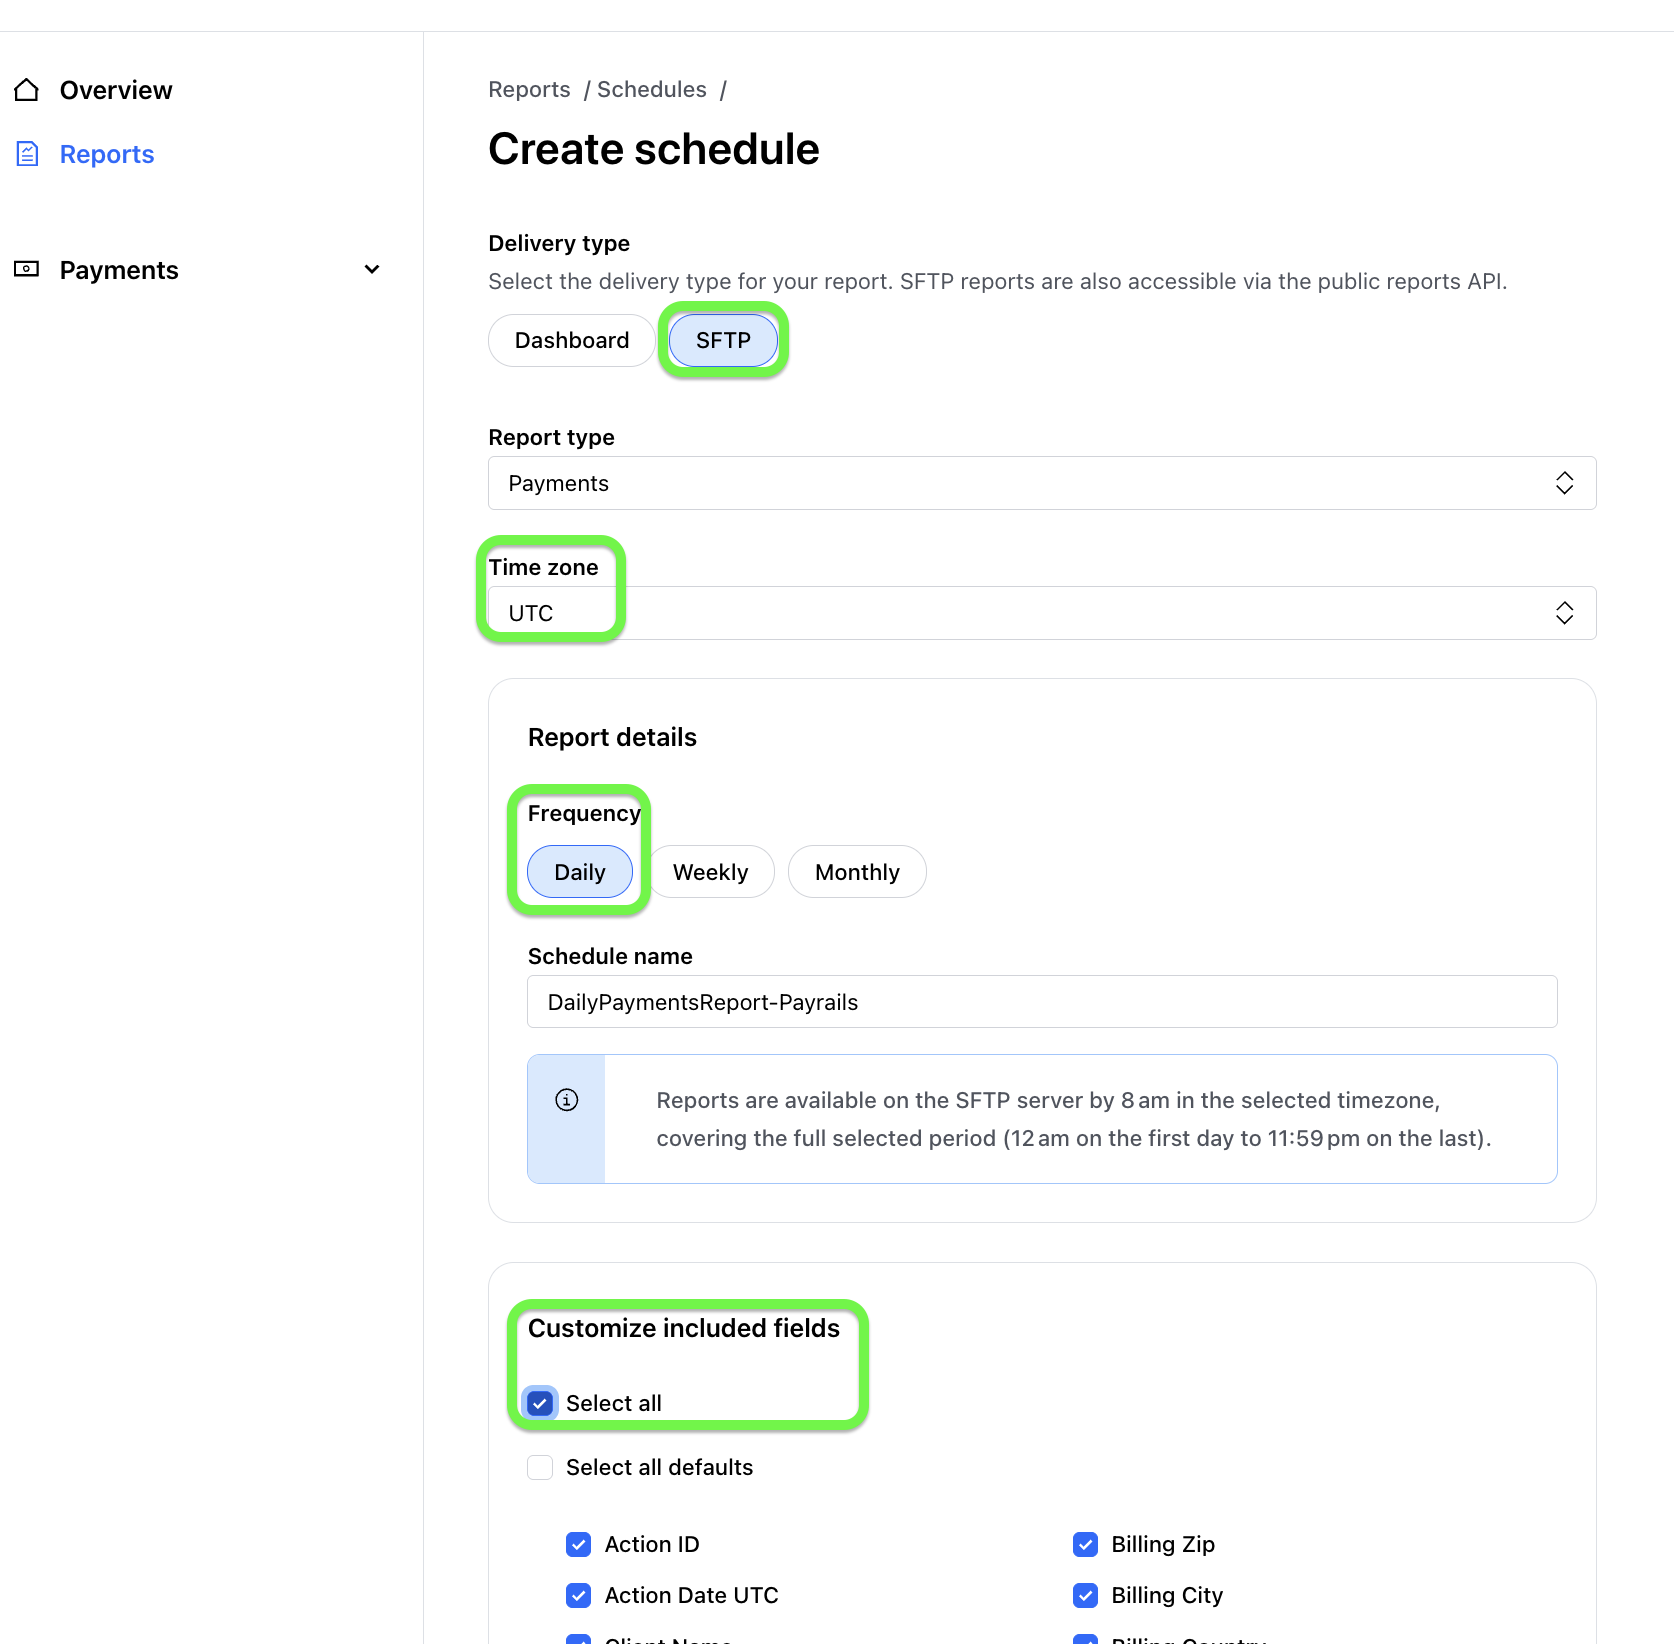
- Select the following input and click on
Create- Delivery Type = SFTP
- Report Type: all reports, each report needs to be set up separately, so you have to redo Step 3 multiple times to enable all reports.
- Time zone = UTC
- Report details
- Frequency = Daily
- Schedule name: can stay as proposed from the system
- customize included fields = Select all
Step 4: Share credentials and entity IDs with Payrails
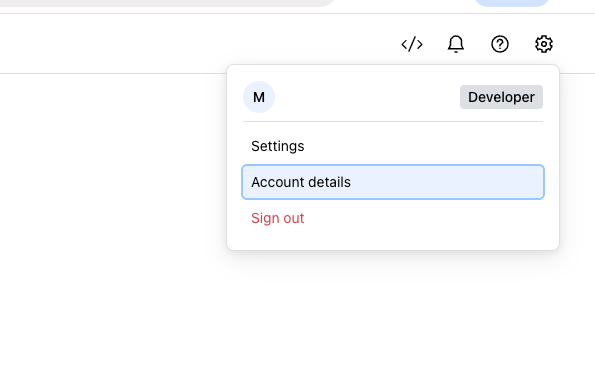
- Select the entity on the left side of your company profile
- Then go to the settings on the right side in the portal and click on
Account Details
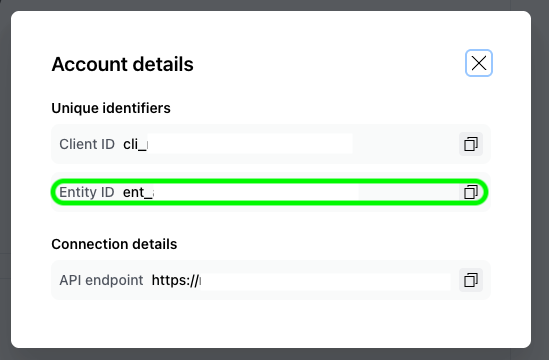
- Find the entity ID in the form of
ent_xxx
- Repeat steps 1 to 3 for each entity
Step 5: Add the Checkout integration in the Payrails portal (self-serve)
- Log in to the Payrails dashboard and open Settings → Integrations → Data.
- Click Add instance (top-right).
- In New instance, select provider: Checkout.com and click Continue.
- On the Configure account screen, fill in:
- Integration instance name — a unique label.
- Start Date — the date of today or tomorrow (currently we can not backfill over the sel-serve capability. In the need of backfilling, please reach out to your Payrails account manager).
- API key — the secret key (
sk_...) created in Step 2. Add one instance per entity/key as needed. - Entity ID(s) — the
ent_xxxIDs gathered in Step 4. - (Optional) Additional data.
- Click Save account. The instance appears in the Data integrations list and Payrails begins ingesting data.
Updated 3 days ago
Did this page help you?