In-person Payments
Payrails In-person allows you to turn your Android Point-of-Sale (POS) system into an acceptance device for Visa & Mastercard contactless cards, contactless wallets including Apple Pay & Google Pay and AliPay QR wallets.
With one single integration, you have access to the best global and local acceptance partners: Adyen (AliPay) and Stripe (Visa, Mastercard) are currently both available for preview. Your own POS app will remain outside of any certification and security scope.
Payrails In-person is currently in preview and we are happy to hear your feedback
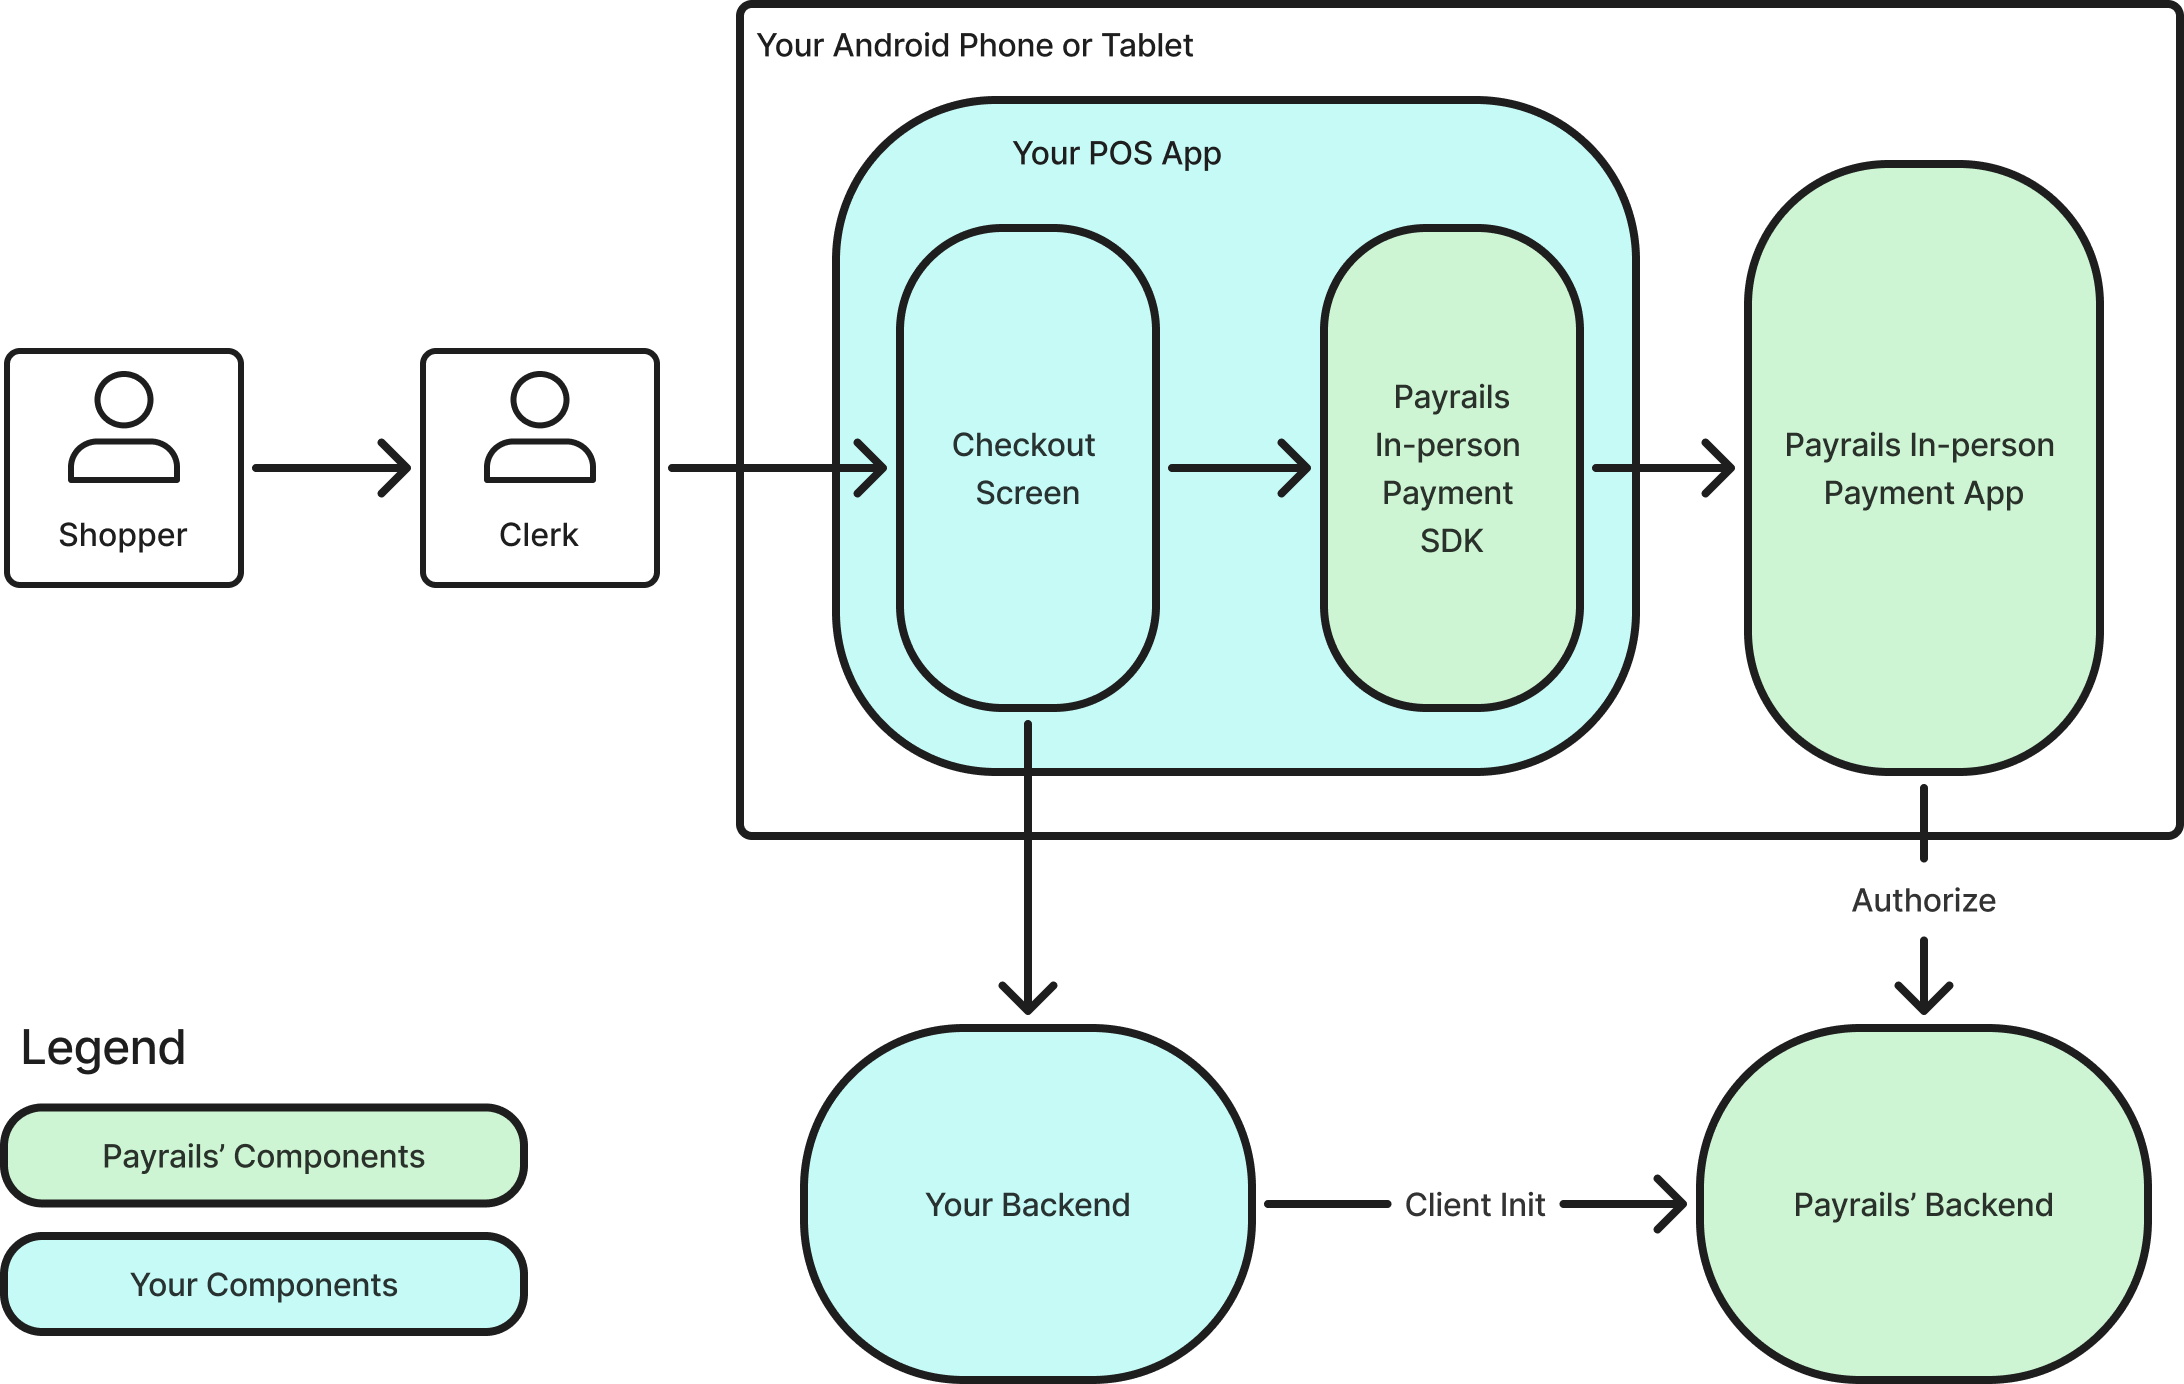
How it works
The backend of your POS software needs to integrate with the Payrails Backend to create the Execution and retrieve the required data to initialise the Payrails SDK in the next step.
Your Android POS App needs to integrate once with the light-weight, rarely changing Payrails SDK.
In addition to your Android POS App, you'll also need to install the Payrails In-person Payment App on each of your Android devices: It takes care of processing the In-person payments via Payrails. We frequently update it to bring to you the latest improvements and newest partners, all without requiring you to update your Android POS App every time.
Payrails In-person
sequenceDiagram
    participant Customer
    participant Clerk
    participant Merchant POS App
    participant Merchant Backend
    participant Payrails In-person Payment SDK
    participant Payrails In-person Payment App
    participant Payrails Backend

    Customer->>Clerk: Would like to pay
    Clerk->>Merchant POS App: Opens
    Merchant POS App->>Merchant Backend: Initiate Payment
    Merchant Backend->>Payrails Backend: Call client init endpoint
    Payrails Backend-->>Merchant Backend: Client init result
    Merchant Backend->>Merchant POS App: Client init result
    Merchant POS App->>Payrails In-person Payment SDK: Initialize Payrails In-person Payment SDK
    Payrails In-person Payment SDK->>Payrails In-person Payment App: Launch Payrails In-person Payment App
    Payrails In-person Payment App-->>Payrails In-person Payment App: Display payment options
    Customer->>Payrails In-person Payment App: Select payment option
    Payrails In-person Payment App-->>Customer: Display payment screen
    Customer->>Payrails In-person Payment App: Pays with selected payment option
    Payrails In-person Payment App->>Payrails Backend: Authorize (In-person)
    Payrails Backend-->>Payrails In-person Payment App: Display Authorize result
    Payrails In-person Payment App-->>Merchant POS App: Go back after payment complete
Step 1: Install the In-person Payment App
Payrails In-person Payment App is the companion App for your own POS Application. Once launched by our In-person SDK, from your own POS Application, the Payrails In-person Payment App takes care of processing the In-person payment via Payrails.
You must install the App on the same device as your POS application that is integrating the Payrails In-person SDK.
Contact Payrails to get access to the Payrails In-person Payment App APK to install on your Android device.
- If not already done, enable developer mode and USB debugging on your Android device
- Install the APK on your device
Step 2: Run your first test transactions
Without any coding, you can immediately familiarise yourself with Payrails In-person by running some test transactions with the In-person Test App. Later in Step 3, you'll learn how to integrate Payrails In-person with your own POS App.
2.1 Install the In-person Test App
Payrails provides a simple test application that already integrates the In-person Payment SDK and can be installed on your Android device alongside the Payrails In-person Payment App.
Contact Payrails to get access to the Payrails In-person Test App APK to install on your Android device.
- If not already done, enable developer mode and USB debugging on your Android device
- Install the APK on your device
2.2 Create an execution via the Payrails Portal
In the portal, navigate to Workflows > Test In-Person payments to quickly run transactions with the In-person Test App and - later - test your integration with the Payrails In-person Payment SDK and App. The page allows you to call the client init endpoint to simulate a call made by your backend. It then exposes different utilities to help you test In-person payments (copy client init response, scan QR codes, ...).
Enter e.g. 1 EUR as the amount and click Start to generate the QR codes:
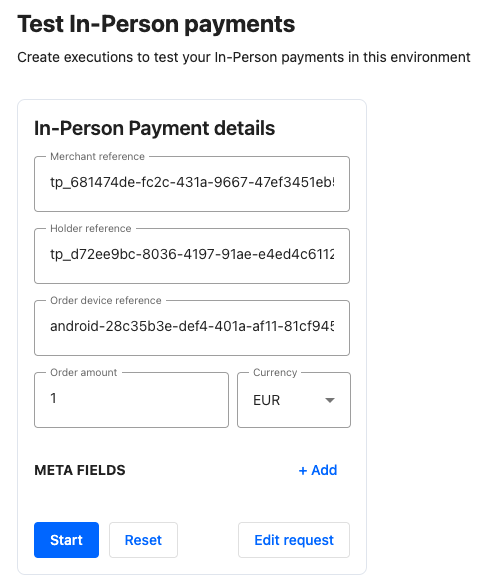
Test In-person Payments page in the portal
You should then see two QR codes:
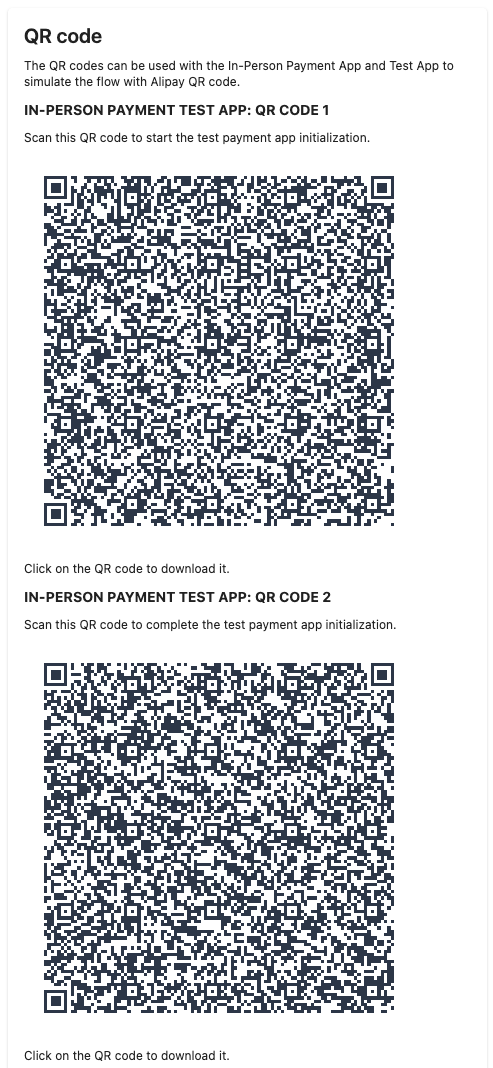
QR codes with client init details, to initialize the In-person Test App
2.3 Scan the QR Codes via the Test App
Once installed, open the test application and you should see this screen:
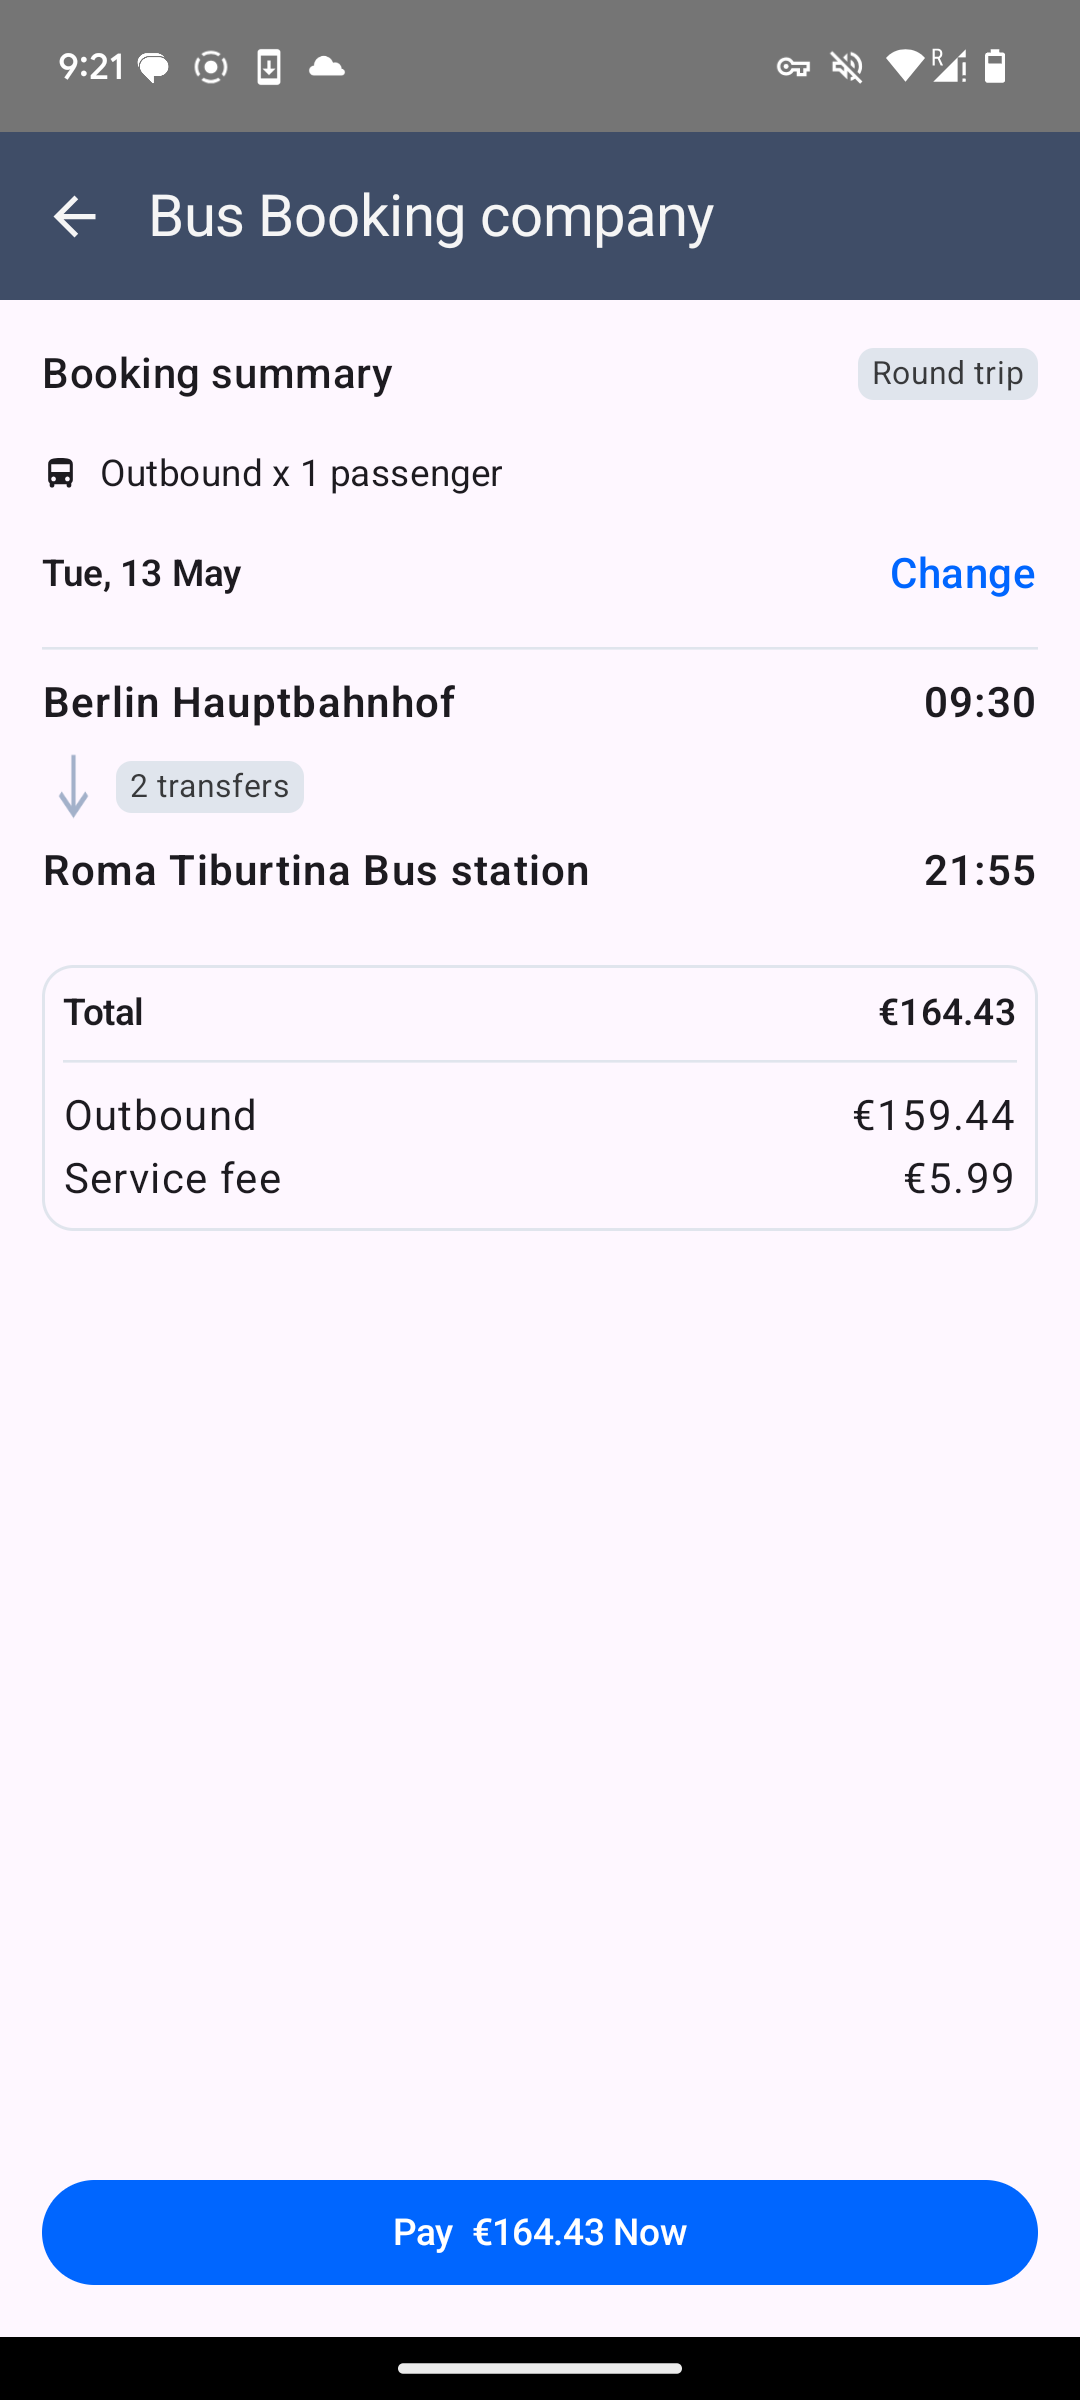
In-person Test App Main screen
Tap on the back arrow on the top left to open the hidden settings screen:
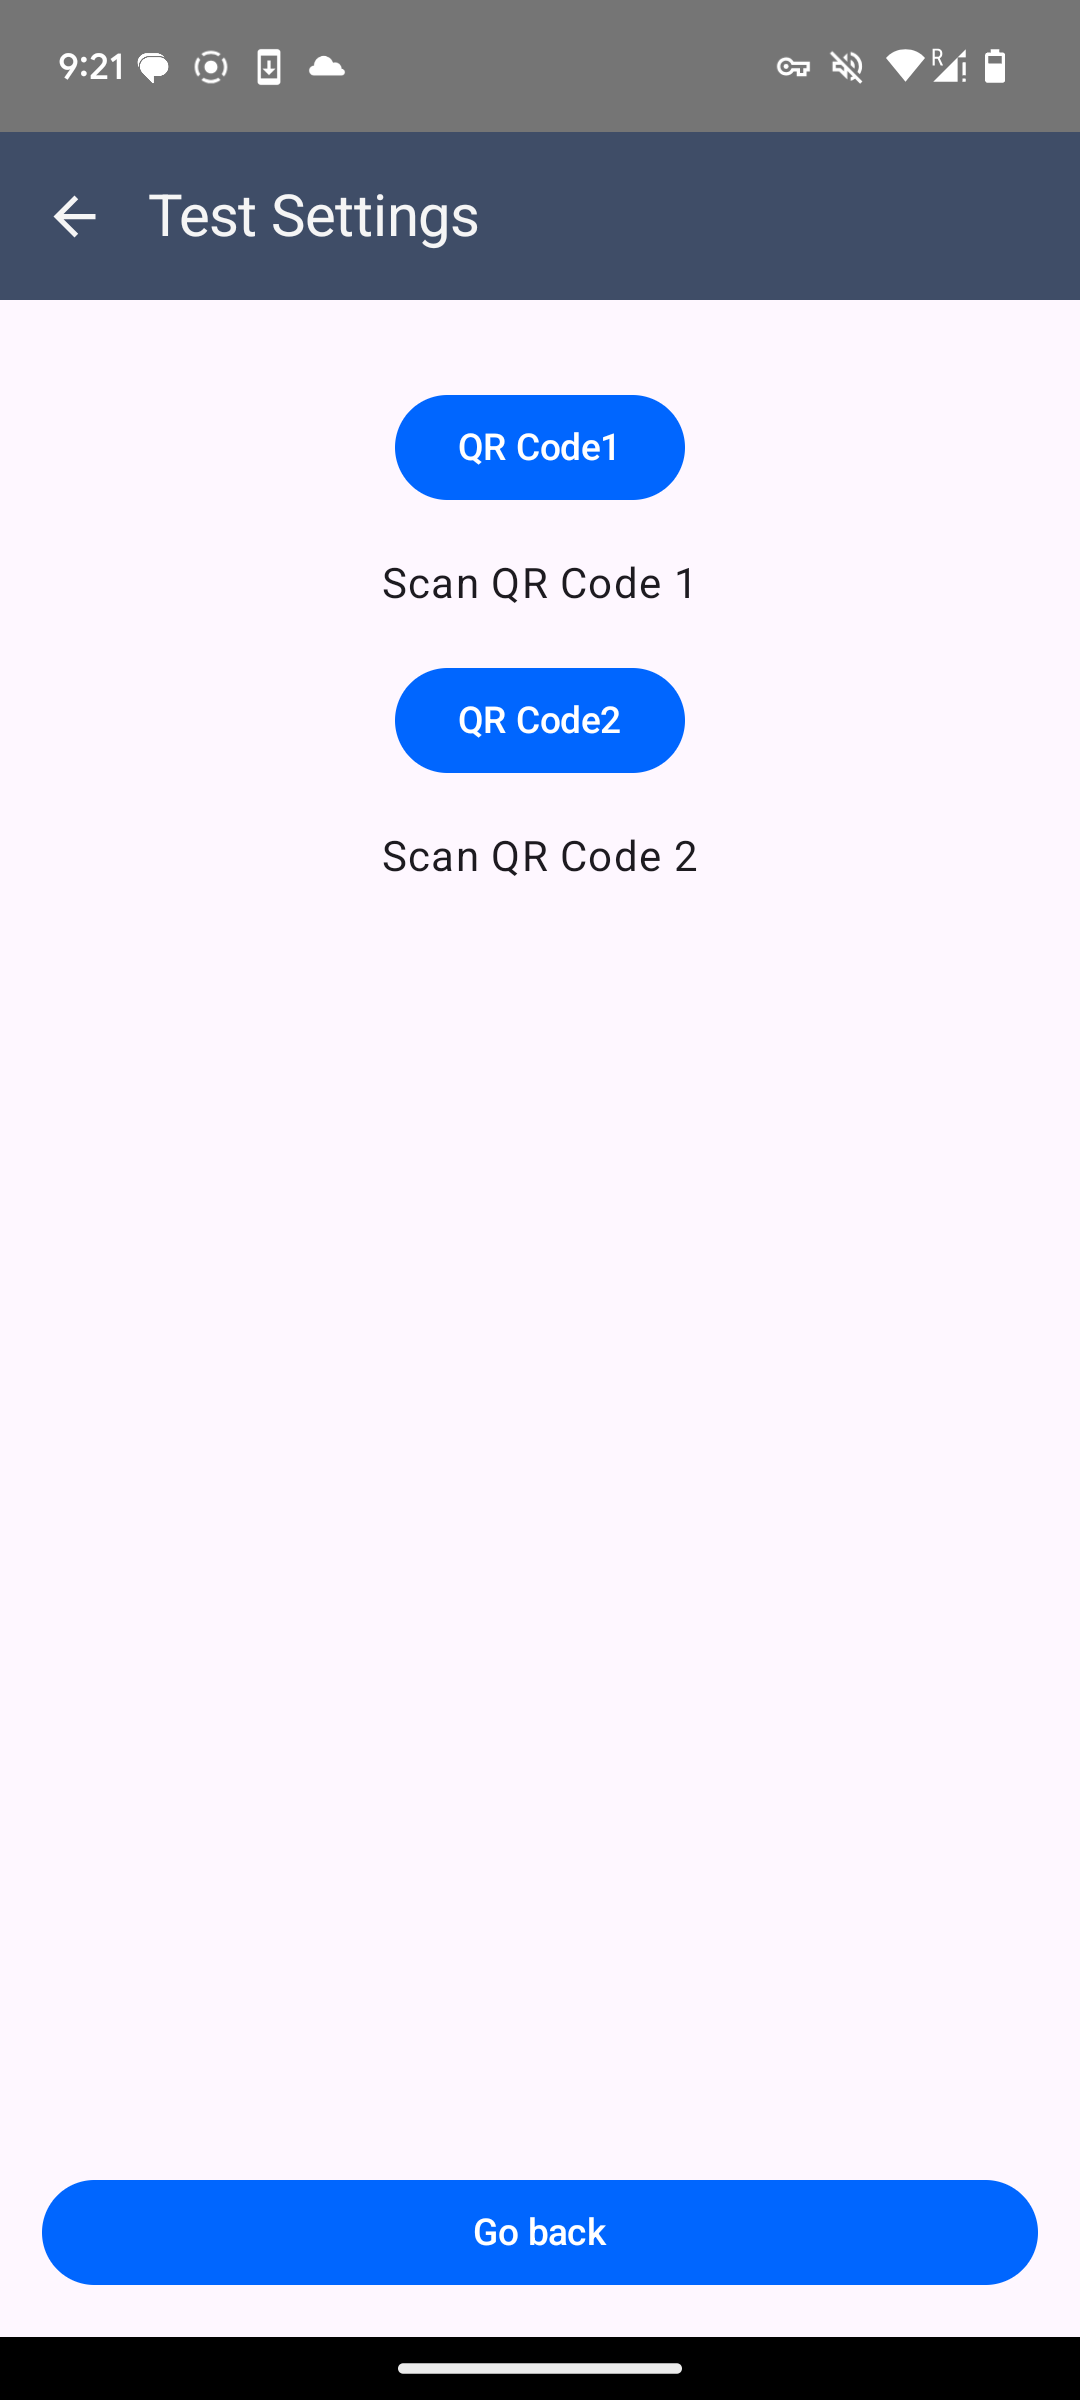
In-person Test App Settings screen
Click on QR code 1 and QR code 2 to scan the respective QR codes displayed in the Test In-person payments page on the portal.
Why scan the QR codes to initialize the In-person Test app?The Test In-persons payments page calls the client init call and exposes the details via QR code to make it easy to setup the Test app. This simulates the call to your own backend that should call the client init endpoint on Payrails backend.
Once scanned, go back to the main screen and click on the button to accept the offer and trigger a In-person payments via Payrails In-person SDK and App.
2.4 Run a Card payment
To test card payments, select Card payment option.
- If you run our debug Payment App APK, the card payment is simulated and will succeed by default. This allows to test card payments without the need of a physical test card.
- If you run our release Payment App APK, you will need a physical test card to be able to test the card payments. Reach out to us if you don't have a test card yet.
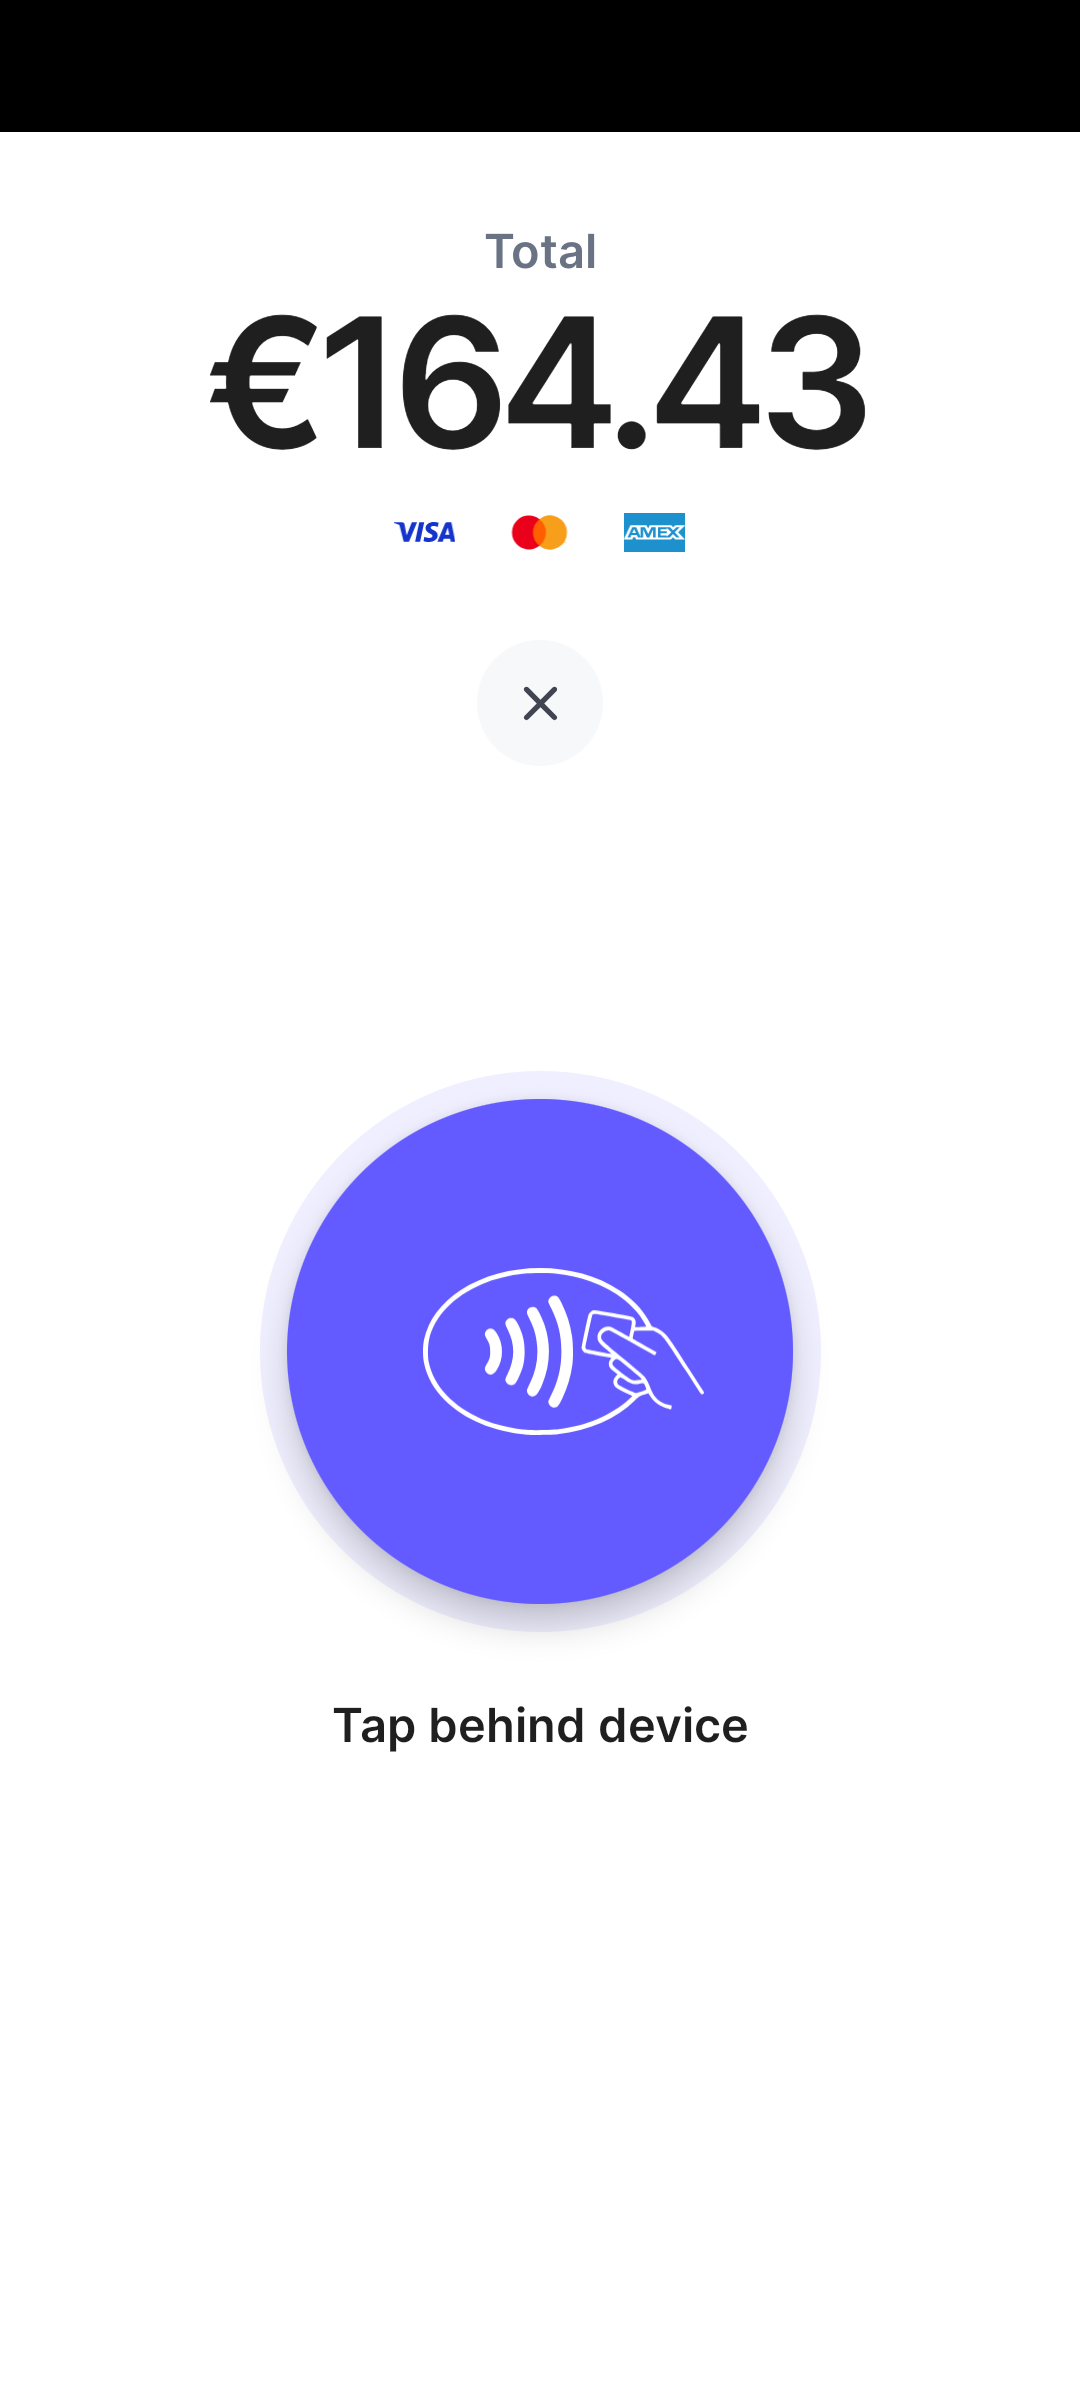
Tap the test card behind the phone to pay with card
2.5 Run an Alipay QR Code payment
The Test In-person Payments page also generates a new Alipay QR Code that you can scan with the In-person Payment App to test Alipay QR code In-person payments.

Select Alipay (QR Code) payment option and scan the QR code
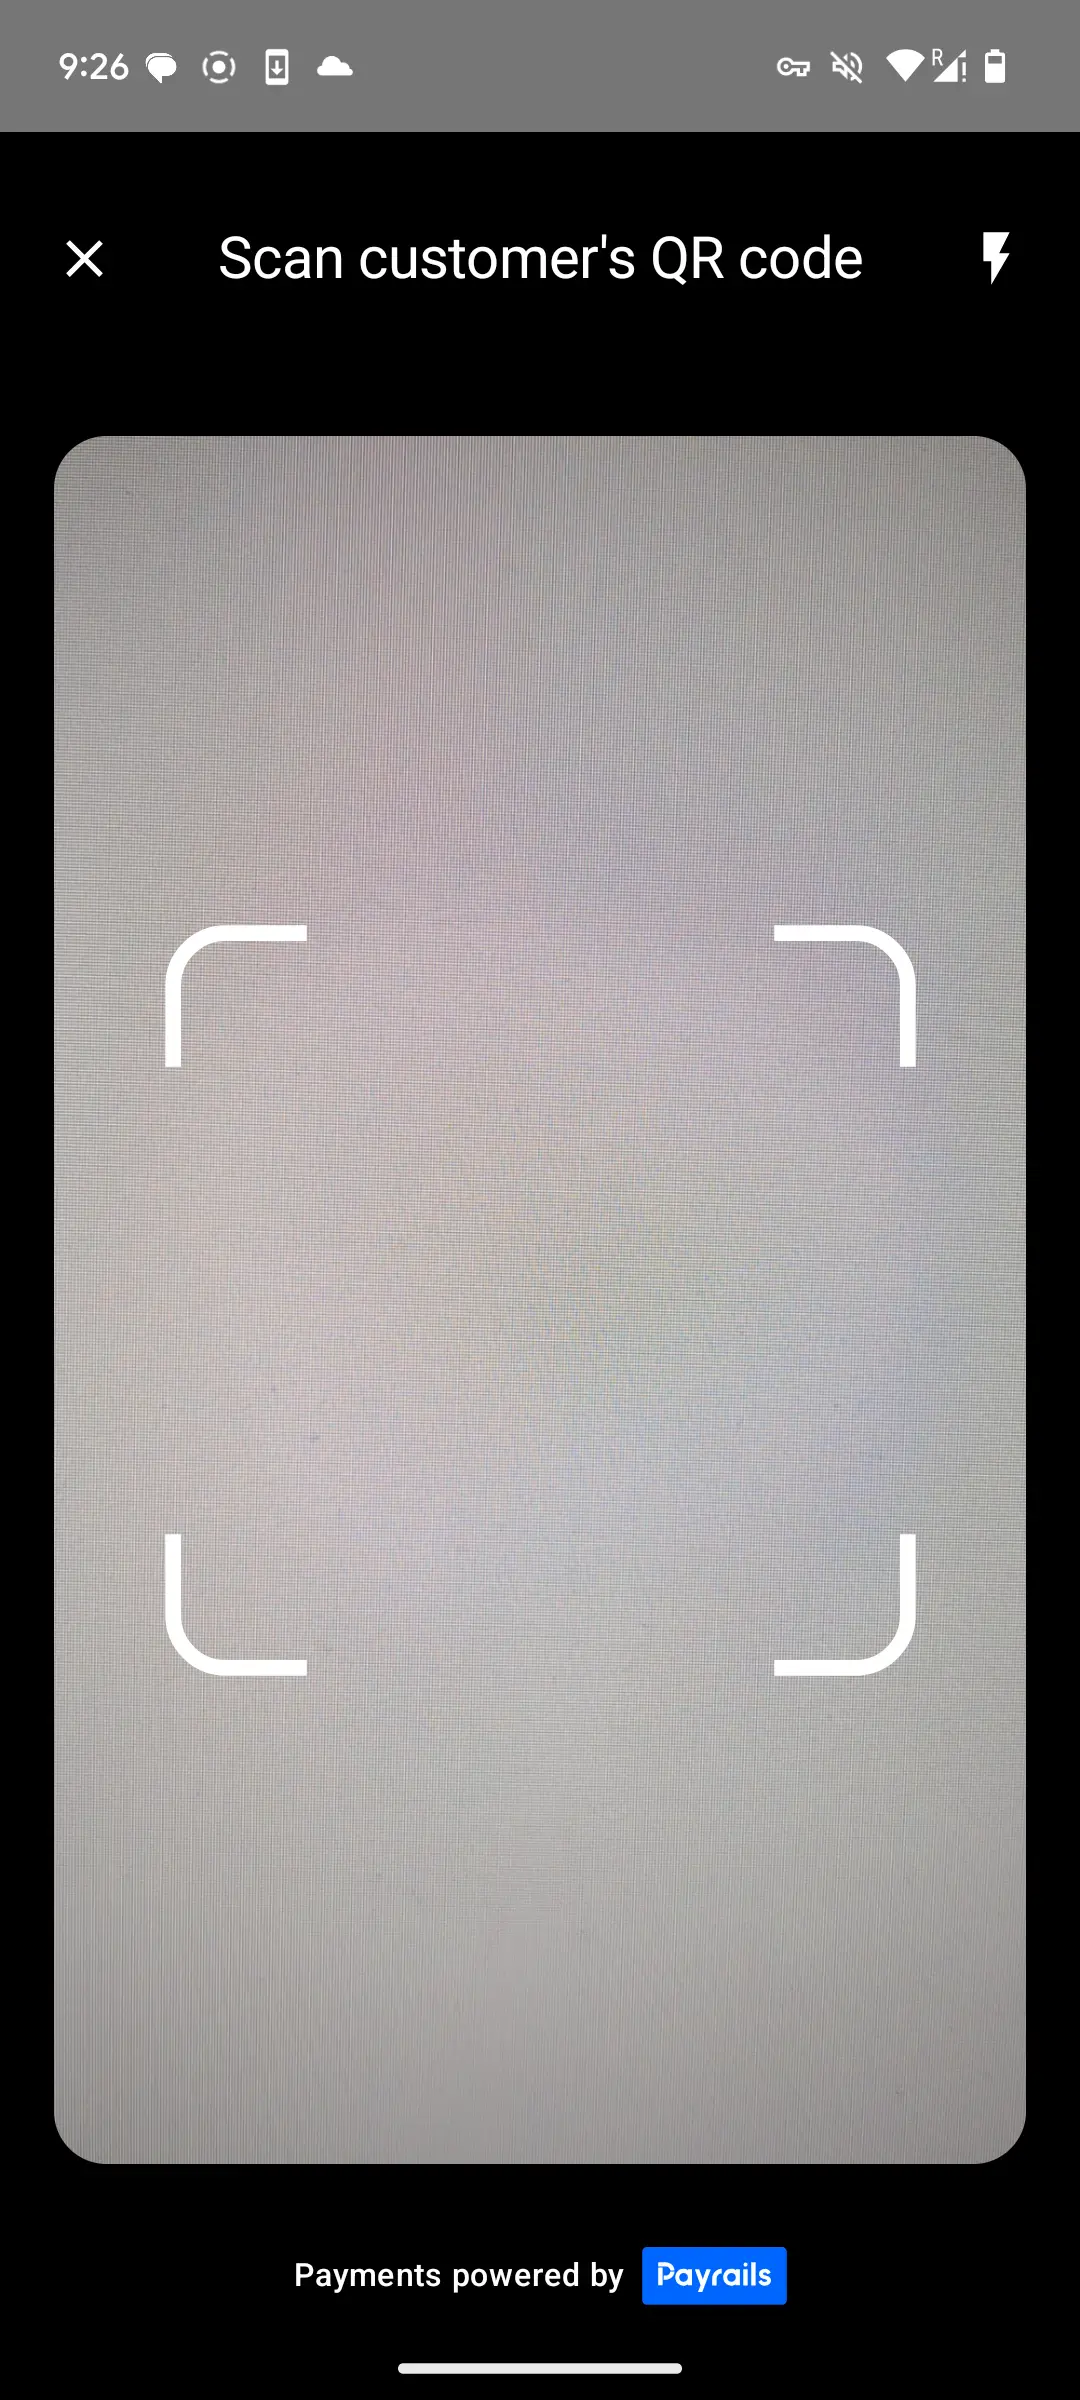
Scan the QR code from the Test In-person payments page to pay with Alipay QR code
You should get an approved transaction after a couple of seconds.
Step 3: Integrate Payrails In-person with your own POS
Now that you know how everything will look like for your store staff and shoppers, it's time to integrate Payrails In-person with your own POS app.
3.1 Integrate the In-person SDK
Include the SDK
You can fetch the SDK from Maven Central by including the following dependency:
implementation("com.payrails.android:inperson:0.6.0")implementation "com.payrails.android:inperson:0.6.0"If the dependency cannot be resolved, make sure that Maven Central is part of your repositories:
mavenCentral()Initialize the SDK
Use the init() method to initialize a Payrails client as shown below.
val config = PayrailsInPersonSDK.Configuration(
	data = <data>, // Data from the response of the client init call
)
val payrailsClient = Payrails.init(config)
import com.payrails.android.inperson.sdk.*;
// ...
String version = "<version>"; // Version from the response of the client init call
String data = "<data>"; // Data from the response
PayrailsInPersonSDK.Configuration.InitData initData
= new PayrailsInPersonSDK.Configuration.InitData(version, data);
PayrailsInPersonSDK.Configuration config
= new PayrailsInPersonSDK.Configuration(initData,null);
PayrailsInPersonSDK payrailsClient = PayrailsInPersonSDK.Companion.init(config);For a proper production deployment, your backend needs to call the Initialize a client SDK endpoint to define amount, currency and further transaction-related settings. You simply have to forward the response to SDK via your POS App.
To quickly start running test transactions without having to change your backend yet, you can also generate the required init data via the Payrails Portal.
Launch the Payrails Payment App
From current context
Launches Payrails In-person payment app from the current context.
payrailsClient.launchPaymentApp(this)payrailsClient.launchPaymentApp(this, null);With authorization result handler (recommended)
It is recommended to define a handler to retrieve the result of the authorization and handle potential errors inside your own POS application.
The Payrails' In-person Payment App returns 2 results:
AUTHORIZE_RESPONSE: When the authorization was successful or when the authorization failed with some business error.ERROR: When the authorization failed, even in case of some technical error.
import com.payrails.android.inperson.sdk.AuthorizeResponse
import com.payrails.android.inperson.sdk.ActivityOutput.RESULT

//...

// Declare the handler in your activity
val authorizeHandler =
        registerForActivityResult(ActivityResultContracts.StartActivityForResult()) { result ->
            val response = result.data?.getParcelableExtra(RESULT, AuthorizeResponse::class.java)
            if (response != null && response.isSuccess()) {
                // Logic when payment is successful (ex: display payment success screen)
            } else {
                // Handle payment failed / error
                val errorMessage = response?.errorMessage
                Log.e("PayrailsInPersonSDK", "Payment failed: $errorMessage")
            }
        }
// ...
// Launch Payrails' In-person Payment App with a registered handler
payrailsClient.launchPaymentApp(activityLauncher = authorizeLauncher)
import com.payrails.android.inperson.sdk.AuthorizeResponse
import com.payrails.android.inperson.sdk.ActivityOutput
//...
ActivityResultContracts.StartActivityForResult contract = new ActivityResultContracts.StartActivityForResult();
// Declare the handler in your activity to handle approved and failed payments
ActivityResultCallback<ActivityResult> authorizeHandler =
new ActivityResultCallback<ActivityResult>() {
@Override
public void onActivityResult(ActivityResult result) {
AuthorizeResponse response = null;
if(result.getData() != null) {
if (Build.VERSION.SDK_INT >= Build.VERSION_CODES.TIRAMISU) {
response = result.getData().getParcelableExtra(ActivityOutput.RESULT, AuthorizeResponse.class);
}
}
if (response != null && response.isSuccess()) {
Log.i("PayrailsInPersonSDK:", "success");
// Logic when payment is successful (ex: display payment success screen)
} else {
String errorMessage = "";
if(response != null) {
errorMessage = response.getErrorMessage();
}
Log.i("PayrailsInPersonSDK:", "Payment failed: " + errorMessage);
// Handle payment failed / error
}
}
};
// ...
// Launch Payrails' In-Person Payment App with a registered handler
ActivityResultLauncher<Intent> authorizeLauncher = registerForActivityResult(contract, authorizeHandler);
payrailsClient.launchPaymentApp(this, authorizeLauncher);
This requires a new dependency to Androidx Activity:
androidx.activity:activity-ktx:<version>androidx.activity:activity:<version>You'll also need to make sure to include the SDK classes in your proguard-rules.pro:
# Keep the SDK's Parcelable and classes
-keep class com.payrails.android.inperson.** { *; }

-keep class com.payrails.android.inperson.sdk.AuthorizeResponse implements android.os.Parcelable { *; }
-keepclassmembers class * implements android.os.Parcelable {
    static ** CREATOR;
}
3.2 Create the initialisation data via the Portal (Testing only)
The Test In-person payments page allows you to quickly copy the response from the client init call and directly test the SDK initialization.
For this, click on Copy Client Init Response to get the response json in your clipboard

You can then use that json to initialize the SDK with a few lines of code only
// This example uses kotlinx serialization - replace with your json serialization library
val json = Json.new()
// Client init response copied from the portal
val clientInitResponse = """{"version":"1.0.0","data":"eyJhbGciOiJSUzI..."}"""
val clientInitData = json.decodeFromString<InitData>(clientInitResponse) PayrailsInPersonSDK.init(Configuration(initData = clientInitData))
import org.json.JSONException;
import org.json.JSONObject;
// ...
String clientInitResponse = "{\"version\":\"1.0.0\",\"data\":\"\"}";
JSONObject payload = null;
String version = null;
String data = null;
try {
payload = new JSONObject(clientInitResponse);
version = payload.getString("version");
data = payload.getString("data");
} catch (JSONException e) {
// Handle exception
}
PayrailsInPersonSDK.Configuration.InitData initData
= new PayrailsInPersonSDK.Configuration.InitData(version, data);
PayrailsInPersonSDK.Configuration config
= new PayrailsInPersonSDK.Configuration(initData,null);
PayrailsInPersonSDK payrailsClient = PayrailsInPersonSDK.Companion.init(config);Make sure to always replace clientInitResponse with the latest response you generated via the Portal, i.e. copy and paste the response into Android Studio and re-run the app.
3.3 Create the initialisation data via your Backend & receive Webhooks
For production, the backend of your POS software needs to integrate with the Payrails Backend, with your API credentials and MTLS certificate, to automatically create the Execution and retrieve the required data to initialise the Payrails SDK by calling the Initialize client SDK endpoint.
{
    "type": "dropIn",
    "holderReference": "customer-001",
    "workflowCode": "payment-acceptance",
    "workflowConfigVersion": "154884",
    "merchantReference": "order-001",
    "meta": {
        "order": {
            "processingType": "InPerson"
        },
        "vendor": {
            "device": {
                "reference": "android-device-000"
            },
            "location": {
                "reference": "location-XYZ"
            }
        }
    },
    "amount": {
        "value": "42.42",
        "currency": "EUR"
    }
}
By providing a merchantReference, you can query the status of the execution/payment later on.
Your Webhook server also receives notifications that inform you about the outcome of each payment, just like for online payments via Payrails.
3.4 Extend your receipt to include required payment data
In order to comply with card scheme and wallet requirements, you will need to add additional information related to the payment to your receipt.
Payrails In-person is currently in preview. Come back soon for code samples for receipts
Optional: Implement refunds
Payrails In-person is currently in preview. Come back soon for code samples for refunds
Updated 5 months ago