SDK Documentation
This guide walks you through the steps allowing you to use and test the payouts through our SDK
Prerequisites
- Proper payout workflow configuration
Steps
1. Install SDK
Install latest payrails SDK version 5.29.6+ -- https://www.npmjs.com/package/@payrails/web-sdk
2. Perform client init to Payrails API
Create a new SDK client init call through the client init endpoint
{
  "holderReference": "holder-6e5ac34d-4174-4d0f-9ce7-3d4501f65e1d",
  "type": "dropIn",
  "workflowCode": "payout",
  "merchantReference": "ref-4e925c51-335b-4f78-9696-803b95573cd0",
  "meta": {
      "order": {
          "placement": {
              "country": {
                  "code": "DE"
                }
            }
        }
    },
  "amount": {
      "currency": "EUR",
      "value": "1"
    },
  "workspaceId": "df9f48ce-7390-42eb-9107-d766d688603a"
}
Parameters Reference
x-idempotency-key– Unique identifier to prevent duplicate requests (Required)workflowCode– Workflow code related to the payouts workflow configuration (Required)holderReference– Beneficiary Instrument holdermerchantReference– Merchant internal reference attached to the execution and payout (Required)workspaceId– Workspace ID used to set the workflow configuration (Required)
Required Metafields
order.placemenet.country.code– The country code associated with the beneficiary bank account
3. Initialize Payrails SDK
Initialize the Payrails SDK using the configuration response in step 2
Refer to public documentation here for more info: https://docs.payrails.com/docs/sdk
import '@payrails/web-sdk/payrails-styles.css';
import Payrails from "@payrails/web-sdk";

const payrailsClient = Payrails.init(config, options);
4. Define and mount Dynamic Element
Define an element to mount the instrument form to
<div id="dynamic-element" />Initialize dynamic element using your configuration, it’s important to note that dynamic element is async method. Make sure to handle the rendering promise
We recommend showing a loader or a spinner while the form loads.
const dynamicElementForm = await payrails.dynamicElement({
   paymentMethod: {
      paymentMethodCode: "bankAccount",
  },
  styles: { ...styles },
  translations: { ...translations }
})
Refer for the SDK element documentation for more details on the translations and styling configuration
Expected UI
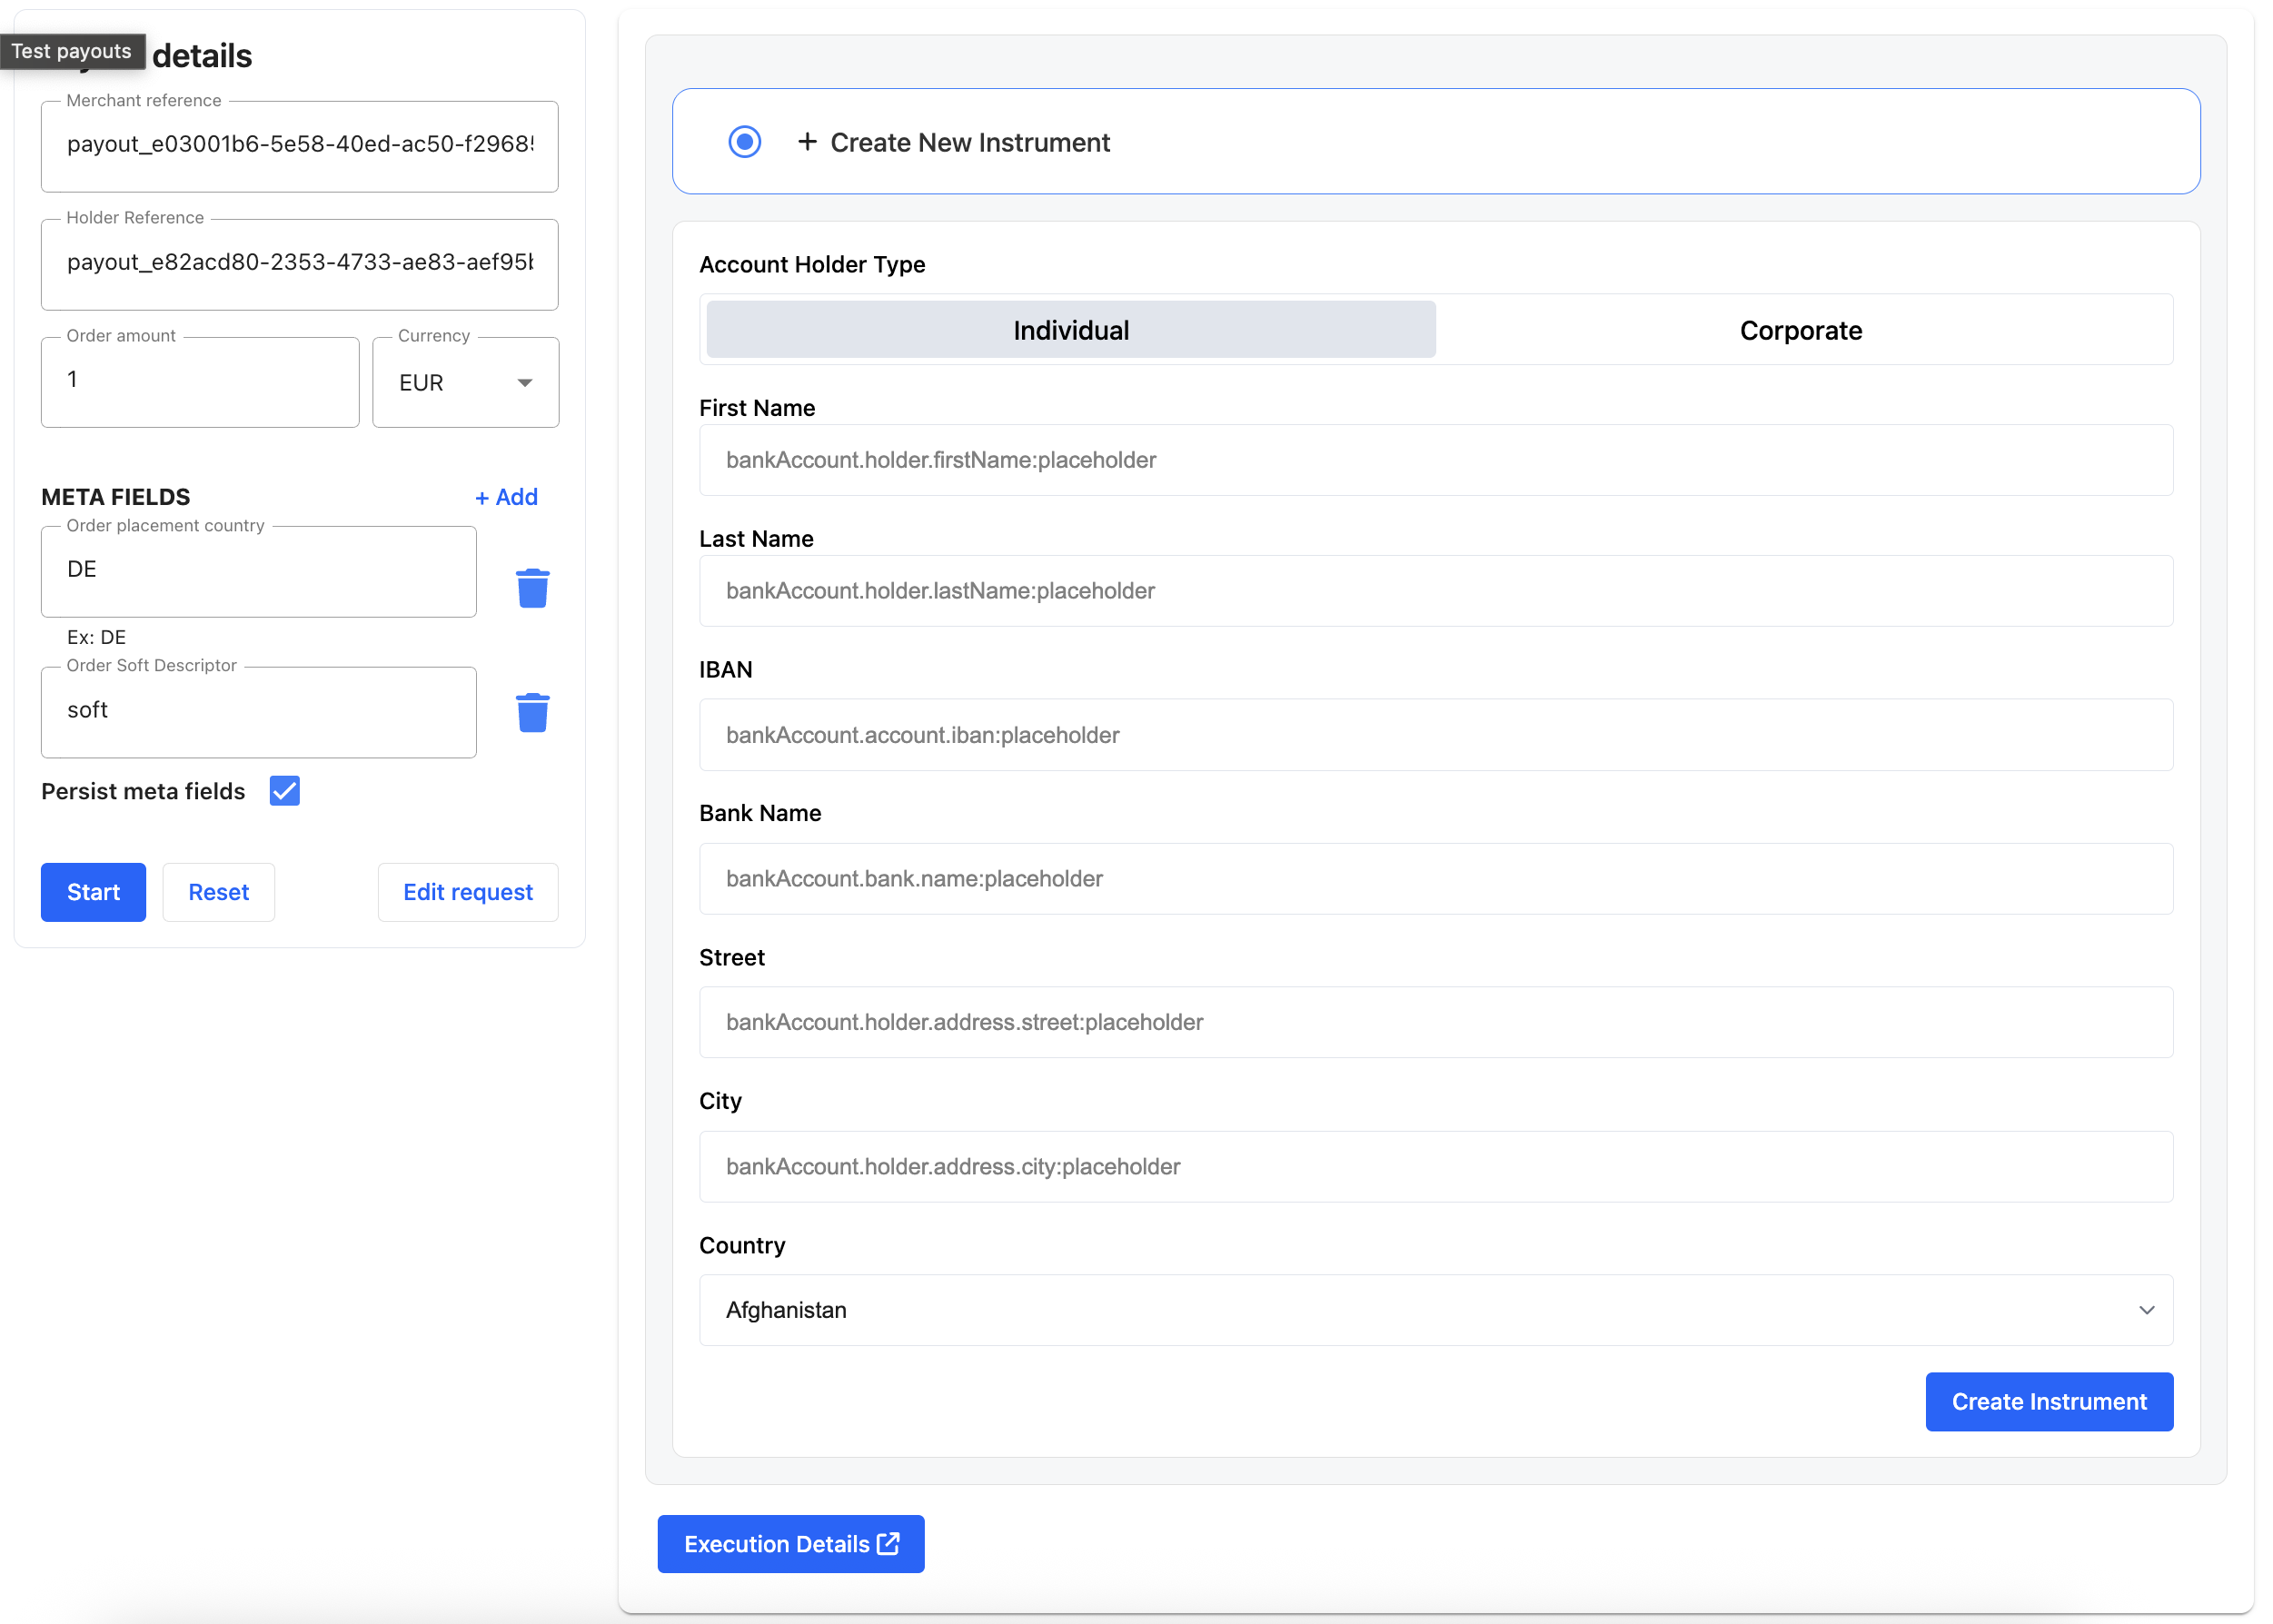
5. Render tokenize button
Payrails SDK doesn’t restrict your usage when it comes to rendering the tokenize button. UI definition of button is left to you
<button id="tokenize-button">Create Instrument</button>
<script>
// Get the button by its ID
const button = document.getElementById("tokenize-button");
// Add a click event listener
button.addEventListener("click", function() {
dynamicElementForm.tokenize().then((tokenizedInstrument) => {
// Handle new instrument
}).catch((error) => {
console.error(error);
});
});
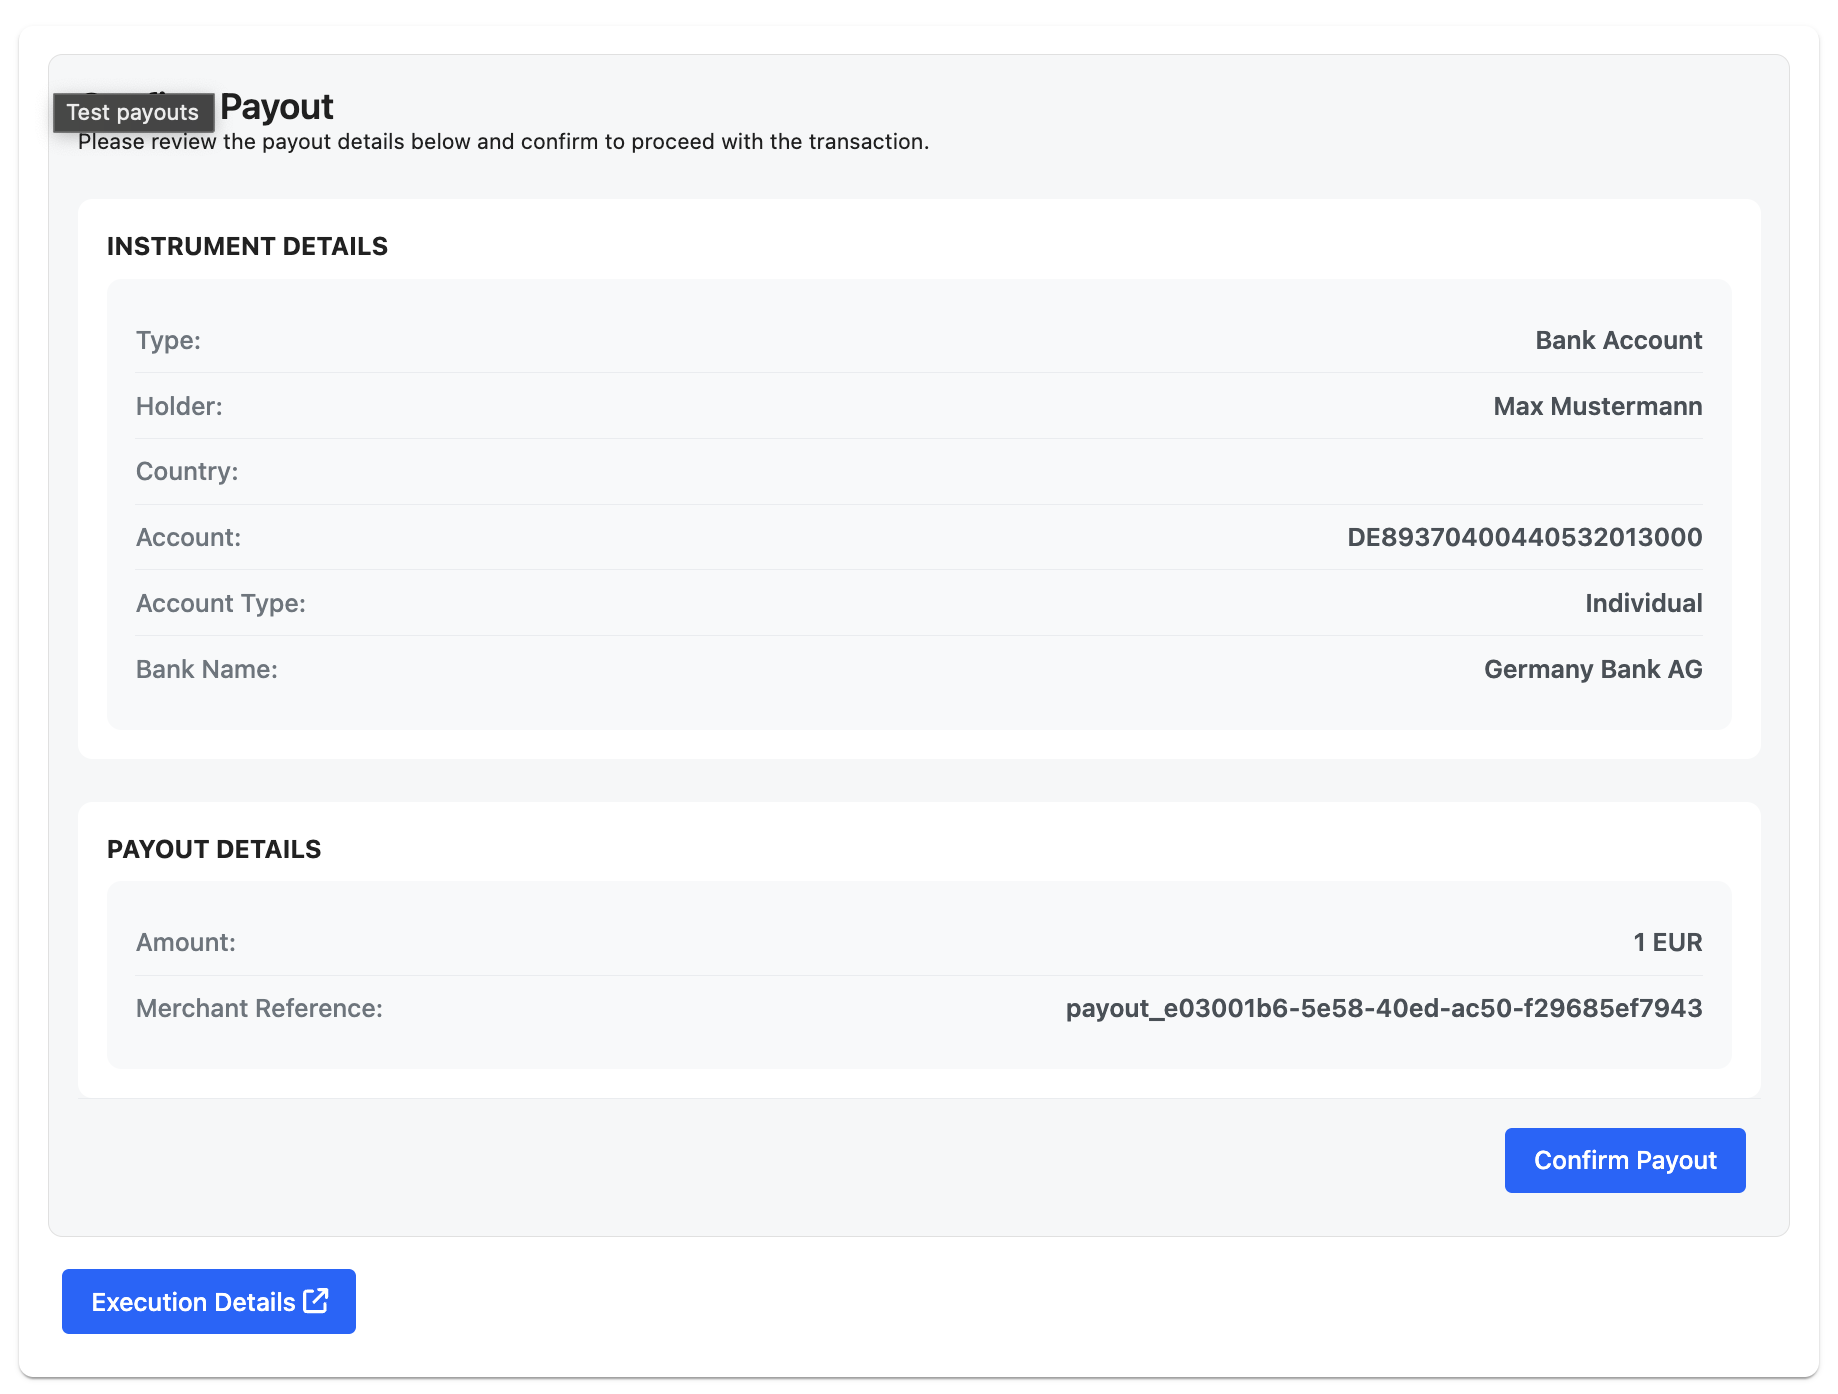
</script>After tokenization we return back the new instrument details. You then use these details to render a payout confirmation page with the instrument details.
5.1 Set Instrument
Before executing the payout make sure to set the instrument in payrails SDK. This tells payrails SDK to use that instrument for the payout action.
payrails.setState({ instrument: tokenizedInstrument });We strongly recommend showing a confirmation screen with all instrument and payout details before executing the payout. Allowing the beneficiary to check the transaction details one last time.
6. Execute the payout using headless SDK API
- The intended instrument must be set in step 5.1
payrails.api({ operation: 'payout' });Flow
sequenceDiagram
    autonumber
    participant MC as Merchant Client
    participant MS as Merchant Server
    participant PS as Payrails Server

    Note over MC: 1) Install @payrails/web-sdk (v5.29.6+)
    MC->>MS: Request payout page

    rect rgb(245,245,245)
      Note over MS,PS: 2) Perform client init to Payrails API
      MS->>PS: POST /clientinit<br/>Headers: x-idempotency-key<br/>Body: holderReference, workflowCode=payout,<br/>merchantReference, workspaceId, meta.order.placement.country.code, amount
      PS-->>MS: Client init config (SDK config)
    end

    MS-->>MC: Serve page + embed SDK config

    Note over MC: 3) Initialize SDK
    MC->>MC: Payrails.init(config, options)

    Note over MC: 4) Mount Dynamic Element (async)
    MC->>PS: Create dynamicElement(paymentMethod=bankAccount, styles, translations)
    PS-->>MC: Renderable form (async)

    Note over MC: 5) Render "Create Instrument" button
    MC->>PS: dynamicElementForm.tokenize()
    PS-->>MC: tokenizedInstrument

    Note over MC: 5.1) Set instrument for payout
    MC->>MC: payrails.setState({ instrument: tokenizedInstrument })

    Note over MC,PS: 6) Execute payout using headless SDK
    MC->>PS: payrails.api({ operation: "payout" })
    PS-->>MC: Payout result (success / error)

    Note over MS,PS: (Optional) Webhooks/notifications to Merchant Server
Updated about 2 months ago