
NMI
A step-by-step guide for setting up your NMI integration in the Payrails portal.
Who should use this guideThis guide is intended for merchants who:
- Use Payrails as a payment orchestrator
- Use NMI to accept card, Apple Pay, and Google Pay payments
NMI is a server-to-server connector — there is no hosted payment page and no redirect flow for cards. Your shopper enters their card details directly in your checkout (via the Payrails SDK's secure fields), or pays with Apple Pay / Google Pay, and payment details are sent directly to NMI's API.
Create and configure an NMI integration in Payrails
Following are the initial steps to set up NMI:
- Log in to the Payrails portal.
- Go to Settings → Integrations → Payments.
- Select Add instance to create a new NMI integration configuration.
- Select the workspaces where this integration should be available.
About workspaces
Workspaces determine where this integration is available. They let you isolate provider setups by region or business line, or share the same configuration across multiple workspaces.
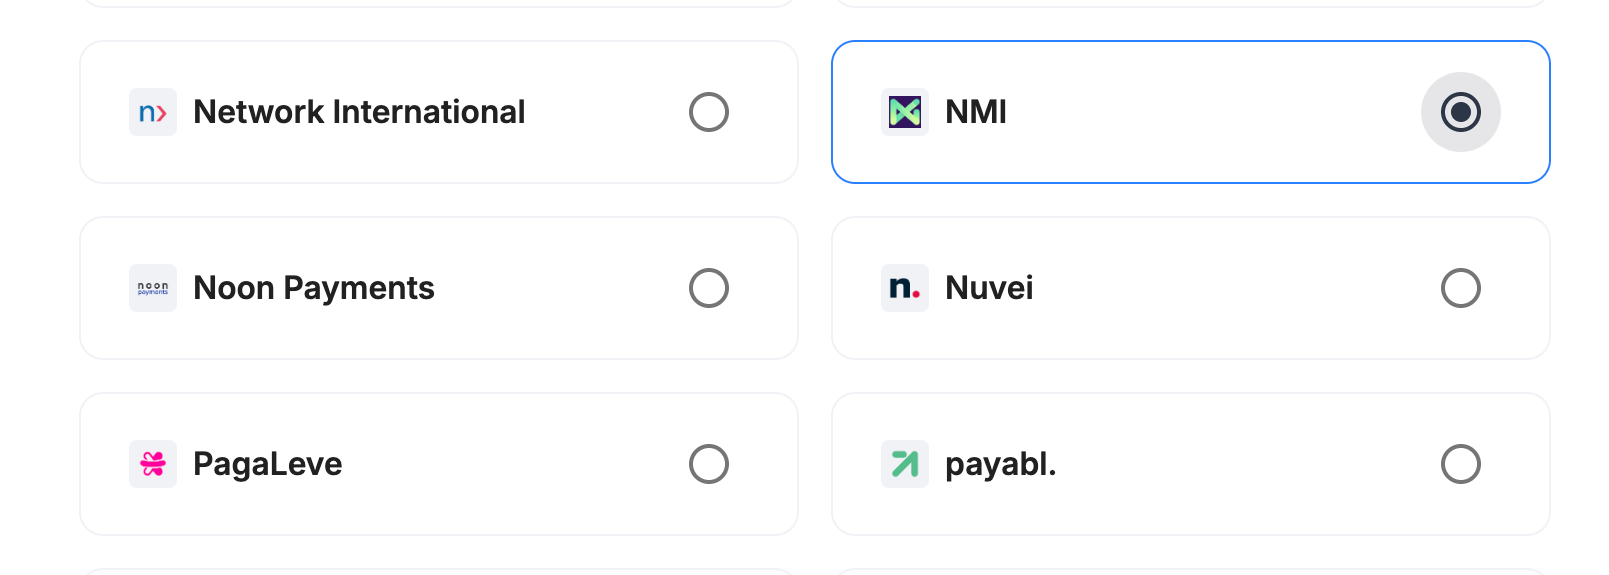
Step 2: Choose the provider
Select NMI and continue to the next step.
Step 3: Configure your NMI integration
What you'll need from NMIBefore you begin, make sure you have access to your NMI Merchant Portal and the following:
- Host — the NMI gateway hostname for your account (e.g.
secure.nmi.com, or a white-labeled domain if your NMI account is resold under a different brand)- API Key — a private security key, used to authorize every payment and maintenance call
- Webhook Signing Key (optional but recommended) — used to verify that notifications genuinely come from NMI
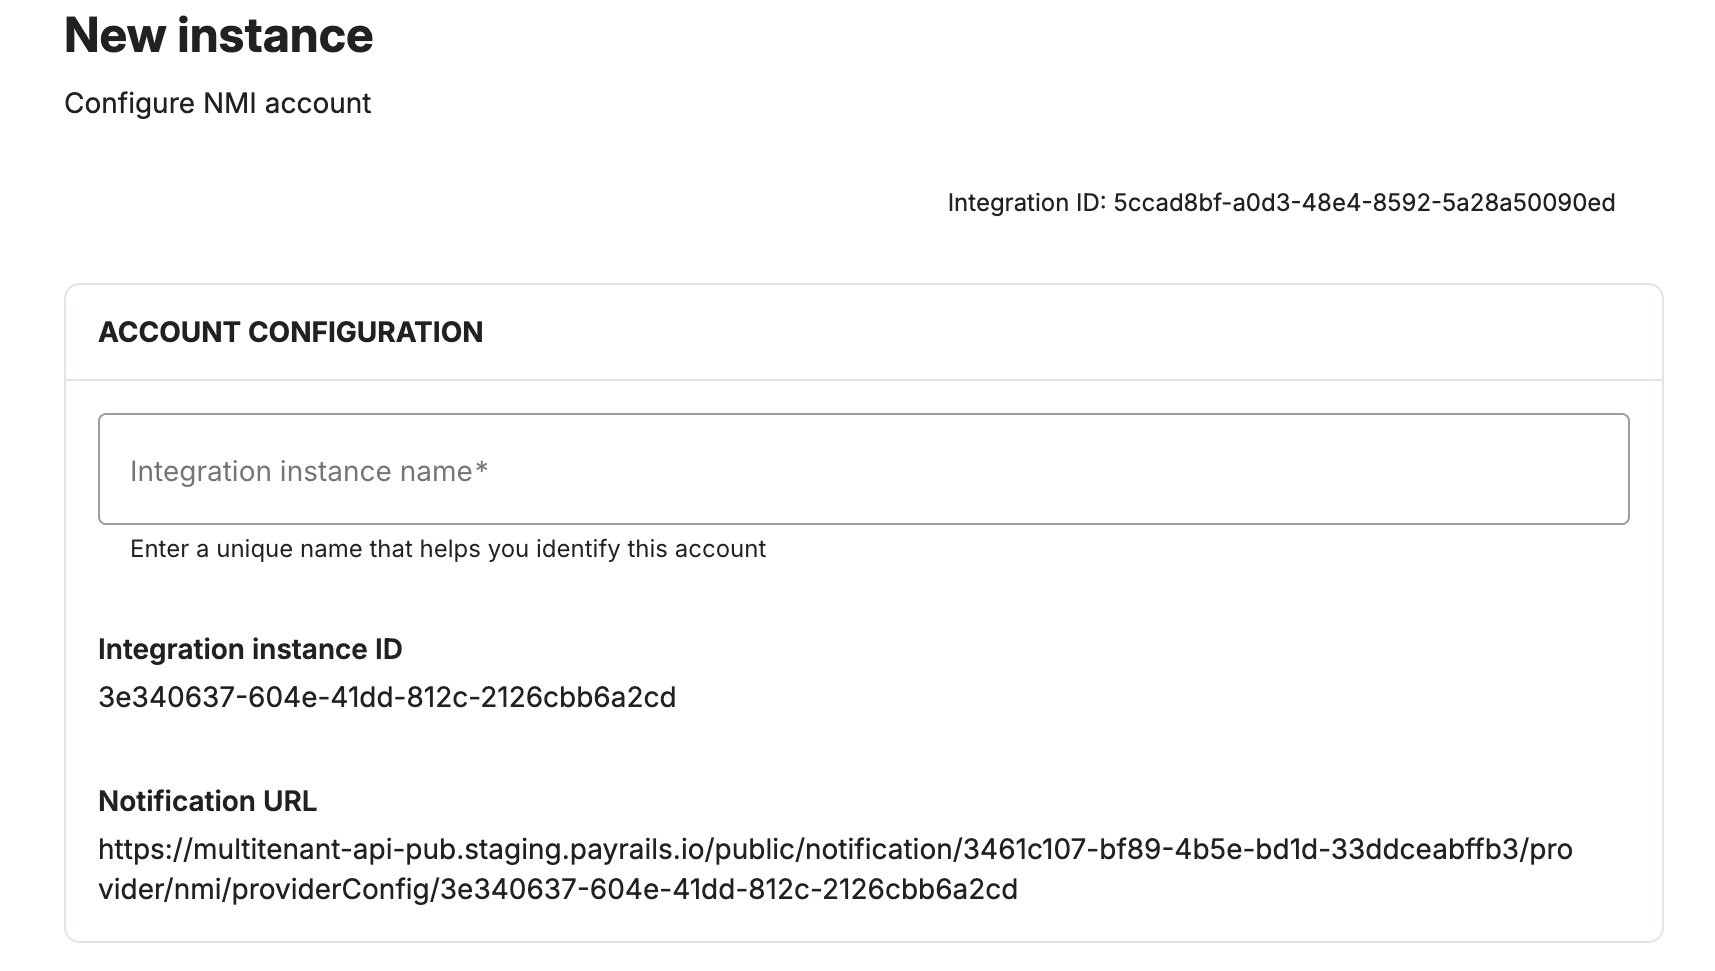
Integration instance name
An integration instance is a specific payment provider setup in Payrails. You can create multiple instances for each provider based on region, currency, or business needs. Choose a clear, consistent name, as it is used in routing.
In Payrails
- Enter an Instance name for your integration.
Account details — Host
In Payrails
- Enter the Host field with your NMI gateway hostname (e.g.
secure.nmi.com, or your white-labeled domain).
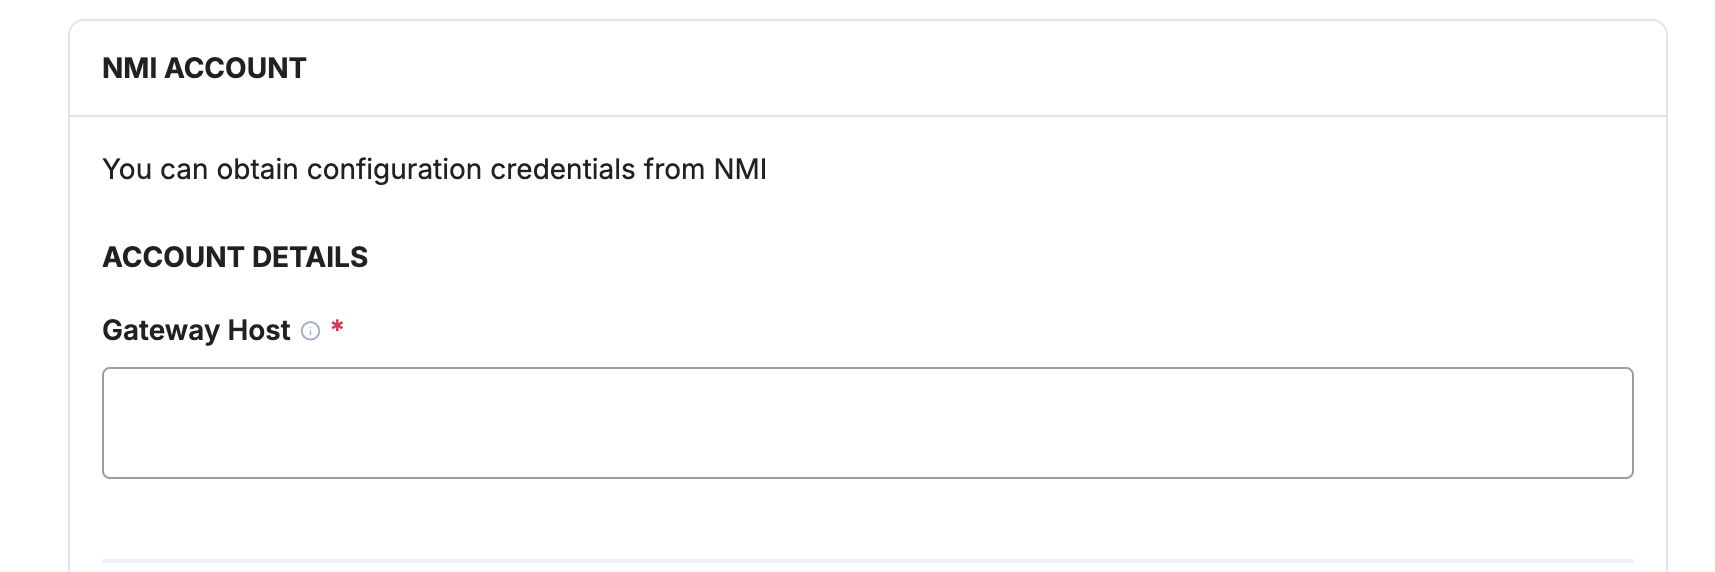
NMI's gateway is frequently white-labeled/resold, so there is no single fixed sandbox/production host — use the hostname provided for your specific NMI account.
API Key
In NMI
- Log in to the NMI Merchant Portal.
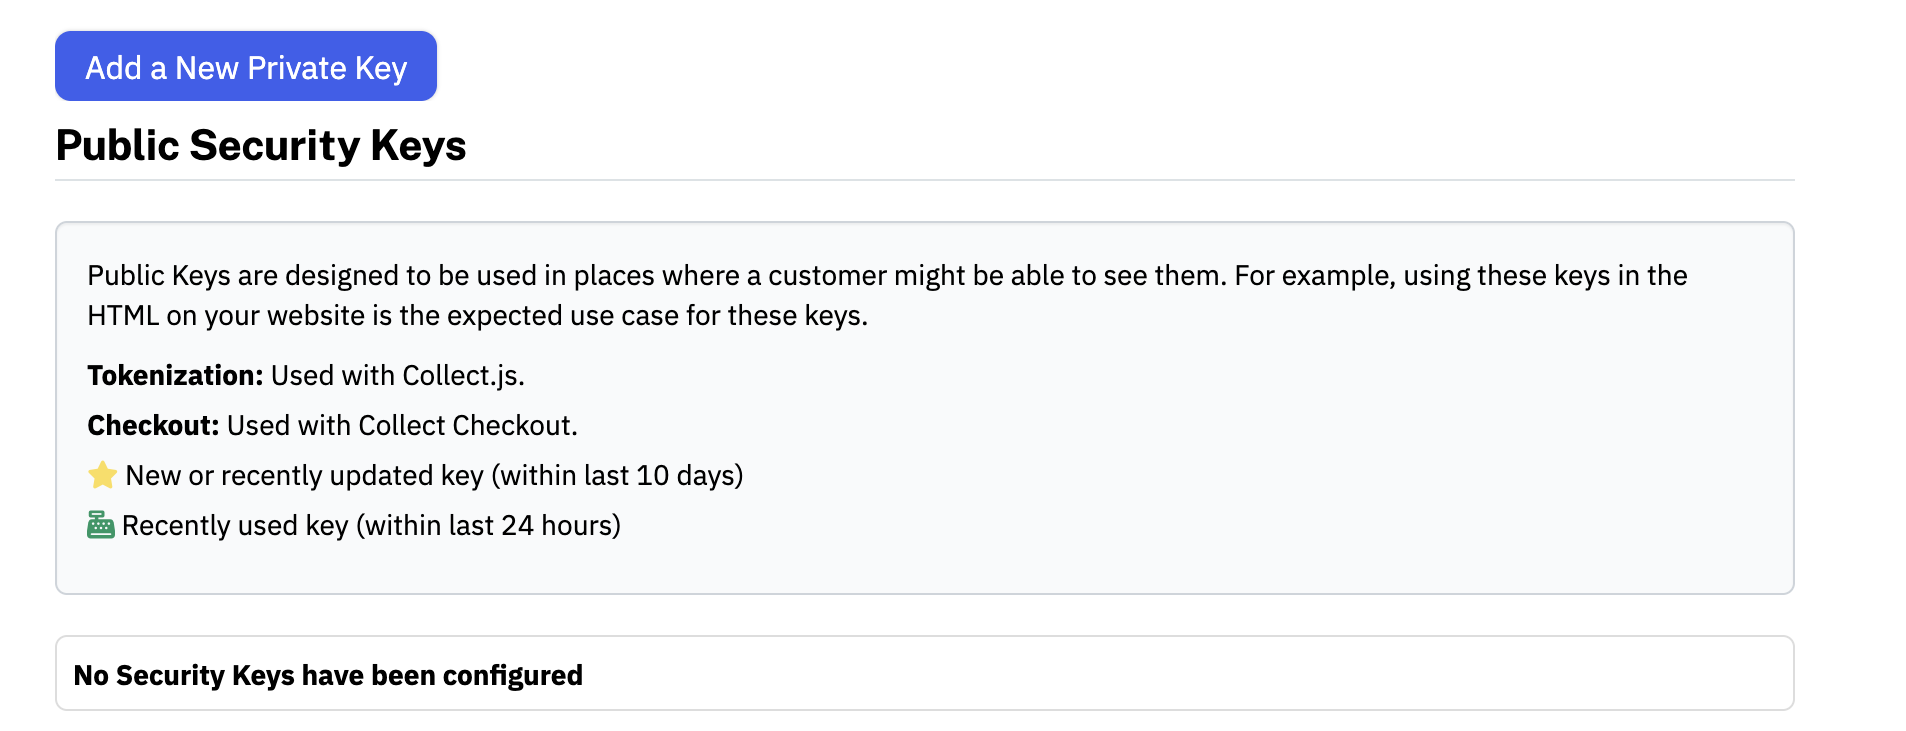
- Go to Settings → Security Options → Security Keys → Private Security Keys.
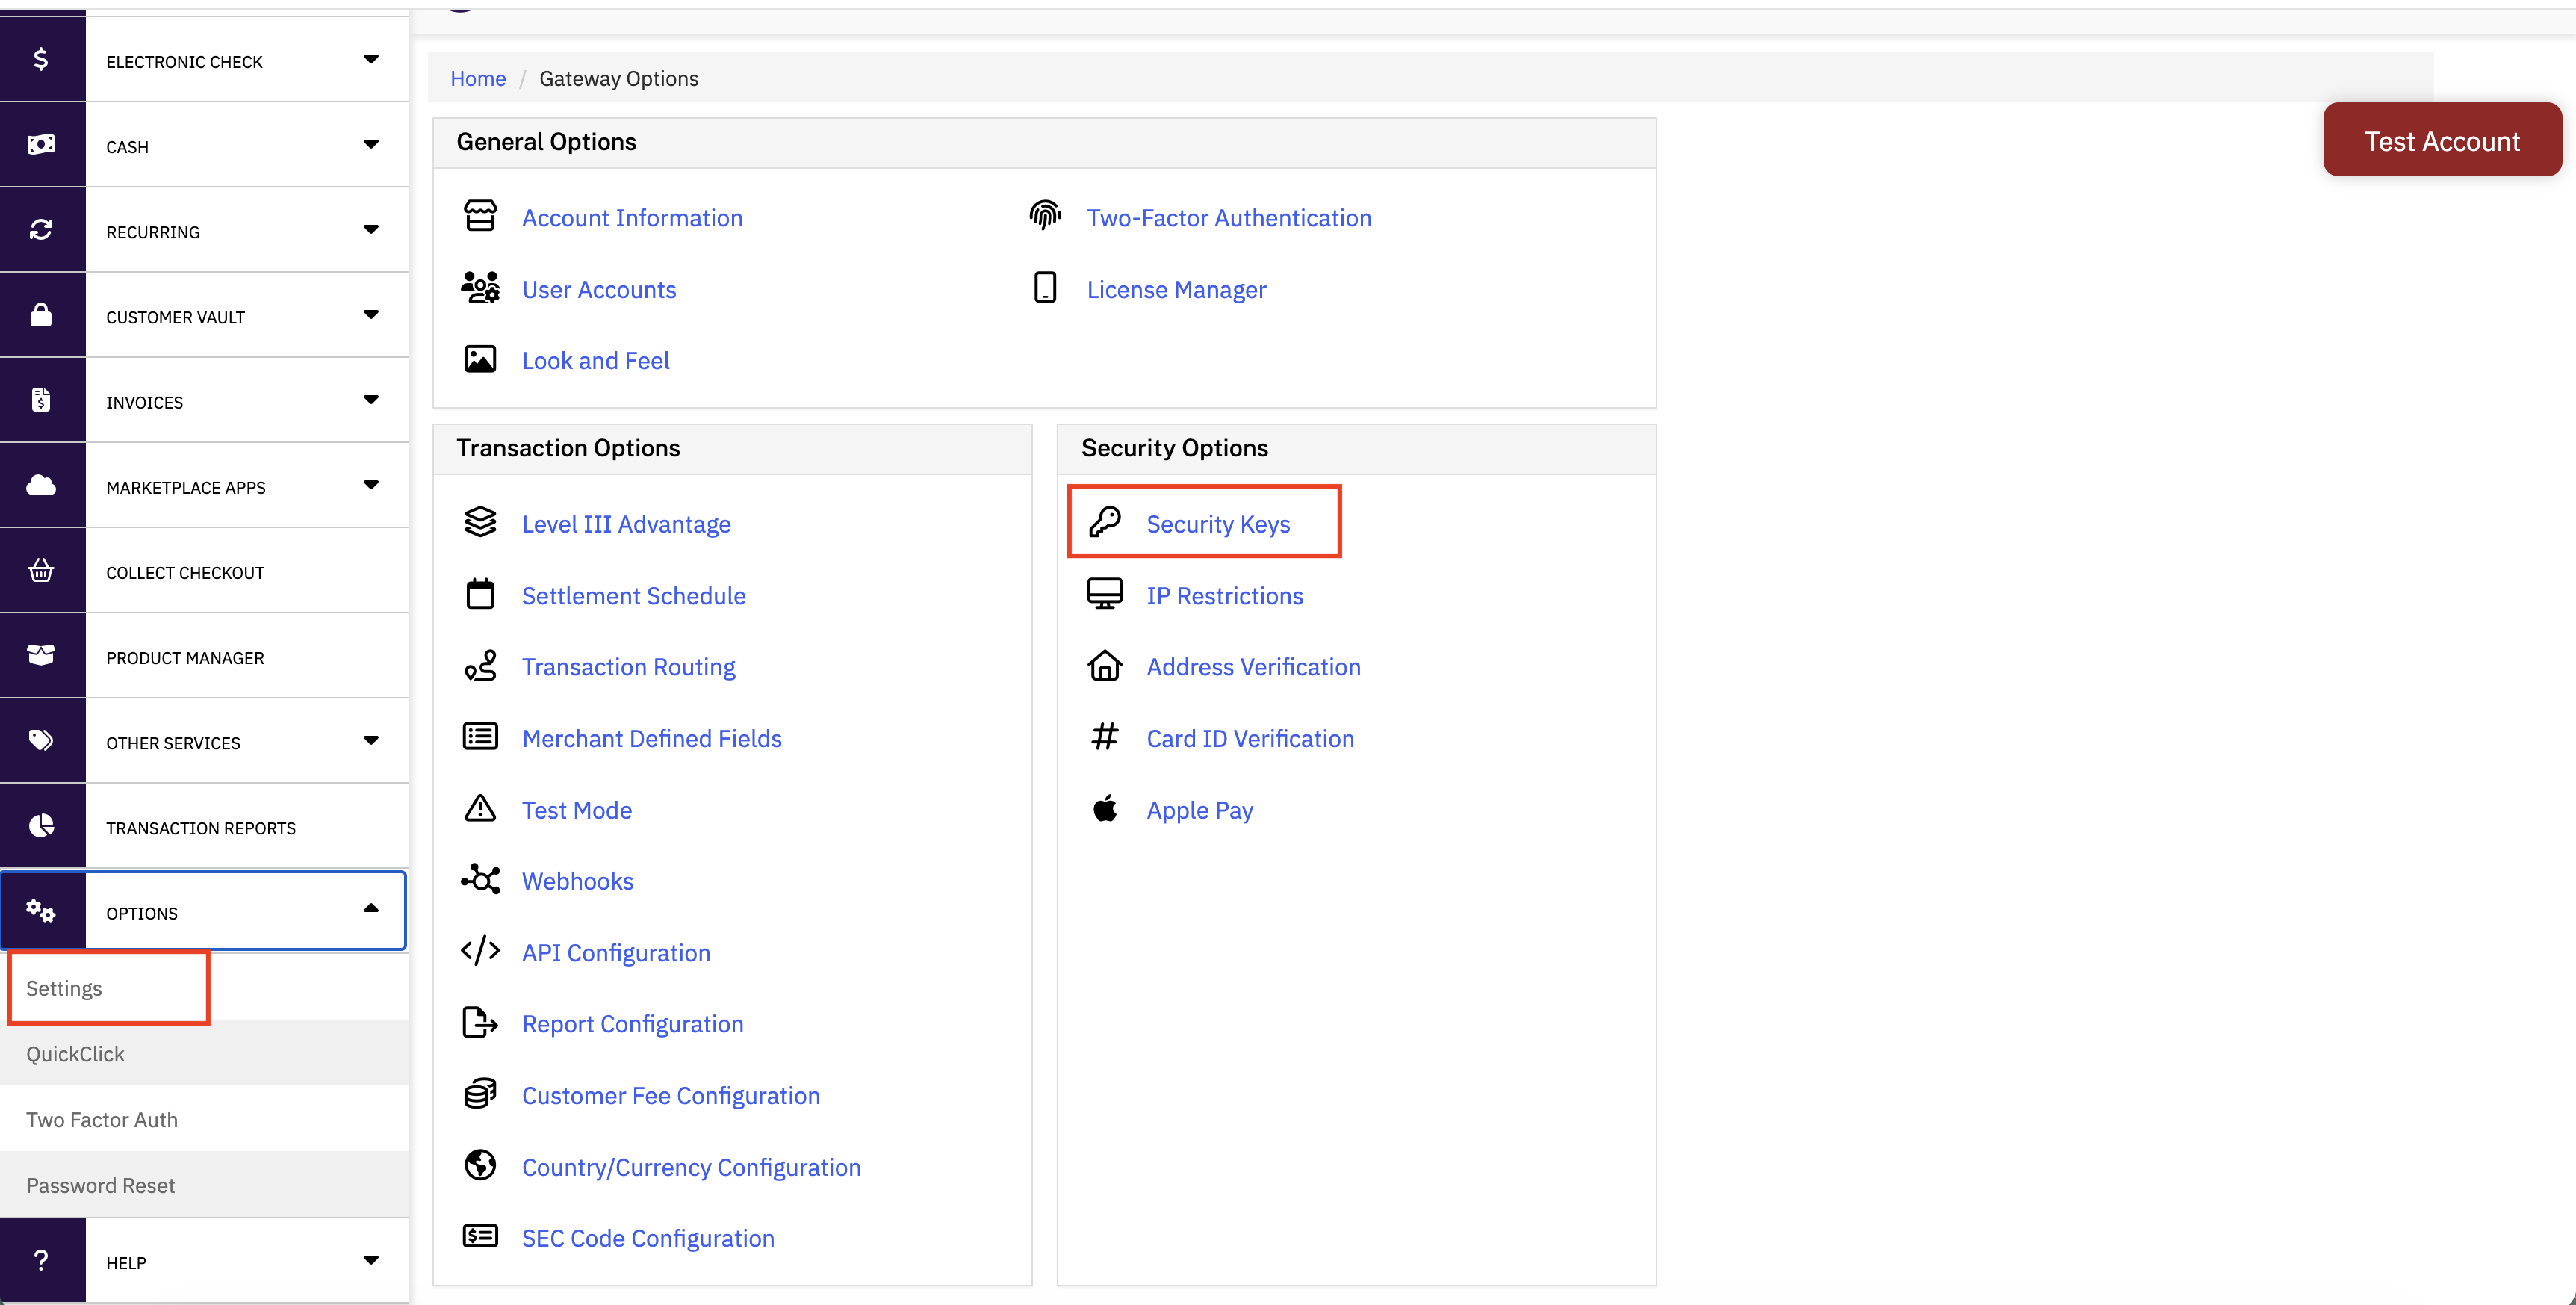
- Select Add a New Private Key to retrieve or generate your API Key.
In Payrails
- Paste the value into the API Key field.

Store your API Key securely. It is sent as a staticAuthorizationheader on every request and is the only credential required to authorize payments.
Webhook Signing Key
In NMI
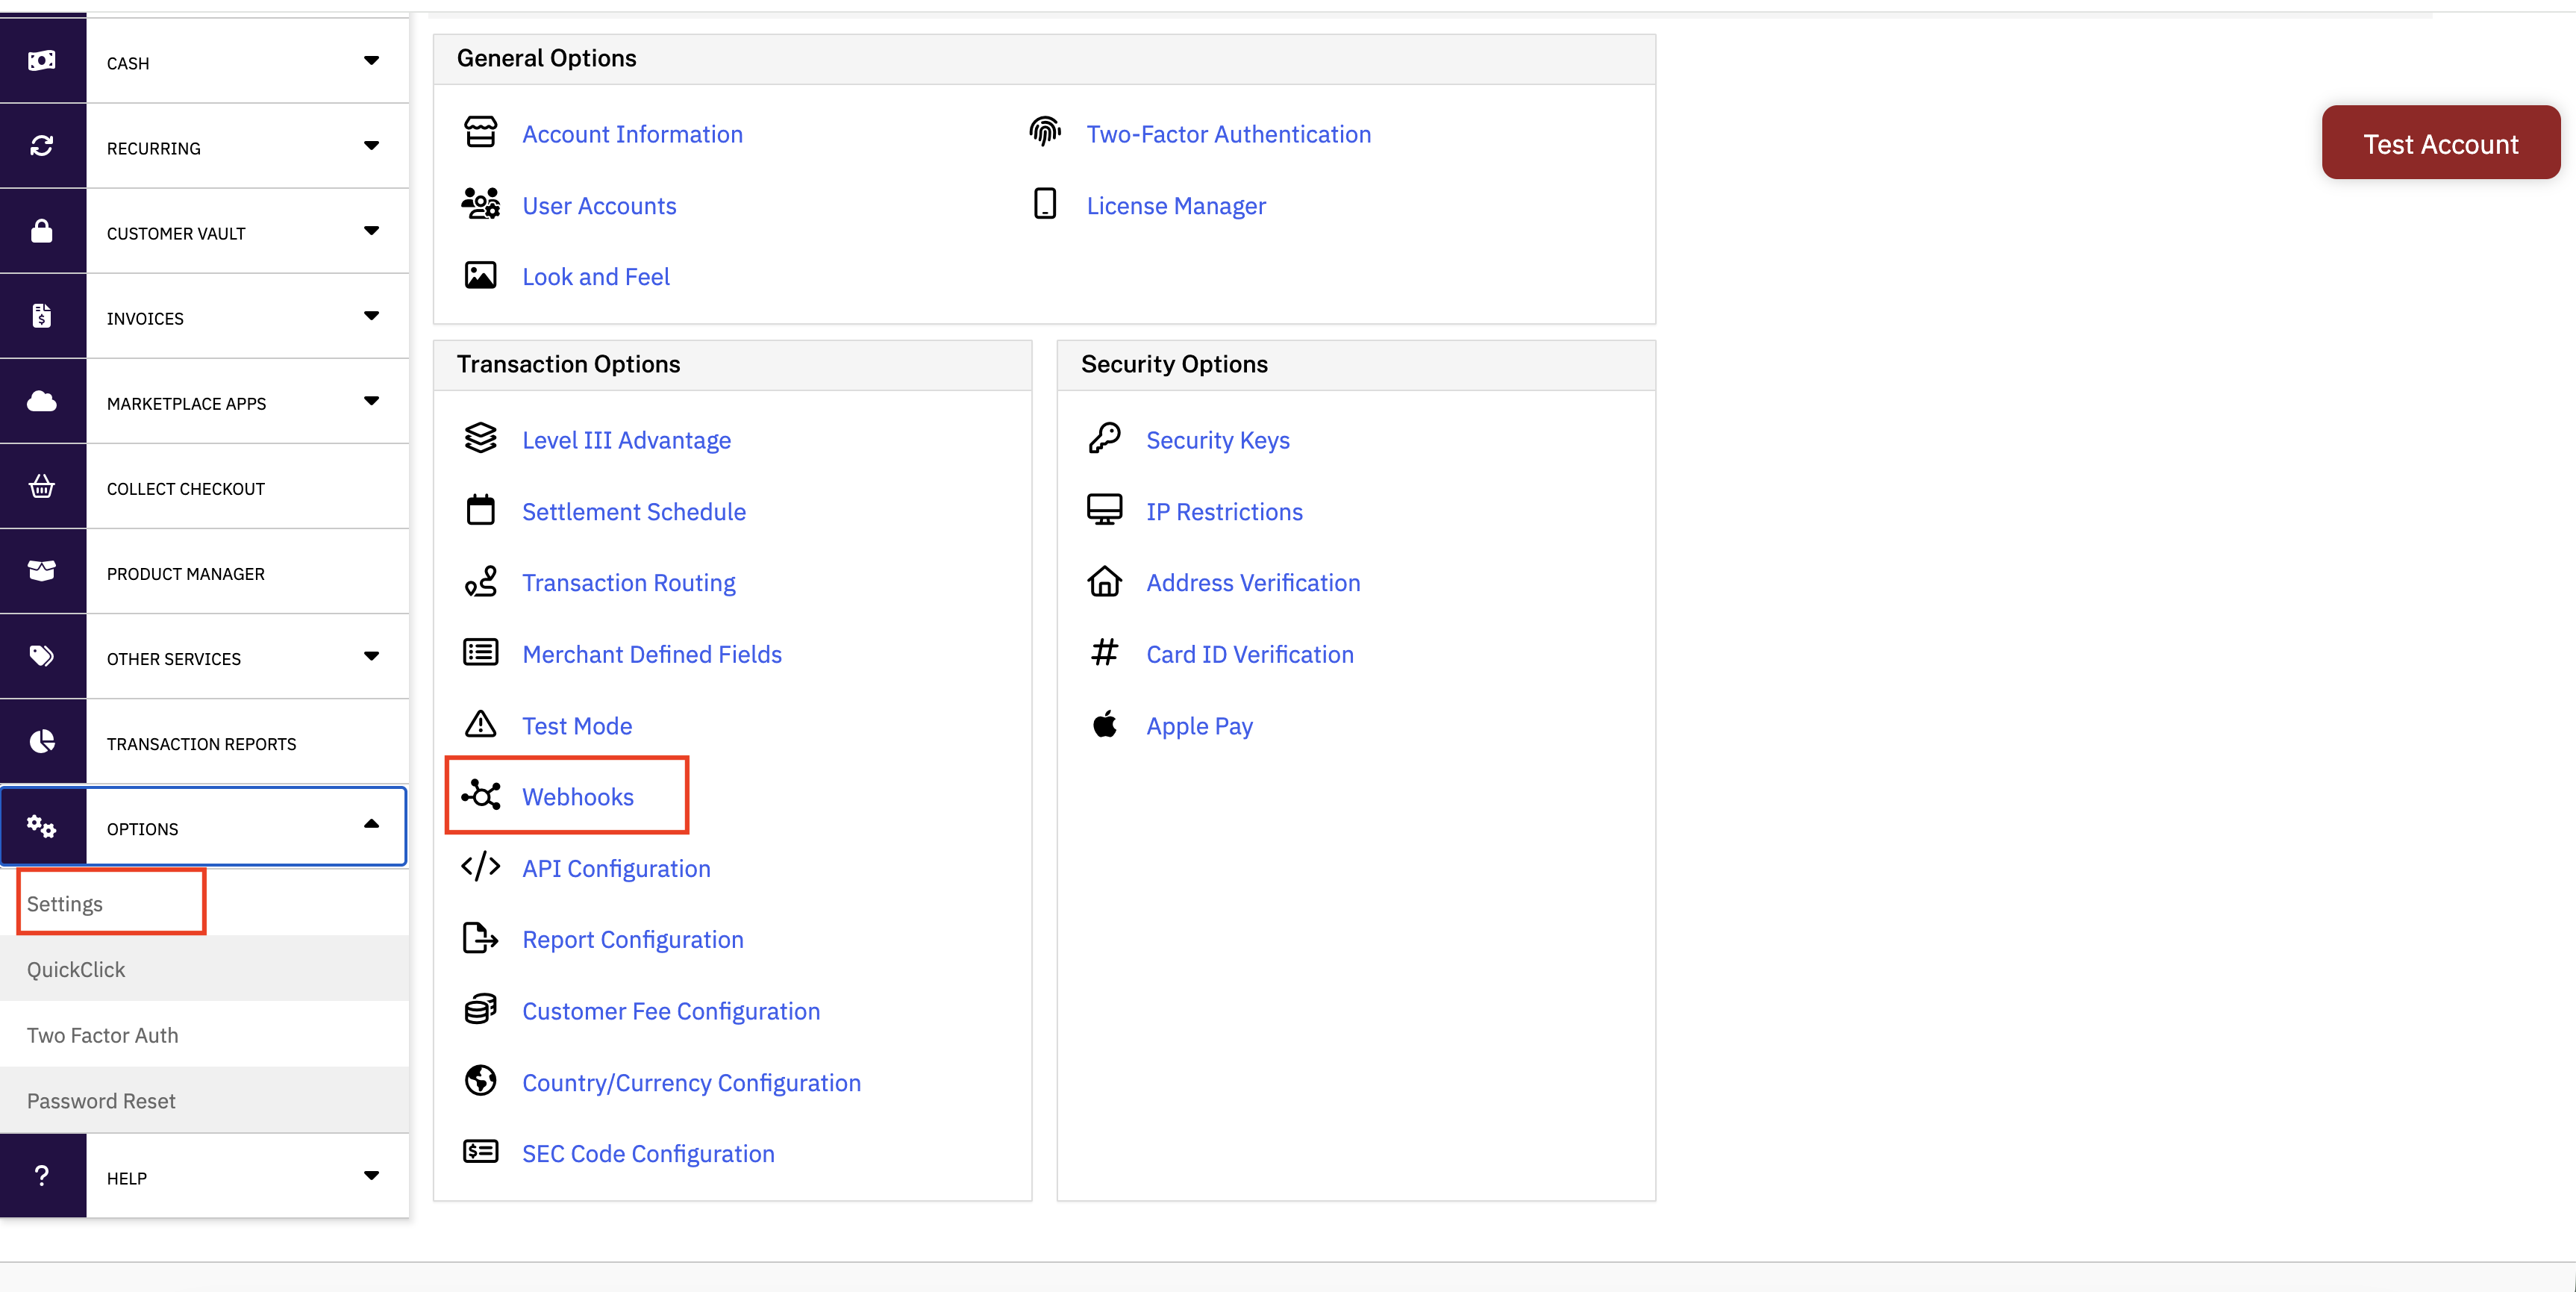
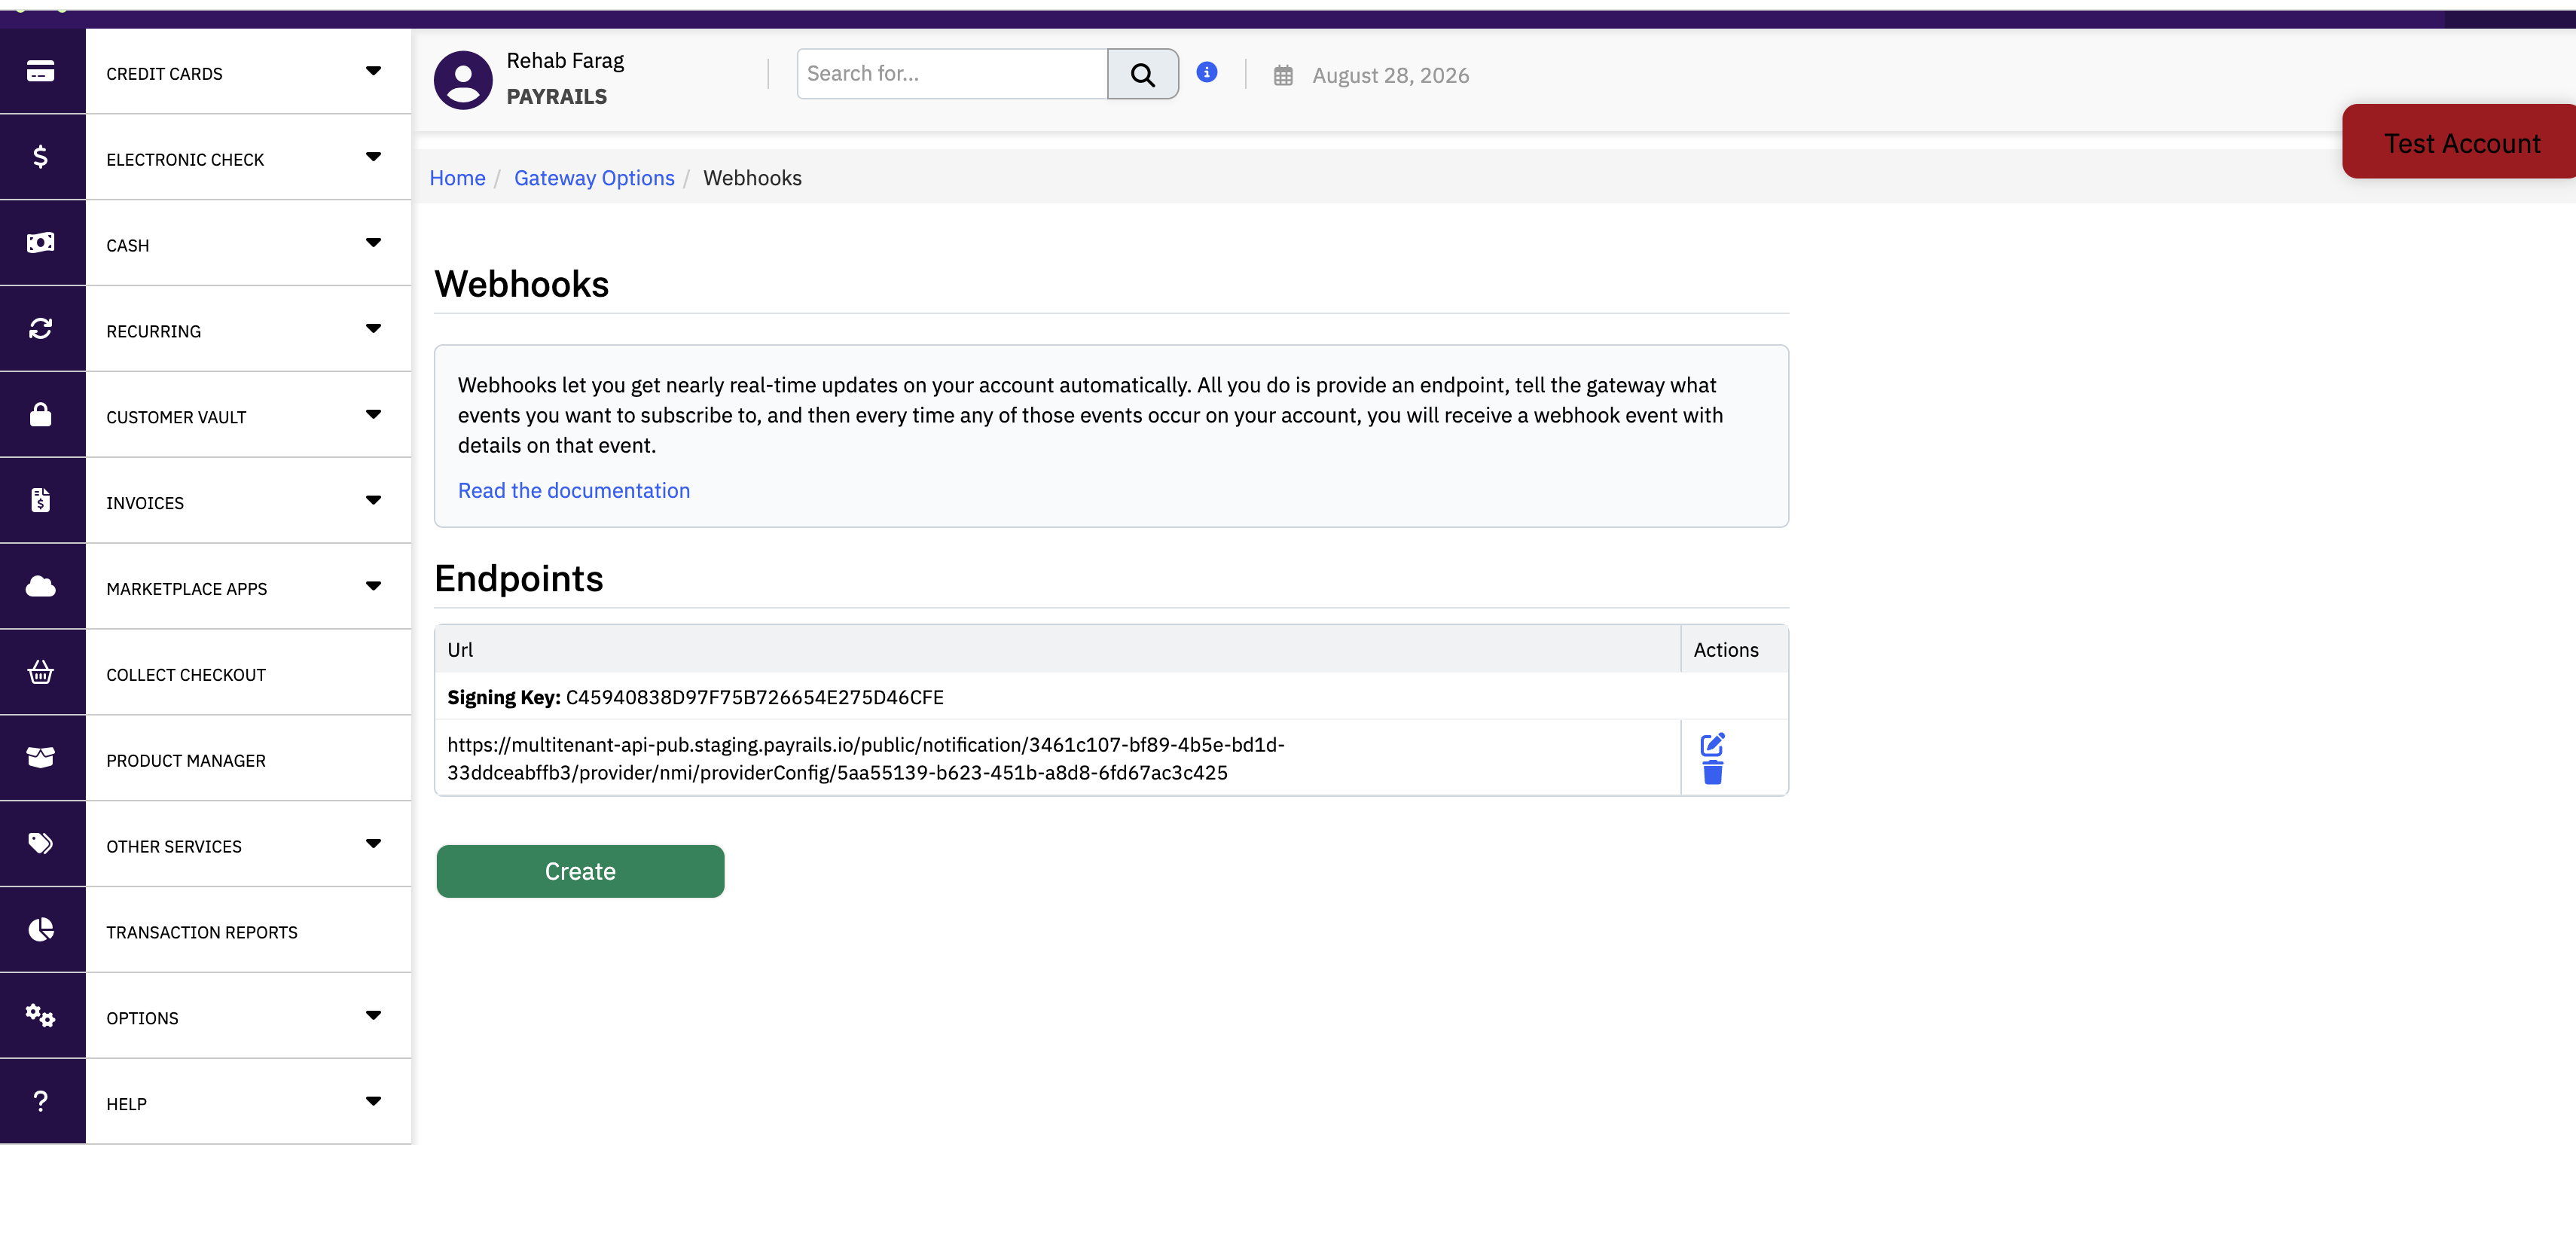
- Go to Settings → Webhooks → Endpoints → Create.
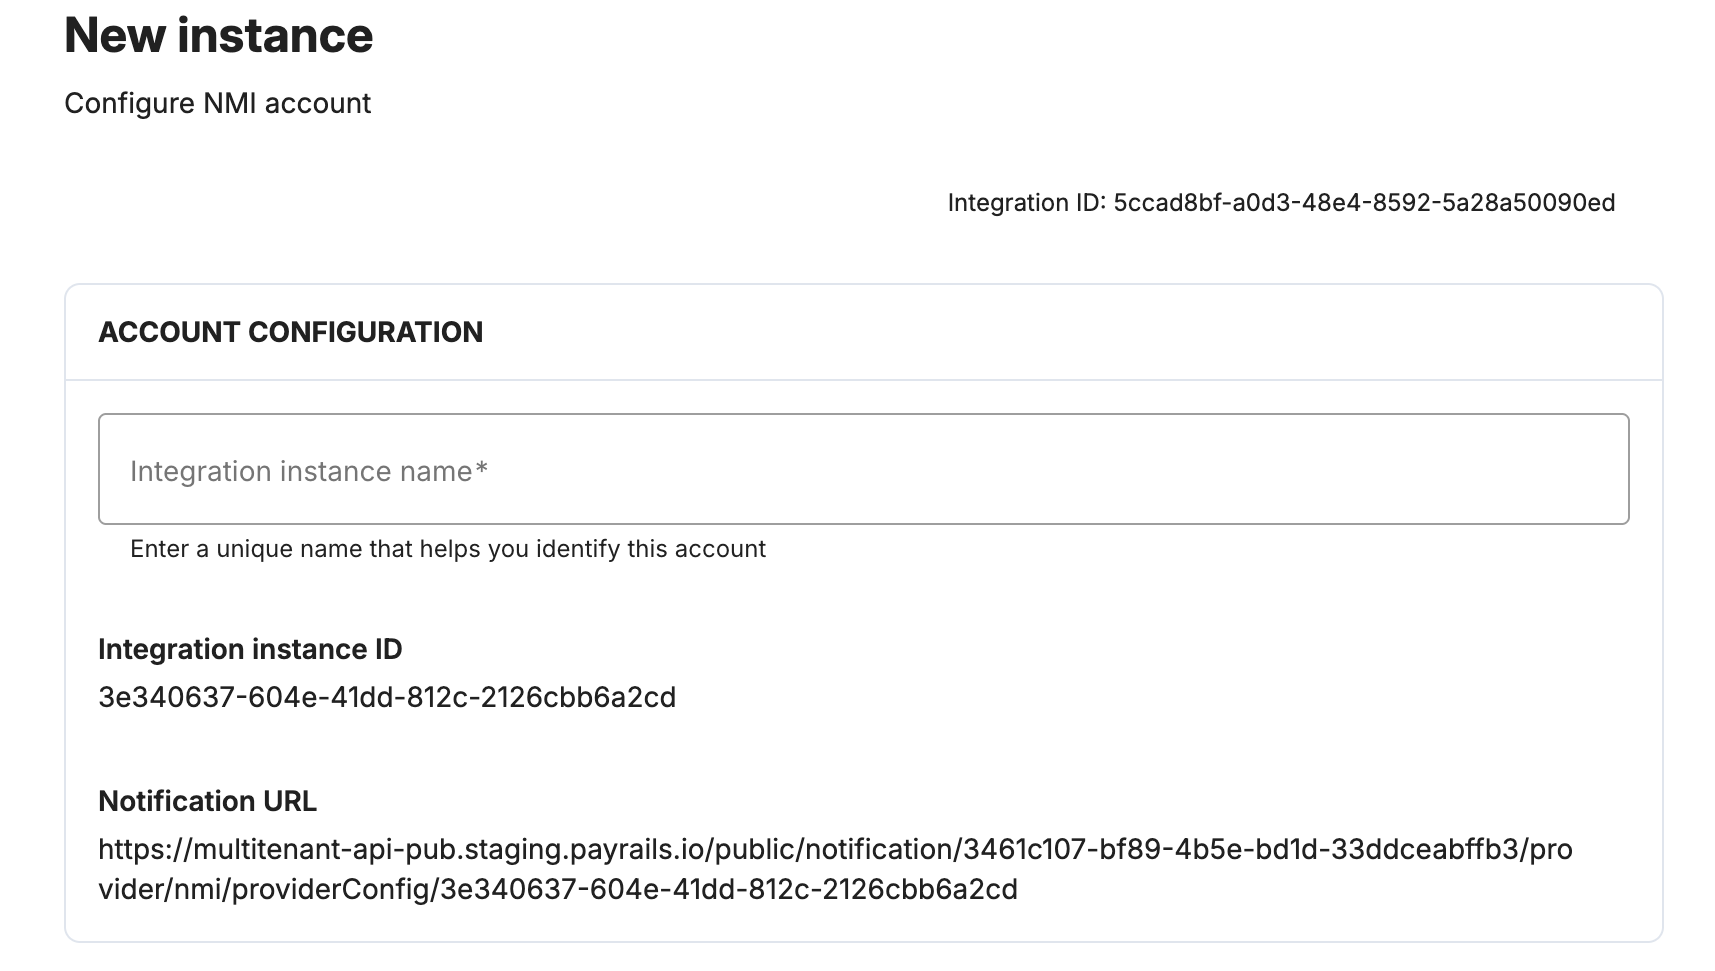
- Add an endpoint pointing at the Payrails notification URL (copied after saving your NMI configuration — see Configure notifications below).
- Select the events you want to be notified on.
- Note the signing key generated for this endpoint.
In Payrails
- Paste the value into the Webhook Signing Key field.

Use your webhook signing key and store it securely. It is used to verify that notifications genuinely come from NMI.
Payment methods
In Payrails
- Under Payment methods, enable Card, Apple Pay, and/or Google Pay as needed. Each has its own configuration block.
Apple Pay requires additional setup. Enabling Apple Pay on the NMI provider config alone is not enough — you also need a valid Apple Pay configuration (certificate / merchant identity) set up on the Payrails side under your workspace's Apple Pay settings.
Enable the integration
In Payrails
- Select Save account to save the configuration and enable the integration.
- The Enabled status confirms that the NMI integration is active.
Your NMI integration is now ready to process payments.
Next steps
- Run a test payment in test mode using an NMI test card:
- Visa:
4111 1111 1111 1111, any near-future expiry, any 3-digit CVV.
- Visa:
- Verify that:
- The payment appears in your NMI Merchant Portal.
- The payment status updates correctly in Payrails.
- Once verified in test mode, repeat the setup in live mode.
→ Continue to: Test a payment
Updated 20 days ago